> This page is for Webflow Cloud.
> For clean Markdown of any page, append .md to the page URL.
> For a complete documentation index, see https://developers.webflow.com/llms.txt.
> For AI client integration (Claude Code, Cursor, etc.), connect to the MCP server at https://developers.webflow.com/_mcp/server.
# Storing data in Webflow Cloud
> Overview of storage options and setup in Webflow Cloud.
Webflow Cloud lets you build and deploy modern web applications with built-in support for persistent data storage. Whether you need to store structured records or simple key-value pairs, Webflow Cloud provides flexible options to match your app's needs.
## Storage options in Webflow Cloud
Webflow Cloud offers three storage solutions, each designed for different types of data and use cases:
#### [SQLite](/webflow-cloud/storing-data/sqlite)
Best for structured, relational data - like user profiles, product catalogs, or transactional records.
#### [Key Value Store](/webflow-cloud/storing-data/key-value-store)
Best for unstructured, dynamic data - like user preferences, session data, or temporary settings.
#### [Object Storage](/webflow-cloud/storing-data/object-storage)
Best for large files and unstructured data - like images, videos, or PDF files.
---
#### Add a database to your app
Ready to add your first database to your app? Jump into the quickstart and
start building with real data in minutes.
[Start building ](/webflow-cloud/add-sqlite)
> **Start from a working example**
>
> Every framework has a starter with bindings that declares **D1**, **R2**, and two **KV** namespaces in `wrangler.json`, with a live `/api/binding-status` health check and per-framework access patterns you can copy. See [Start from a starter app](/webflow-cloud/getting-started#start-from-a-starter-app) for all of them, or jump to [`hello-world-next-app`](https://github.com/Webflow-Examples/hello-world-next-app/tree/v16-with-bindings) or [`hello-world-astro-app`](https://github.com/Webflow-Examples/hello-world-astro-app/tree/v7-with-bindings).
## How storage works in Webflow Cloud
Webflow Cloud connects your app to storage resources using **bindings.**
A binding is a configuration that grants your app secure, direct access to a specific resource managed by Webflow Cloud. When you declare a binding in your `wrangler.json` file and deploy your app, Webflow Cloud automatically creates a resource and grants your app permission to use it.
With bindings, you can:
* **Access resources automatically.** No secret keys required.
* **Reference bindings** as environment variables in your app.
* **Maintain isolated environments.** Each binding is specific to an app's [environment](/webflow-cloud/environments).
* **Manage bindings and resources** in the Webflow Cloud dashboard.
Bindings combine permission and API access in a single step, so you can read and write data securely and efficiently.
## Declaring a binding
Declaring a binding is the first step to using storage in your app. You can declare a binding in the Webflow Cloud dashboard or in your `wrangler.json` file.
### Before you start
Before you can declare a binding, you need to have an app in Webflow Cloud and an environment.
If you don't have an app or environment, you can create them by following the steps in the [getting started guide](/webflow-cloud/getting-started).
#### Dashboard
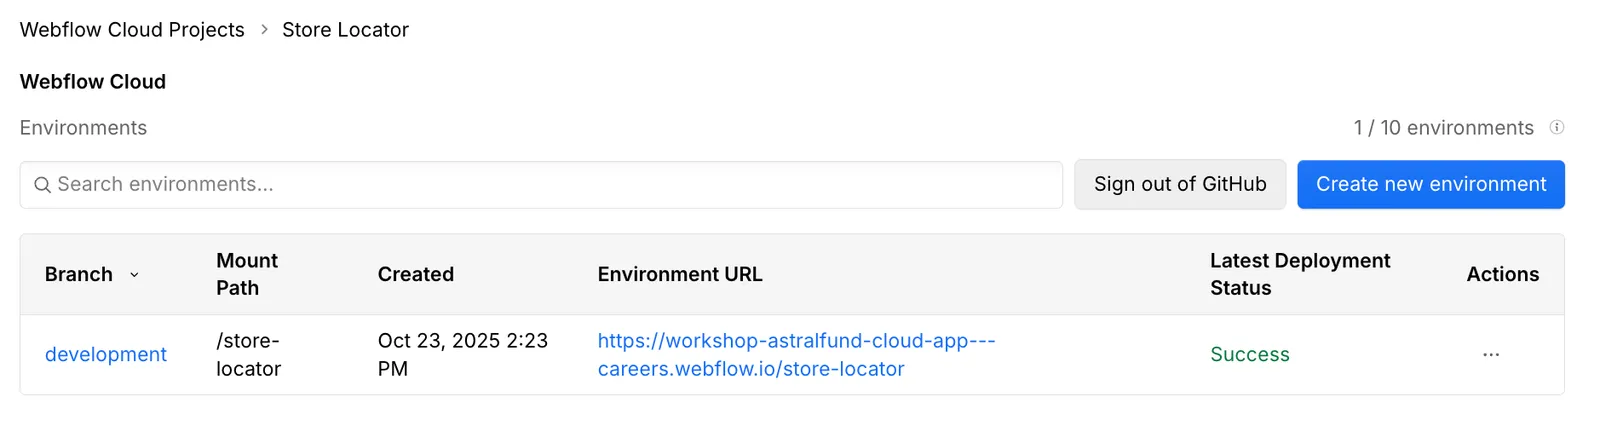
#### Open the environment dashboard
In Webflow Cloud, select your app and the environment where you plan to deploy your app.
#### Go to the storage tab
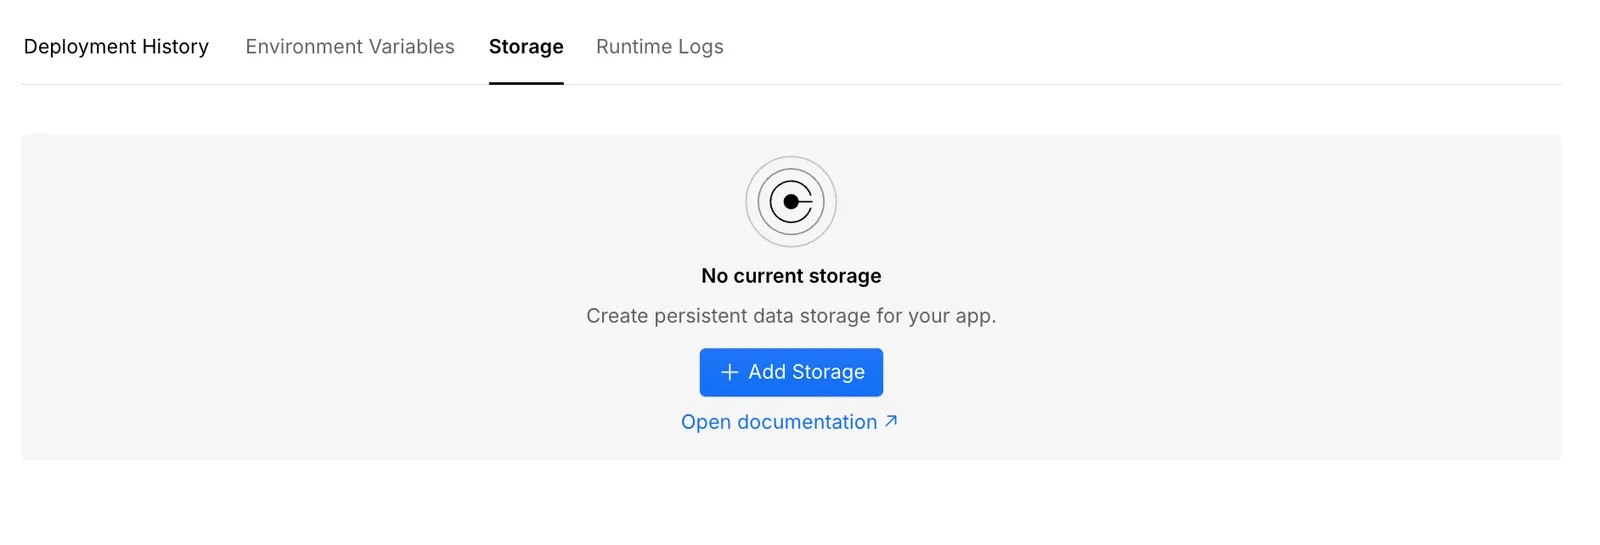
In the environment dashboard, click the **Storage** tab to view all storage resources for the selected environment.
#### Add a storage resource
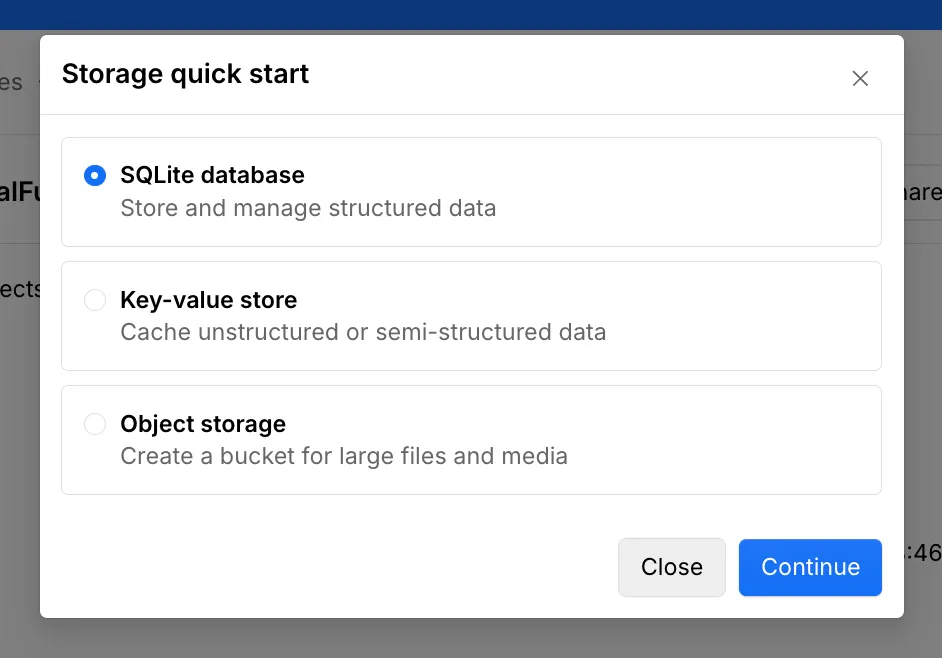
Click the **Add Storage** button to add a new storage resource. Choose the storage type you want to use from the dropdown menu.
#### Copy the provided snippet to \`wrangler.json\`
Copy the provided snippet, and paste it into the `wrangler.json` file in your app's root. Replace the placeholder values with values you want to use.
#### SQLite
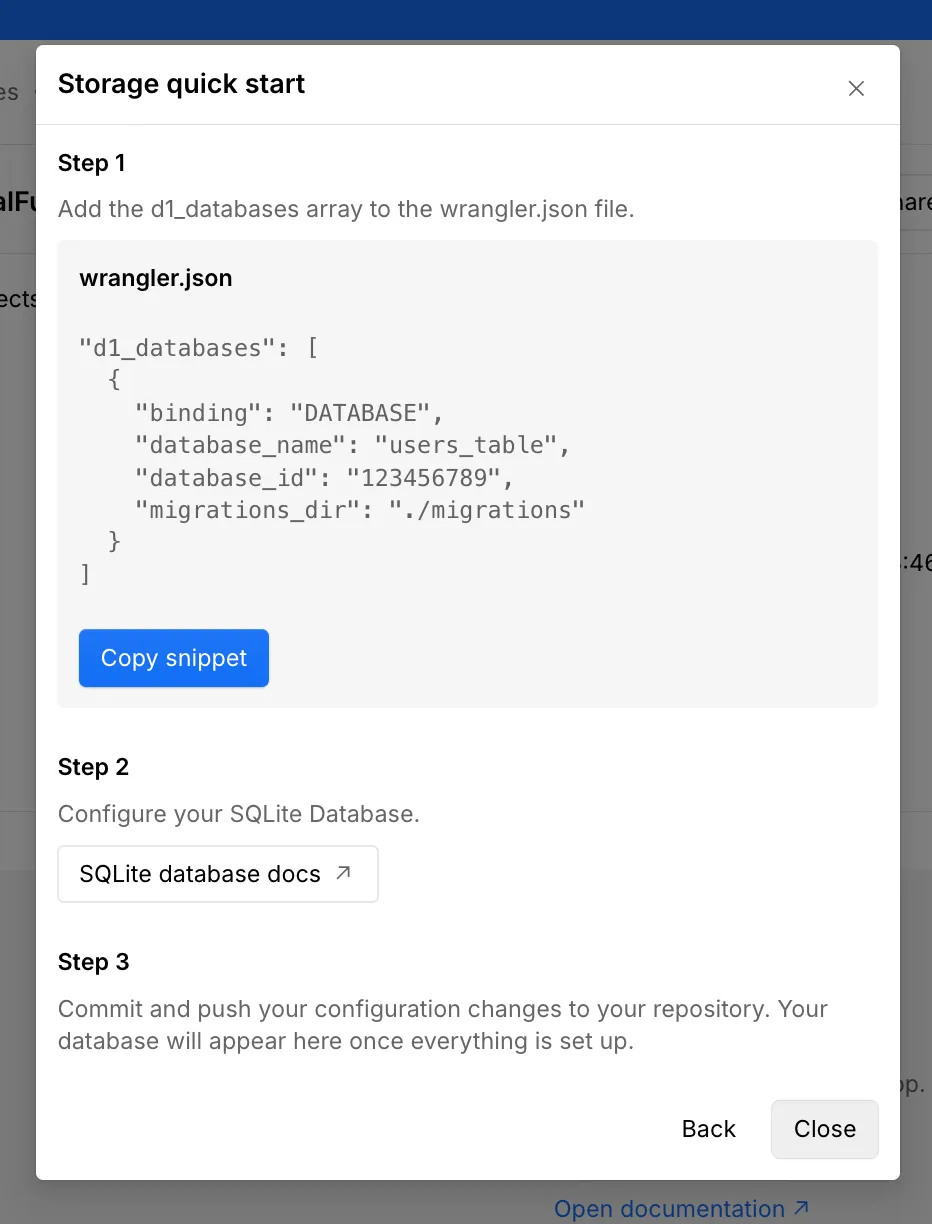
| Property | Description |
| ---------------- | --------------------------------------------------------------------------------------------------------------- |
| `binding` | The name of the binding to use in your app. |
| `database_name` | The name of the database to create. |
| `database_id` | The ID of the database to create. **Webflow Cloud will generate a unique ID for you once you deploy your app.** |
| `migrations_dir` | The directory containing your migration files. |
> **Prepare your database schema**
>
> Before deploying your app, [you need to prepare your database schema and create a migration file](/webflow-cloud/storing-data/sqlite#manage-schema-and-migrations). You can create SQL migration files manually or generate them with a migration tool such as [Drizzle ORM](https://orm.drizzle.team/). On each deployment, Webflow Cloud will apply the migrations to your database.
#### Key Value Store
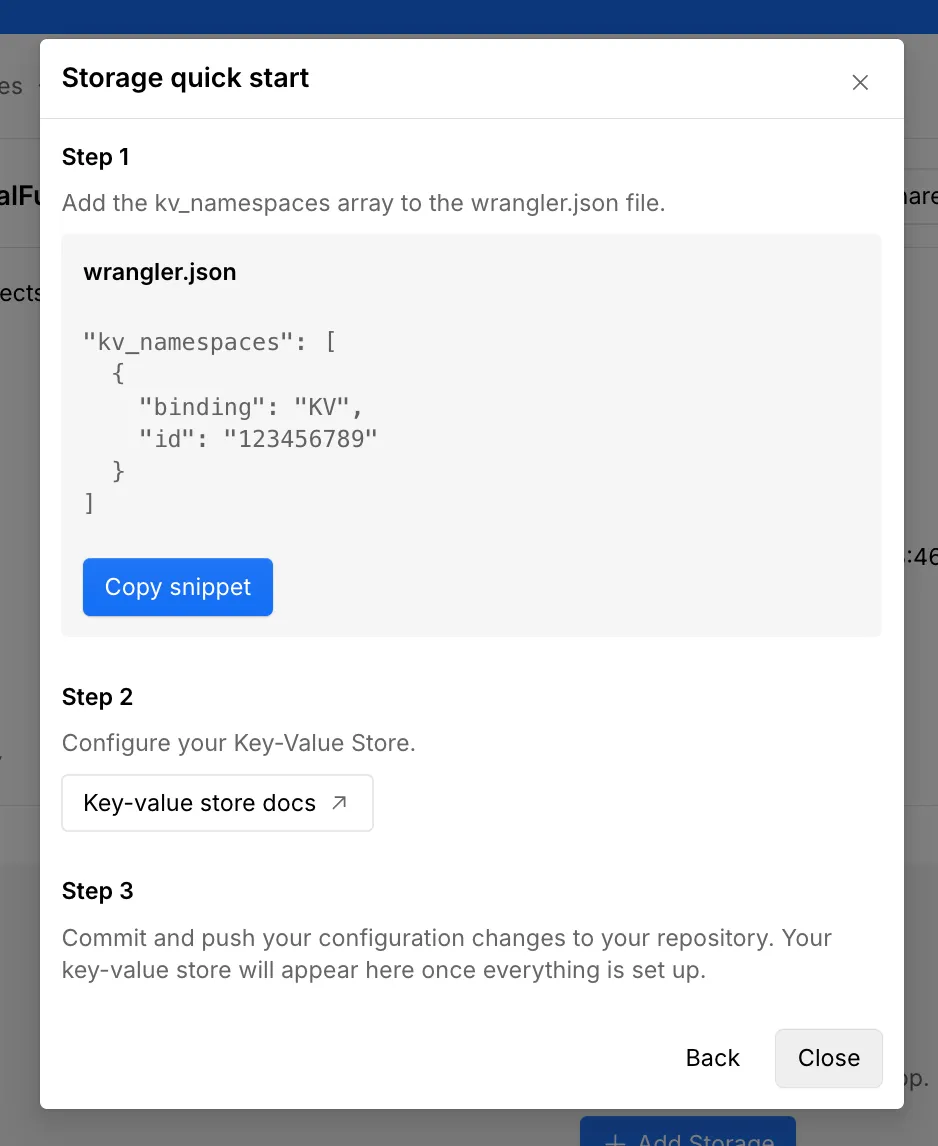
| Property | Description |
| --------- | ---------------------------------------------------------------------------------------------------------------- |
| `binding` | The name of the binding to use in your app. |
| `id` | The ID of the Key Value Store to create. **Webflow will generate a unique ID for you once you deploy your app.** |
#### Object Storage
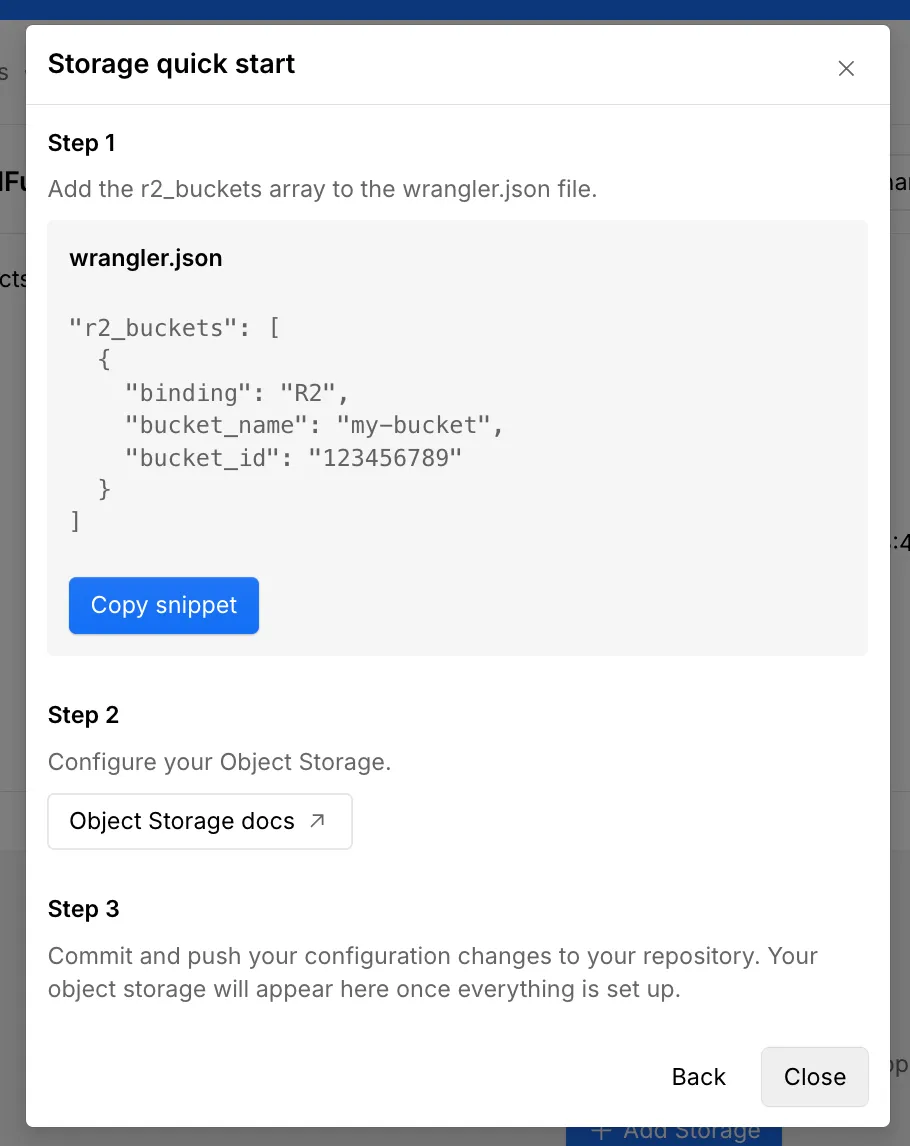
| Property | Description |
| ------------- | ------------------------------------------------------------------------------------------------------------- |
| `binding` | The name of the binding to use in your app. |
| `bucket_name` | The name of the bucket to create. |
| `bucket_id` | The ID of the bucket to create. **Webflow Cloud will generate a unique ID for you once you deploy your app.** |
#### Generate types for your binding
Generate TypeScript types for your bindings to enable autocomplete and type safety in your code editor:
```bash
npx wrangler types
```
This creates/updates a `worker-configuration.d.ts` file with your binding types.
#### Deploy your app
Deploy your app to Webflow Cloud by committing and pushing your changes to your linked GitHub repository. After deployment, you can [view and manage your storage resources in the Webflow Cloud dashboard](/webflow-cloud/storing-data/overview#managing-storage-in-the-webflow-cloud-dashboard).
#### wrangler.json
#### Add a binding to your \`wrangler.json\` file
In your `wrangler.json` file, add a binding for the storage resource you want to use.
#### SQLite
To use SQLite, add a `d1_databases` array to your `wrangler.json` file. Declare a binding for each database you want to use inside the array.
**Note:** Webflow Cloud will assign a unique ID for each resource on deployment.
**`wrangler.json`**
```json title="wrangler.json"
{
"d1_databases": [
{
"binding": "DB",
"database_name": "MY_DATABASE",
"database_id": "1234567890" // Webflow Cloud will assign a unique ID for each resource on deployment
}
]
}
```
See the [SQLite overview](/webflow-cloud/storing-data/sqlite) for full details.
#### Key Value Store
To use a Key Value Store, add a `kv_namespaces` array to your `wrangler.json` file. Declare a binding for each namespace you want to use inside the array.
**Note:** Webflow Cloud will assign a unique ID for each resource on deployment.
**`wrangler.json`**
```json title="wrangler.json"
{
"kv_namespaces": [
{
"binding": "CACHE",
"id": "8e83a86e33b541338700795162251e43" // Replace after deployment
}
]
}
```
See the [Key Value Store overview](/webflow-cloud/storing-data/key-value-store) for full details.
#### Object Storage
To use Object Storage, add a `r2_buckets` array to your `wrangler.json` file. Declare a binding for each bucket you want to use inside the array.
**Note:** Webflow Cloud will assign a unique ID for each resource on deployment.
**`wrangler.json`**
```json title="wrangler.json"
{
"r2_buckets": [
{
"binding": "WEBFLOW_CLOUD_MEDIA",
"bucket_name": "Media",
}
]
}
```
#### Generate types for your binding
Generate TypeScript types for your bindings to enable autocomplete and type safety in your code editor:
```bash
npx wrangler types
```
This creates/updates a `worker-configuration.d.ts` file with your binding types.
#### Deploy your app
Deploy your app to Webflow Cloud. After deployment, you can view and manage your storage resources in the Webflow Cloud dashboard.
For a complete walkthrough of using storage in your app, see the guides on [adding a SQLite database to your app](/webflow-cloud/add-sqlite) and [adding a Key Value Store to your app](/webflow-cloud/add-key-value-store).
## Accessing storage in your app
Once you've declared a binding, access the resource in your app using the binding name as an environment variable. Environment variables for bindings are automatically available in your app and don't need to be manually created in your environment dashboard.
#### Next.js
In a Next.js app, you must access the environment variables for your bindings through the [Workers runtime](/webflow-cloud/environment) using the `getCloudflareContext()` function.
#### How to use `getCloudflareContext()`
* **Always** call `getCloudflareContext()` inside a function (not at the top level of your module) to ensure the binding is available in the correct context.
* **For static routes or use outside of request handlers** (such as Incremental Static Regeneration or Static Site Generation), use `getCloudflareContext({ async: true })` and await the result. This ensures the environment bindings are correctly resolved in all environments.
**`src/db/getDB.ts`**
```javascript title="src/db/getDB.ts" {7-10}
import { getCloudflareContext } from "@opennextjs/cloudflare"; // Import the function
import { drizzle } from "drizzle-orm/d1";
import { cache } from "react";
import * as schema from "./schema";
// Use in a request handler (e.g. API route)
export const getDb = cache(() => {
const { env } = getCloudflareContext(); // Access the cloudflare environment
return drizzle(env.DB, { schema }); // Access the DB binding
});
// Use for static routes (i.e. ISR/SSG)
export const getDbAsync = cache(async () => {
const { env } = await getCloudflareContext({ async: true });
return drizzle(env.DB, { schema });
});
```
#### Astro
Access your storage resource using the binding name as an environment variable.
**`src/pages/index.astro`**
```javascript title="src/pages/index.astro" {5} maxLines=10
import { desc } from "drizzle-orm";
import { drizzle } from "drizzle-orm/d1";
import { linkShare } from "../schema";
const db = drizzle(Astro.locals.runtime.env.DB);
const links = await db
.select()
.from(linkShare)
.orderBy(desc(linkShare.created));
---
Astro
```
#### Start working with real data
Ready to add your first database to your app? Jump into the quickstart and
start building with real data in minutes.
[Start building ](/webflow-cloud/add-sqlite)
## Managing storage in the Webflow Cloud dashboard
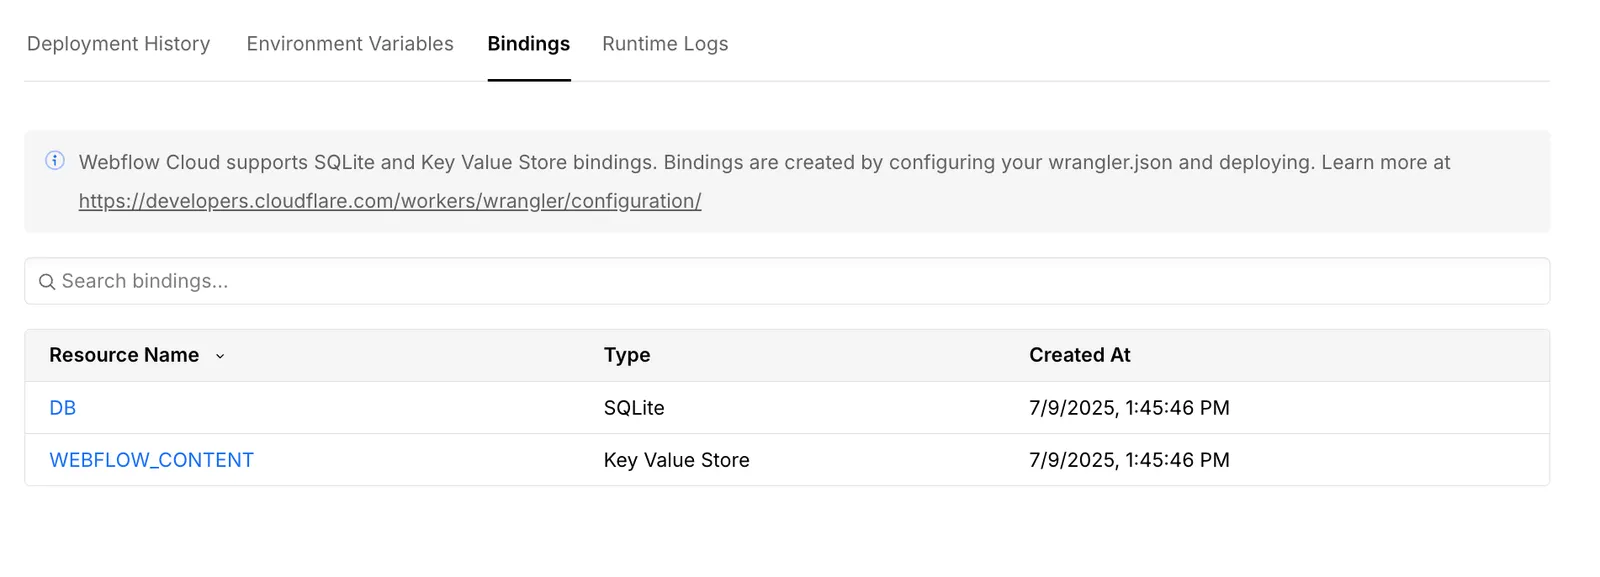
Once you've deployed your app with the declared bindings, you can view and manage your storage resources directly in the Webflow Cloud dashboard:
#### Open the environment dashboard
In Webflow Cloud, select your app and environment where your app is
deployed with storage bindings configured in `wrangler.json`.
#### Go to the storage tab
In the environment dashboard, click the **Storage** tab to view all storage
resources for the selected environment. Each storage binding shows its name, type,
and creation date.

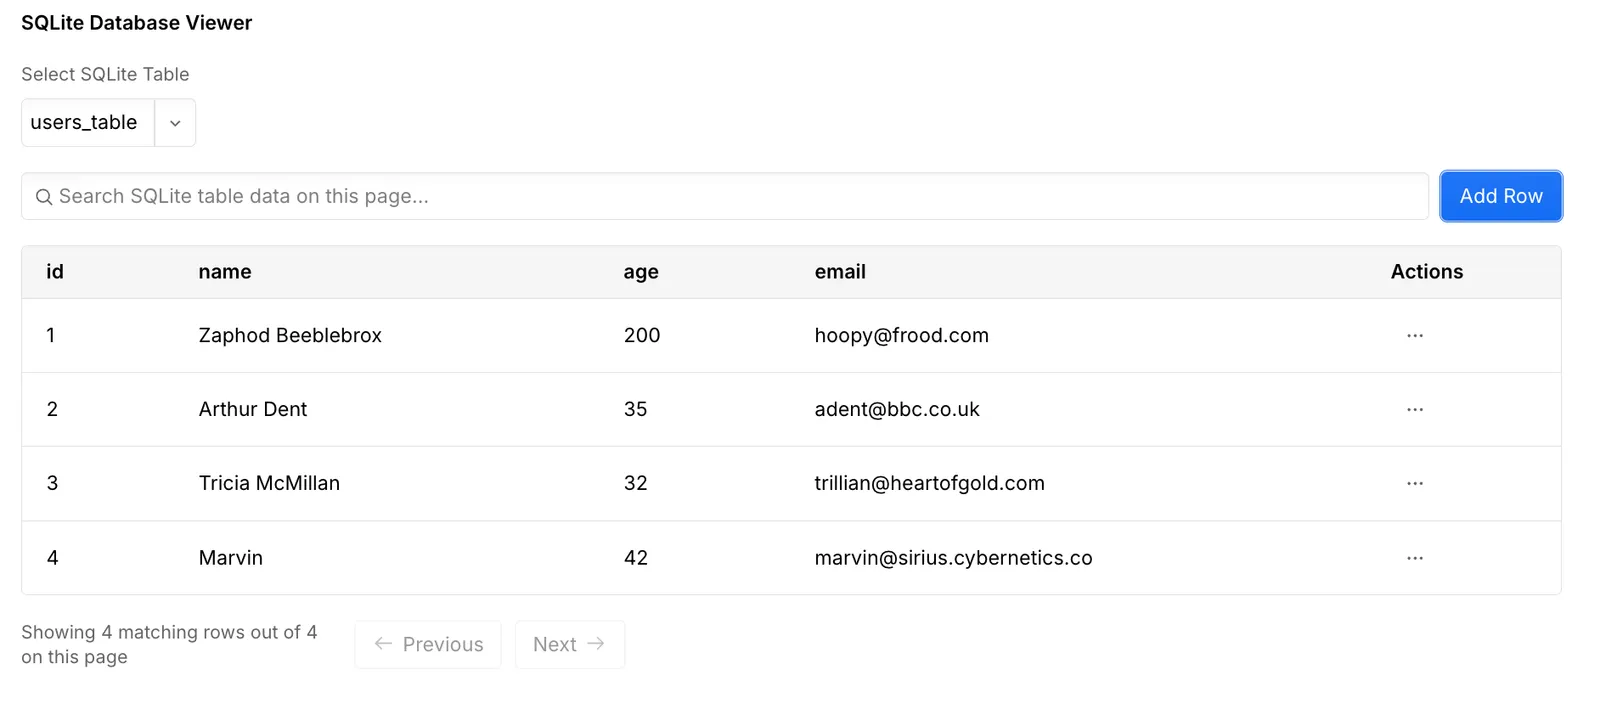
#### View and manage data
Click a binding to open the database viewer. You can: - Create, read,
update, and delete records (CRUD) - Search and sort data
## Next steps
* [Learn more about SQLite](/webflow-cloud/storing-data/sqlite)
* [Learn more about Key Value Store](/webflow-cloud/storing-data/key-value-store)
* [See how to configure storage bindings in your app](/webflow-cloud/storing-data/overview#declaring-a-binding)
* [Explore the starter apps with bindings for every framework](/webflow-cloud/getting-started#start-from-a-starter-app)
* [Learn about storage limits in Webflow Cloud](/webflow-cloud/limits)
## FAQs
#### Where can I see my storage resources?
Once you've deployed your app with the declared bindings, you can view and manage your storage resources directly in the Webflow Cloud dashboard.
#### I declared a binding in my \`wrangler.json\` file, but I can't see it in the dashboard.
If you have an existing Webflow Cloud app, you may need to edit your app settings to enable storage:
1. Go to your app in the Webflow Cloud dashboard.
2. Select the "..." icon in the "Actions" section of the menu.
3. Select "Edit" (you don't actually need to edit anything).
4. Press "Save Changes" to update your app.
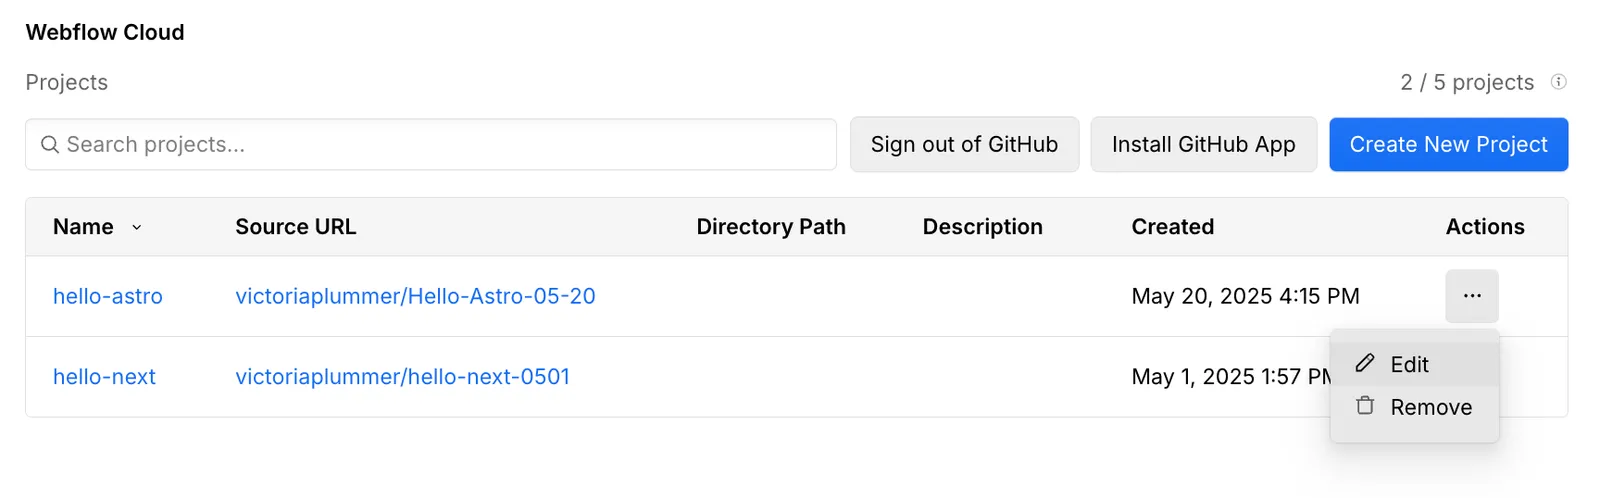
Save the changes and redeploy your app. Once your app deploys you should see the storage tab in the dashboard.
#### I can't access the API methods on my binding
After declaring a binding, make sure you've generated the types for your binding. After running the following command, you'll be able to access the API methods on your binding.
**`Astro`**
```bash title="Astro"
wrangler types
```
**`Next.js`**
```bash title="Next.js"
npm run cf-typegen
```
This creates/updates a `worker-configuration.d.ts` file with your binding types.