OAuth
This tutorial guides you through setting up an OAuth 2.0 authentication flow. This flow allows users to grant limited permissions to your App and enables your App to request an access token to perform actions on behalf of the user.
By the end of this tutorial, your Webflow App will be able to obtain an access token on behalf of a user using the Authorization Code Grant flow.
Authorization Code Grant Flow
Webflow uses the Authorization Code Grant flow to provide access tokens to Apps. This flow involves a series of interactions between Webflow’s authorization server and your web app. Here’s how the process works when a user visits your site for the first time:
- User sign-up/Login: A user signs up or logs in to your App. At some point, they may need to perform an action that requires using the Webflow API.
- Authorization request: To make requests to the Webflow API on the user’s behalf, your App redirects the user to an authorization screen. Here, they can review the permissions your App is requesting and authorize access to specific Webflow Sites or a Workspace.
- User authorization: Once the user grants authorization, Webflow redirects them back to your App via a redirect URI specified during the app setup, adding a
codeparameter to the query string. - Token Request: Your app uses the
codeto make a secure request to Webflow’s authorization server to obtain an access token. If the request is valid, Webflow responds with an access token. - API Requests: Your app can now use this access token to make requests to the Webflow API on behalf of the user.
Get an access token
Requirements
Before you begin, ensure you have the following:
- A Webflow App created with the “Data Client” building block. Learn more here
- Your app’s client credentials:
client_idandclient_secret.
Note: Only workspace administrators are authorized to view a client secret. If you’re not a site administrator, please contact one to get the secret for you.
1. Set up your server
Before you can request an access token, you’ll need to set up your server to handle the OAuth 2.0 flow. We recommend using JavaScript or Python, as we provide SDKs for these languages that can help simplify the authentication process.
Follow the below examples in Node.js or Python to help you create a server that can accept requests and communicate with the Webflow authorization server.
Node.js
Python
-
Install the necessary packages
Ensure all required libraries and dependencies are installed.
-
Store environment variables
Create a
.envfile to store your sensitive information like theCLIENT_IDandCLIENT_SECRET..env -
Initialize server
Set up the server to listen on a specific port.
server.js
2. Create an authorization link
To enable users to install your App, you need to create an authorization link. This link directs users to a Webflow authorization screen where they can grant your App permission to access their Webflow data.
Where do I put this link?
App Marketplace Submission: Supply this link in your application to the App marketplace. Users will use it to install your App from the marketplace.
Your Site: Place this link on your site to direct users to try out or install your App.
You can create the authorization link using various methods, with the recommended approach being through our JavaScript and Python SDKs.
Request Parameters
To create the authorization link, you will need the following information:
Unique ID for your application. Can be found in the dashboard.
This value should always be “code”.
The URI to redirect the user once they’ve granted authorization. This must match what’s used in your App settings.
A token value provided by your application to prevent CSRF attacks. If passed, the authorization server should respond with this parameter.
Constructing the authorization link
Scopes on the OAuth URL
Verify that the scopes requested in this Install/OAuth URL are equal to or a subset of the scopes configured for your app in the app settings. If there’s a mismatch where the Install URL requests scopes beyond what’s configured in the app settings, users won’t be able to install your app and an error will be displayed.
Using the SDK
To simplify the process of creating authorization links and handling OAuth flows, you can use the provided JavaScript and Python SDKs. These SDKs offer convenient methods to generate the authorization URL with the required parameters.
Node.js
Python
Manually create the authorization link
If you prefer not to use the SDKs, you can manually construct the authorization link by adding the necessary query parameters to the authorization URL:
Construct the authorization URL using the gathered parameters:
- When URL encoding multiple scopes, they should be connected by a space (
%20). - Scopes are written in the format
scope:action, so the colon (:) should be encoded as%3A.
For example passing the following scopes: sites:read, sites:write, and pages:read should look like sites%3Aread%20sites%3Awrite%20pages%3Aread
Copy the link from the Dashboard
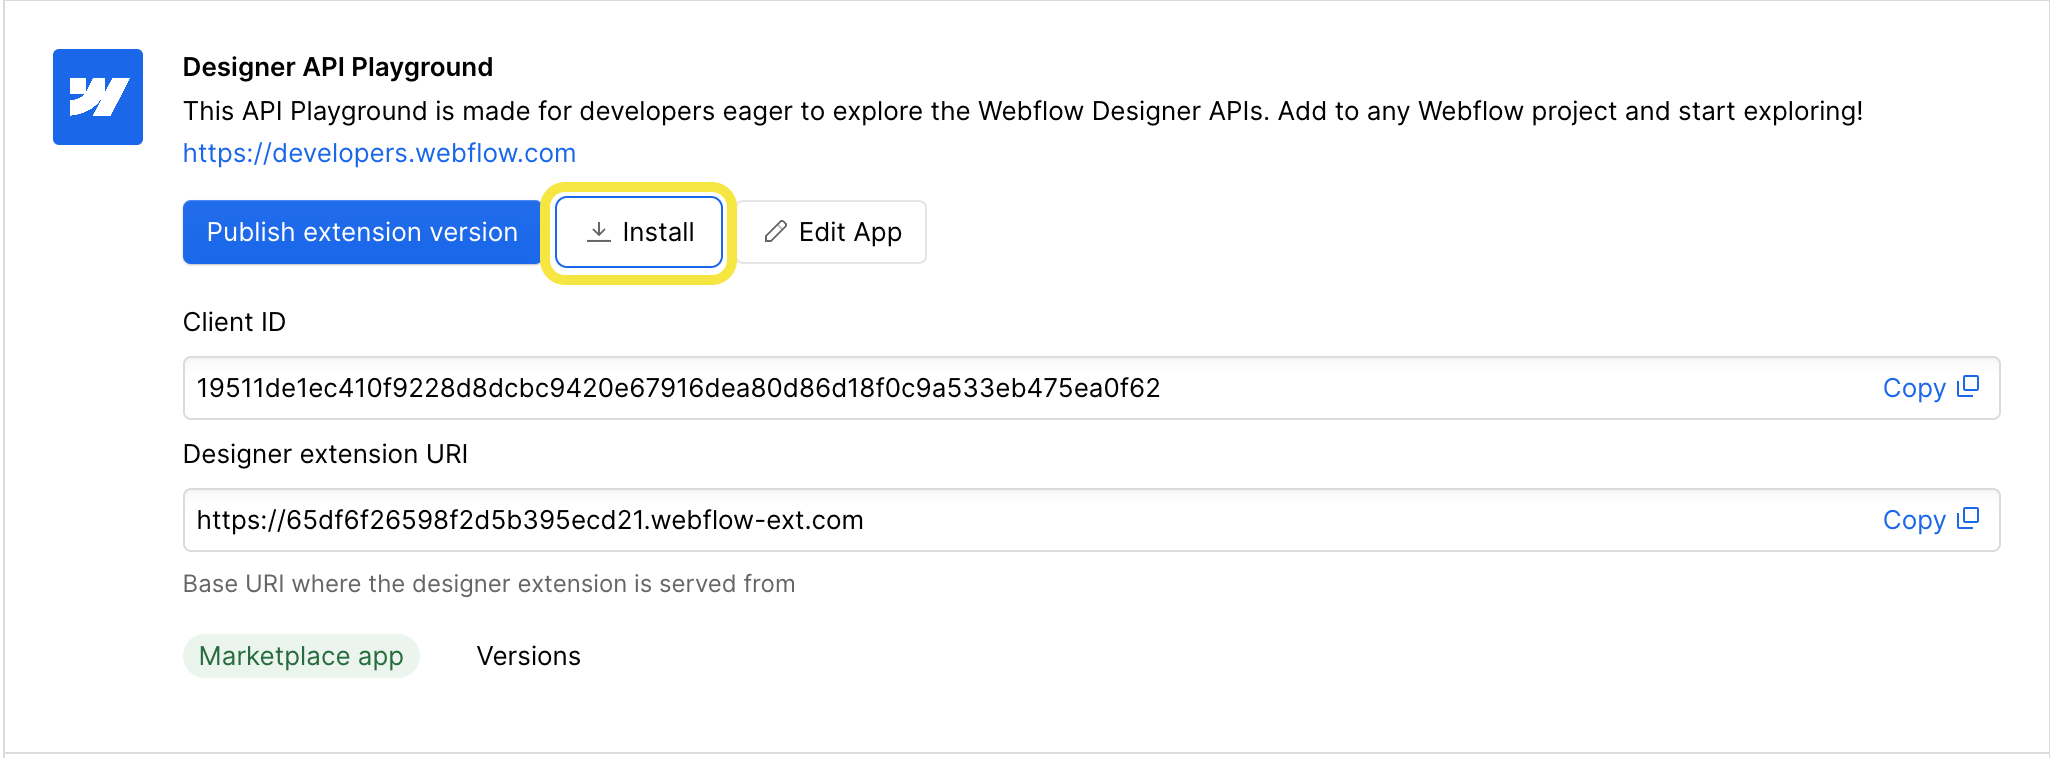
Additionally, you can copy an auto-generated installation link from your App’s settings.
In your Workspace Dashboard:
- Select to “Apps and Integrations” in the left-hand menu
- Scroll to the “App Development” section and find your App
- Copy the link from the “Install” button
3. Handle redirect to the callback URI
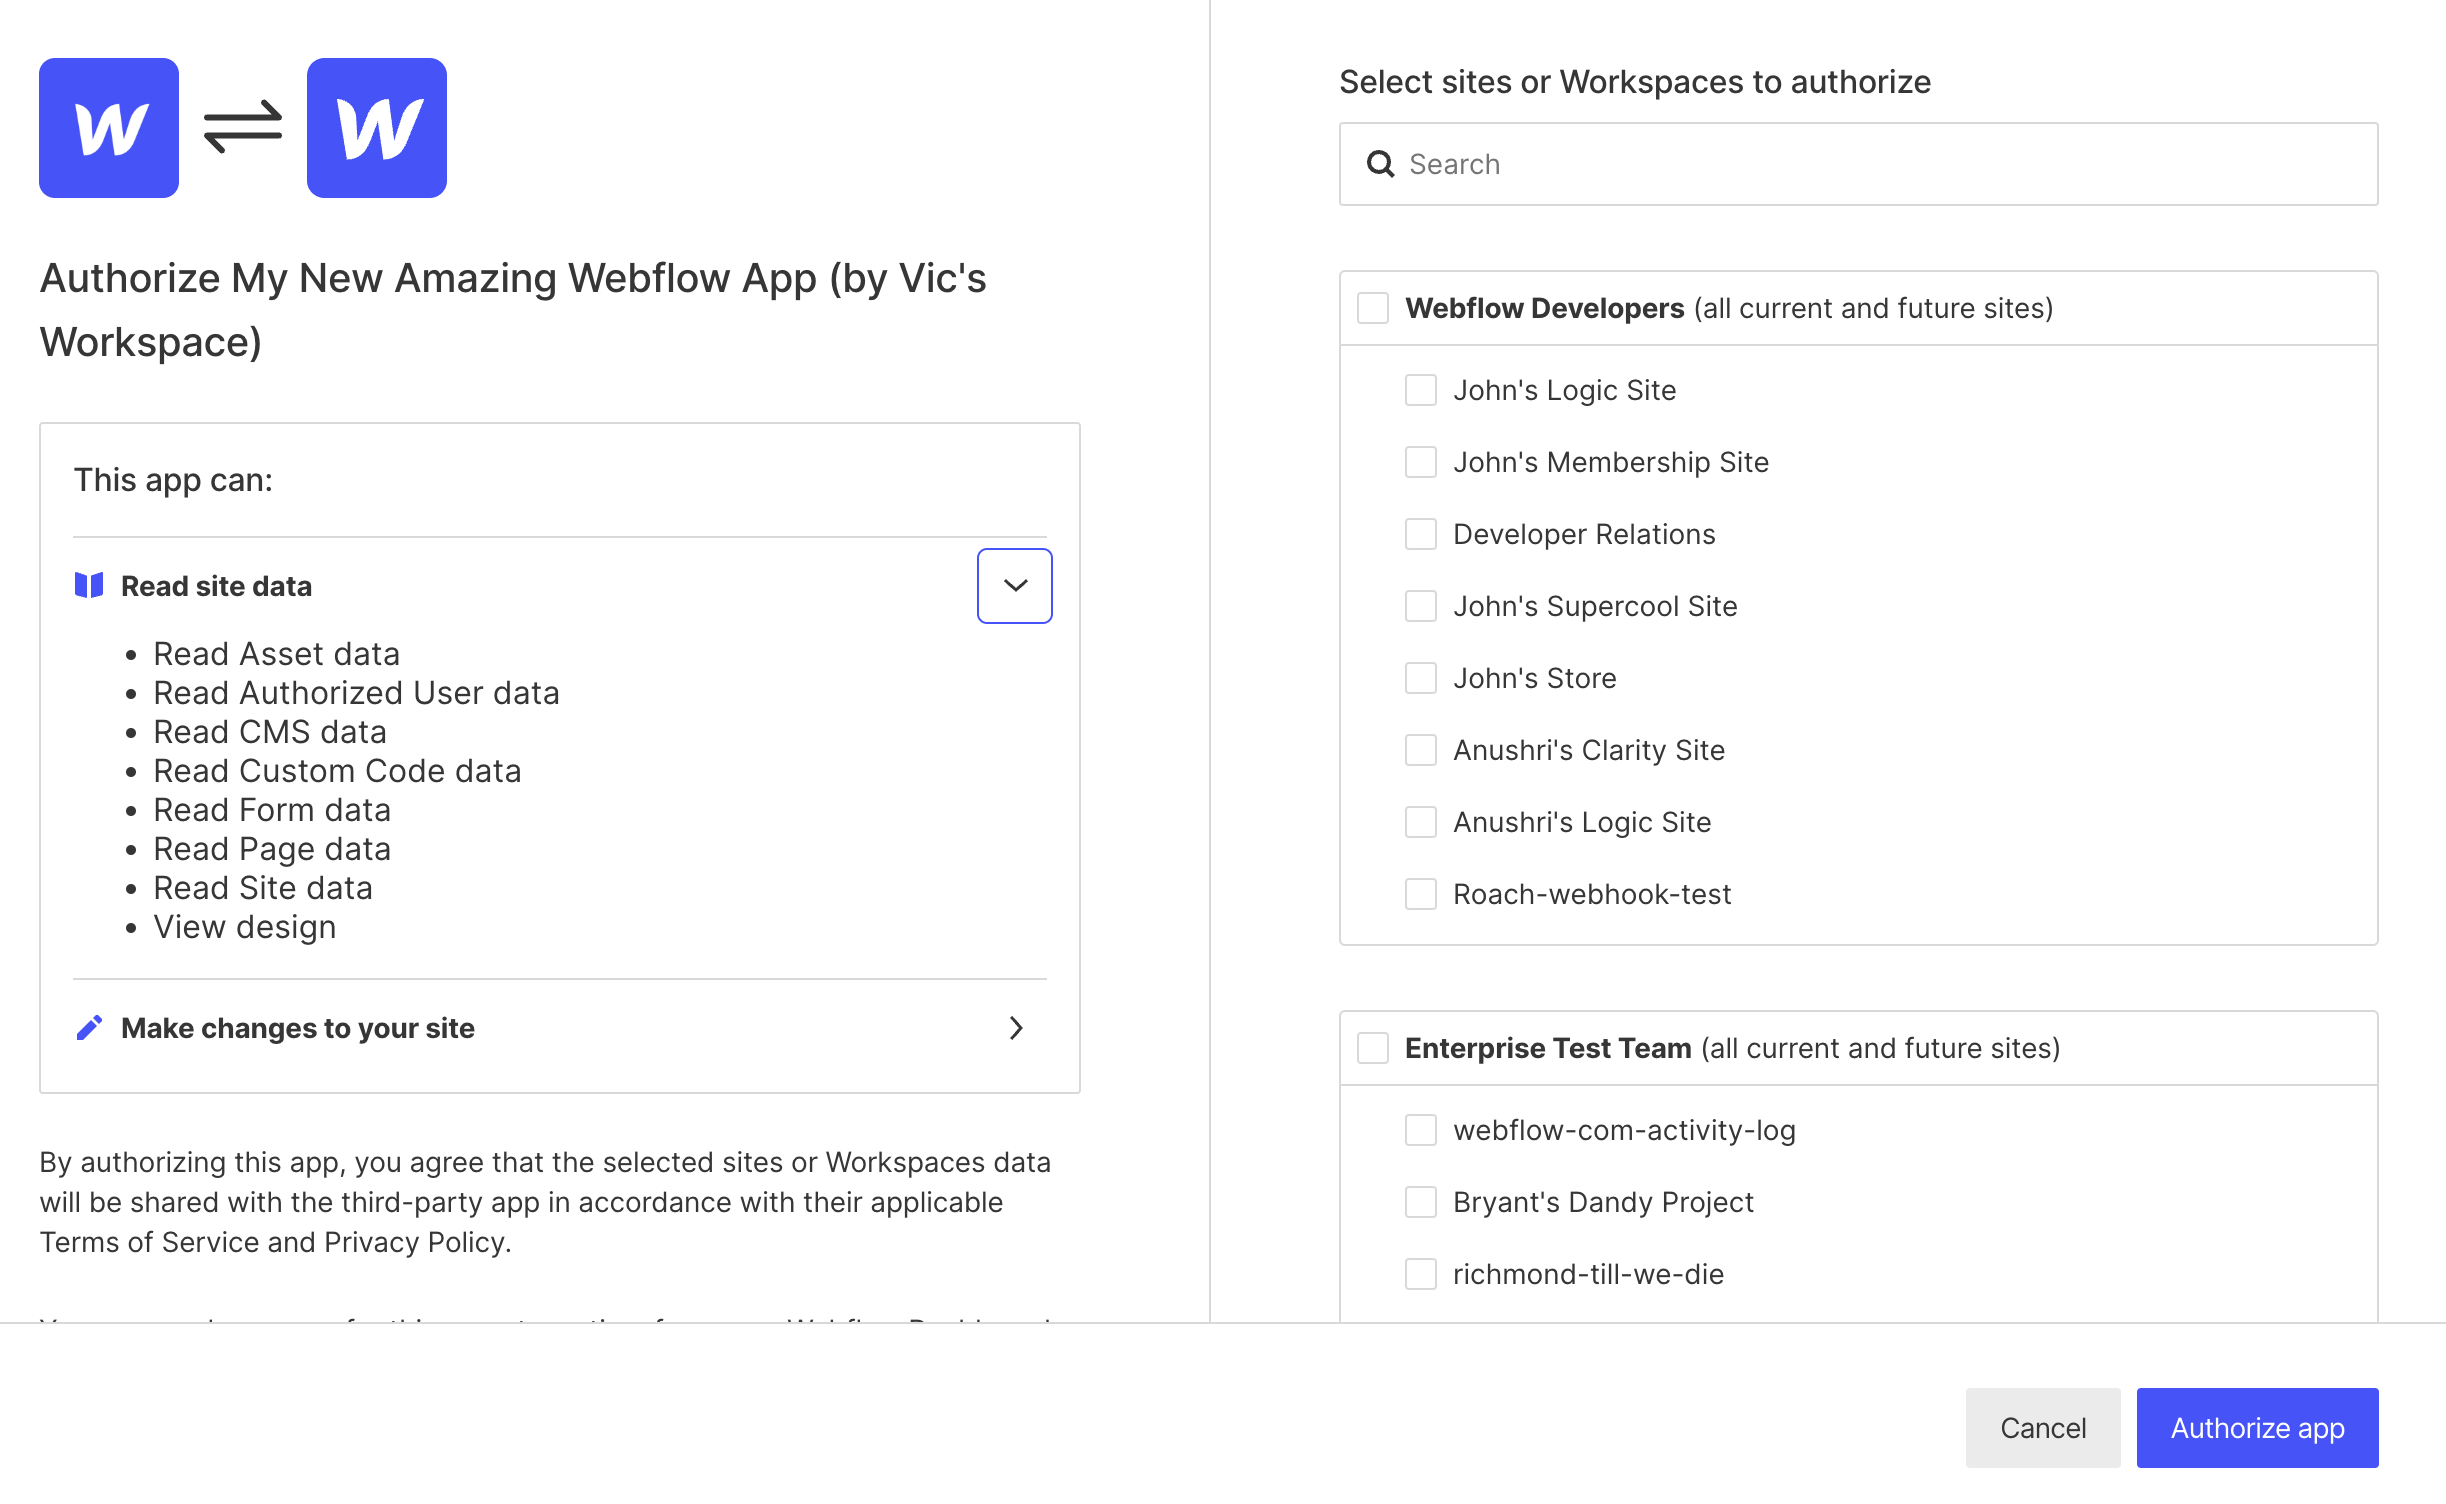
When users click on the authorization link, they will be taken to a screen where they can review and grant the necessary permissions for your App.
After the user authorizes the App, Webflow redirects them to your server using the redirect URI specified in your App settings. This GET request to your server includes the following query parameters:
code- A single-use authorization code that you’ll exchange for an access token. This code is only valid for 15 minutes.state: optional - The unique state value you provided in the initial request. Ensure this value matches the original to protect against CSRF attacks.
Let’s set up an endpoint to handle the callback request and store these parameters, as you’ll need them in the next step to request an access token from Webflow.
See the example below for details on completing the following steps:
- Setup the callback endpoint Create a route to handle the redirect from Webflow
- Verify
stateparameter Optionally, check that the state parameter matches the one sent in the authorization request. - Extract authorization code Retrieve the code from the query parameters.
Example
Node.js
Python
4. Request an access token
Now that you have the authorization code you can exchange it for an access token. The access token request should be made as soon as possible after authorization as an unconfirmed authorization code is only valid for 15 minutes.
Let’s walk through the steps to create a smooth flow for a user:
-
Request an access token from Webflow’s authorization server
In the same endpoint we just set up, create a request to Webflow with the following parameters. Webflow requires these parameters to ensure that the entity requesting the access token is the same entity that received the authorization code.
Authorization server endpoint
POST https://api.webflow.com/oauth/access_tokenRequest parameters
Unique ID for your application. Can be found in the dashboard.
Private value unique to your application. Can be found in the dashboard.
Authorization code used to retrieve an access_token for the user. Can only be used once.
-
Store the access token securely
For demonstration purposes, we’re storing the access token in a variable and printing it to the terminal. However, this approach isn’t secure for production. You should store the access token securely in a database or environment variables. For comprehensive guidance on securely storing tokens, please refer to our example apps on GitHub.
-
Redirect the user within your App
After successfully obtaining the access token, redirect the user to an appropriate location within your app. This could be a dashboard, a welcome page, or any other relevant section. Ensure that the user experience is smooth and they’re informed about the successful authentication.
Example
Node.js
Python
5. Start your server and test the authentication flow
You’re ready to test your newly created authentication flow! In this step, we’ll start our server, navigate to the authorization screen, and get an access token from Webflow.
-
Create a secure tunnel using ngrok (OPTIONAL)
using ngrok
ngrok can be used to create a secure tunnel to your localhost, providing you with an HTTPS link that can be used as a valid redirect URI.
- Install ngrok Download and install ngrok using a package manager or directly from their website.
Homebrew
Choco
- Authorize the ngrok agent Copy your authentication token from ngrok, and enter the following command in your terminal.
- Create a secure tunnel In a new terminal window, run the following command to create a tunnel to your local server:
Ngrok will provide you with a public HTTPS URL that forwards to your local server running on port 3000. It should look something like this:
-
Update your redirect URI in your App’s settings
-
In your workspace settings, navigate to Apps & Integrations > App Development
-
Find your App and click the “Edit App” button
-
Navigate to the “Building Blocks” menu
-
Update the Redirect URI with your Ngrok URL, ensuring that you include the correct endpoint. For example, if your endpoint is
/callback, your Redirect URI should look something likehttps://your-ngrok-url.ngrok.io/callback. -
Update the redirect URI in your
.envfile Be sure to also update your redirect URI in your.envfile if you’re passing your callback URI when creating an authorization link.
-
Start your server Enter the following command into your terminal to start your server.
Node.js
Python
-
Start the authorization flow
- Start the authentication process
Open your browser and go to
http://localhost:3000/auth. You will be redirected to Webflow’s authorization screen for your App. - Authorize your app Select the workspace or sites you want your app to access, and click the “Authorize” button.
- Redirect to your app Upon successful authorization, you will be redirected to your app’s dashboard.
- Verify the access token Check your terminal to see the access token printed out.
- Start the authentication process
Open your browser and go to
Didn’t see what you expected? Read the troubleshooting guide below.
Revoke an access token
To revoke an access token that has been issued to your application, make a POST request to the following endpoint with the below parameters:
Request Parameters
The unique identifier for your OAuth application.
The secret key associated with your OAuth application.
The access token that you wish to revoke.
Example Request
Response
If the request is successful, the access token will be revoked, and the response will return an HTTP status code of 200 OK with the following response body:
Possible Errors
Troubleshooting
My authorization link shows 400 Bad Request
- The
client_idis correct and matches the one provided in your app’s settings. - The scopes you are requesting are registered and valid for your app in the dashboard.
- If you are including the
redirect_uriparameter, verify that it matches the one registered for your app in the dashboard. - Ensure that the URL is properly constructed and encoded if you are creating it manually.
My server responds with an invalid_grant error
- If you included a
redirect_uriin your authorization link, you must also include it in your request for an access token. - Ensure your environment variables are loading, and you’re sending the correct
client_idandclient_secret. - Make sure you have a fresh
codevalue, these tokens are single-use and can not be used again. Also, the token is only valid for 15 minutes after it has been granted.