MCP server and AI tools
The Model Context Protocol (MCP) server connects your AI tools directly to your Webflow projects. Prompt an AI agent to update designs, manage site data, and work with the CMS from your preferred AI environment.
For developers using AI-powered tools like Cursor or Claude Desktop, the MCP server enhances an agent’s understanding of your Webflow projects. It’s built on Webflow’s APIs, exposing them as tools your AI agent can use to create elements, styles, and variables on the canvas, as well as manage collections, custom code, assets, and other site data.
See the full list of available tools in the MCP server documentation.
Installation
Get started by installing Webflow’s remote MCP server, which uses OAuth to authenticate with your Webflow sites, and a companion app that syncs your live canvas with your AI agent.
Companion app
The MCP server companion app can only be installed when you authorize the MCP server to your sites/workspace. It is not a public app on the Webflow app marketplace.
For local installation, please refer to the instruction in the NPM package documentation.
Requirements
Node.js version 22.3.0 or higher.
Node.js Version Management
Currently, the MCP server only supports Node.js version 22.3.0 or higher. See the Node.js compatibility section for more information on troubleshooting Node.js issues.
Claude Desktop
Cursor
Windsurf
Webflow provides a connector that you can use in Claude Desktop. It provides direct access to the MCP server.
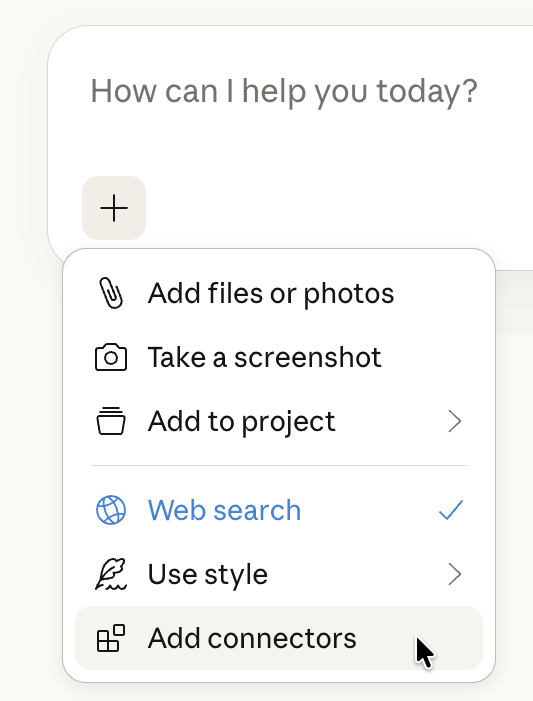
Open the list of connectors
In the Claude chat window, click the + symbol and then click Add connectors.
Find the Webflow connector
Search for the Webflow connector by name. You may need to select All instead of Featured to see it.
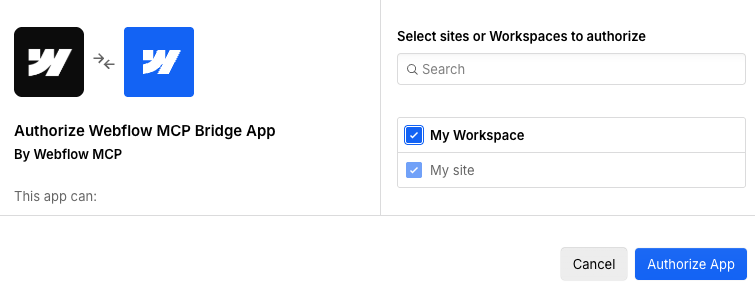
Grant access
Grant Claude access to your Webflow account and log in to your Webflow account if you are prompted to do so.
Resetting your OAuth token
If you need to reset your authorization, you can run the following command before restarting your MCP client.
Claude Desktop
Cursor
Windsurf
Please run following command and then restart your Claude Desktop.
Node.js compatibility
Currently, the MCP server only supports Node.js version 22.3.0 or higher. If you encounter issues with Node.js you can try the below approaches to troubleshoot:
Use version 22.3.0 as your default Node.js version
Use version 22.3.0 as your default Node.js version
To use version 22.3.0 as your default Node.js version, follow these steps:
Install NVM
If you don’t have nvm installed, you can install it with the following command (or download from nvm releases).
Use Node Version Switcher
To use Node Version Switcher (nvs) with the MCP server, follow these steps:
Install Node.js 22.3.0
Install the required Node.js version with nvs by running the following command in your terminal:
Use version 22.3.0
Use the version 22.3.0 with nvs by running the following command in your terminal:
Many thanks to @jessehouwing for the inspiration and guidance on using nvs with the MCP server.
How the MCP server works
The Webflow MCP server implements Anthropic’s Model Context Protocol specification to standardize communication between AI agents and Webflow’s APIs.
Architecture
The server acts as a translation layer that exposes Webflow’s APIs as MCP tools. Built as an open-source package, it wraps Webflow’s REST and Designer APIs into a format that any MCP-compatible AI agent can understand and execute.
Remote deployment
The server runs remotely to enable OAuth authentication, allowing you to:
- Authorize multiple Webflow sites without storing API keys locally
- Maintain secure, token-based access to your projects
This architecture eliminates the need to manage API credentials in your local environment while providing secure access to your Webflow projects.
Remote authorization is currently experimental
Remote authorization relies on the mcp-remote npm package, which is currently considered experimental.
Available tools
The MCP server exposes Data and Designer APIs as MCP tools. See the complete list of available tools and their parameters in the MCP server repository.
Designer API tools
Data API tools
Designer API tools enable real-time canvas manipulation:
- Visual design: Create and modify elements, styles, and components
- Layout control: Manage responsive breakpoints and positioning
- Design system: Work with variables, classes, and component instances
- Live preview: See changes instantly in the Designer interface
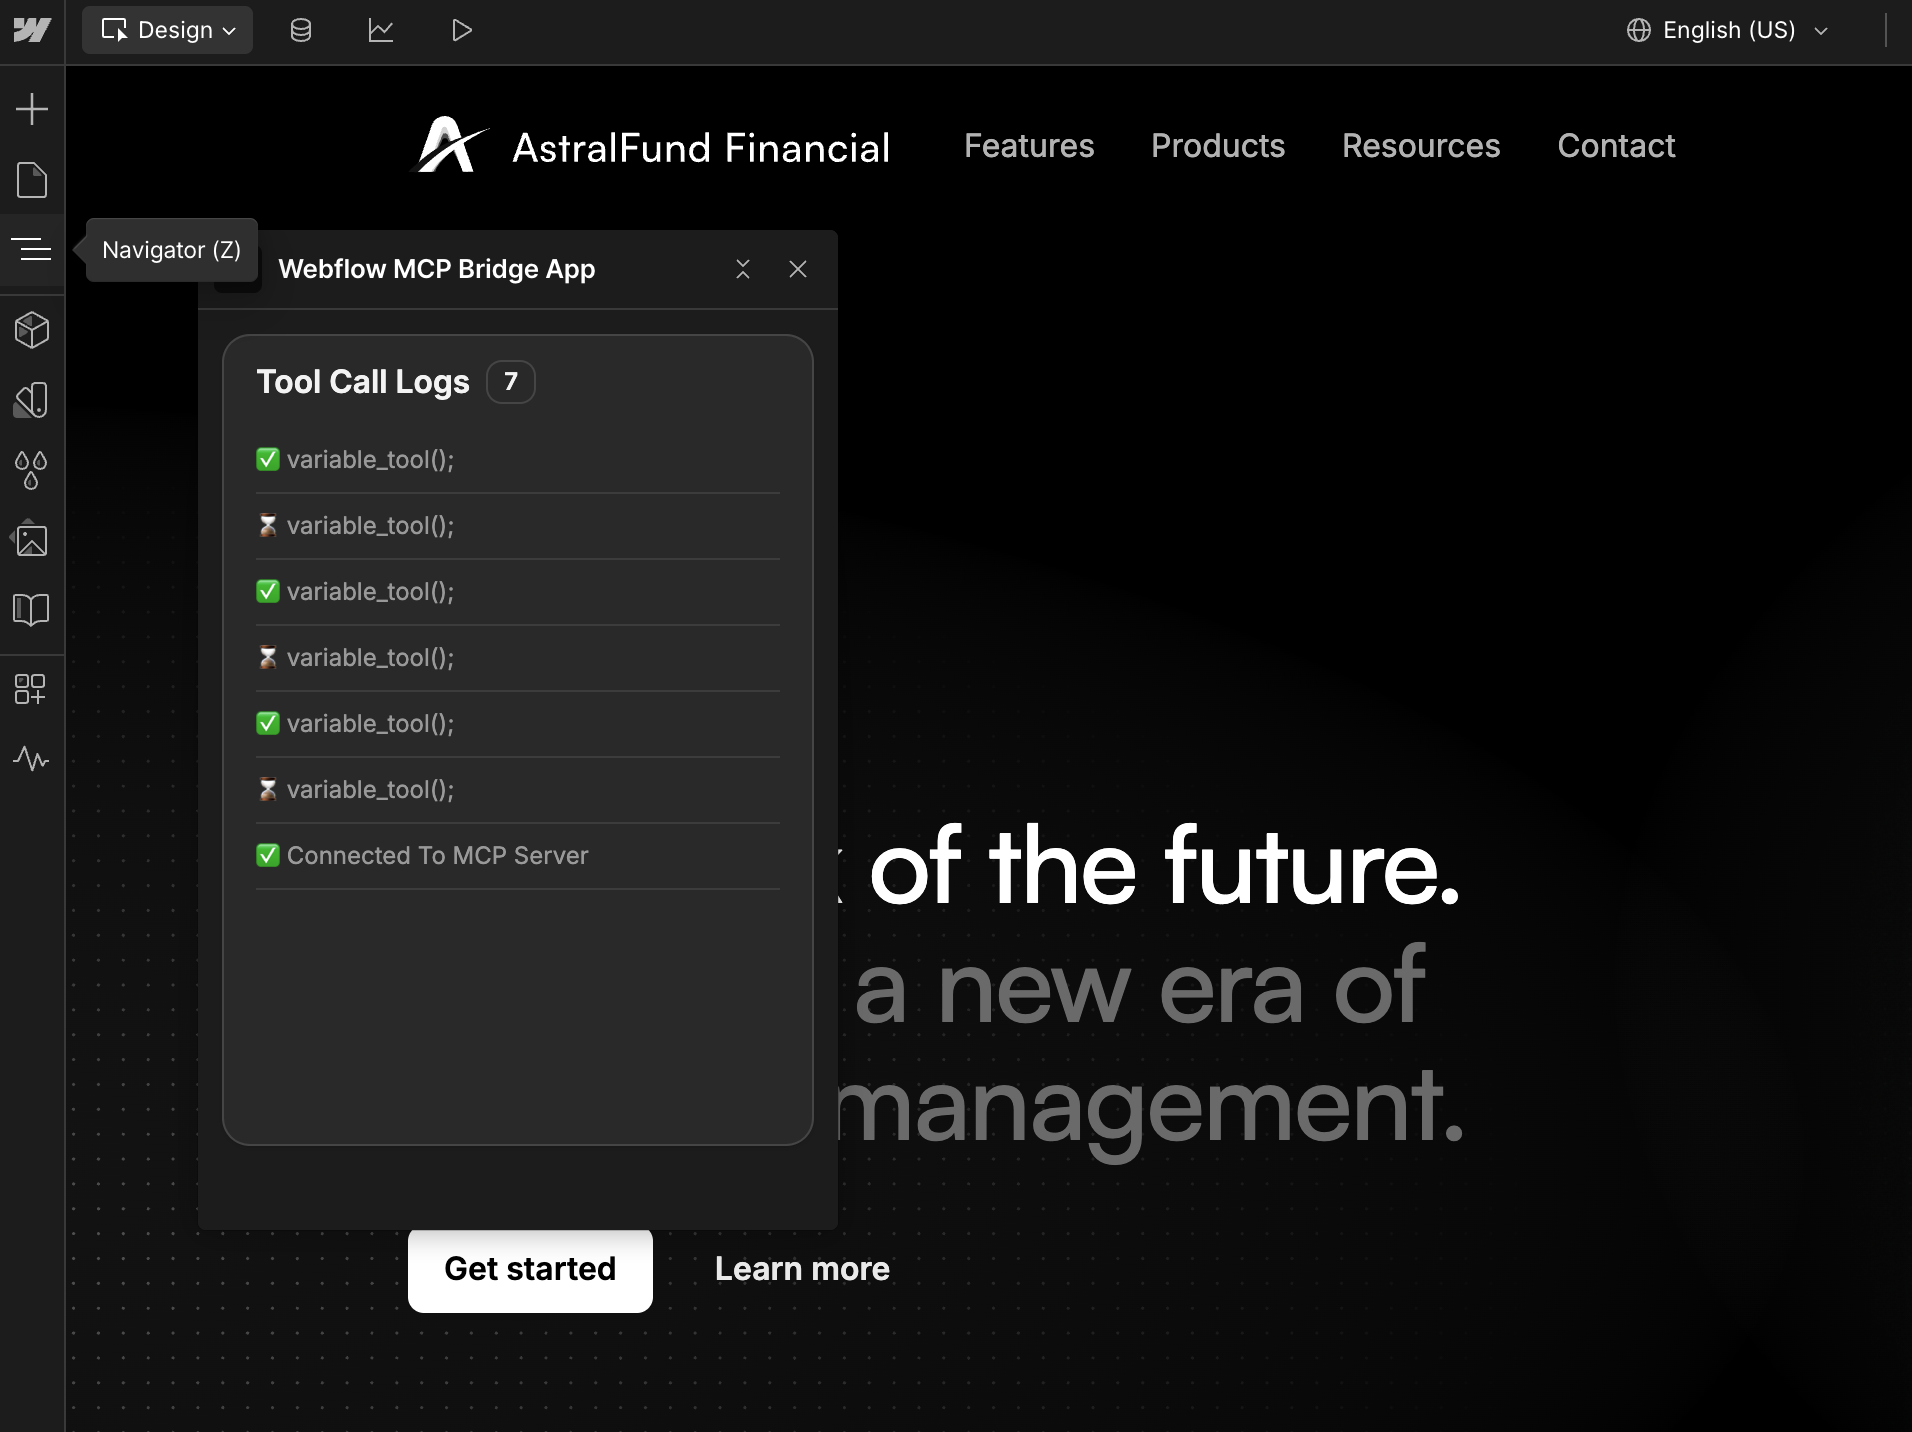
Designer companion app
Designer API calls are executed through a companion app that automatically installs to your authorized sites after OAuth authorization. The companion app must remain open in the Webflow Designer for Designer API tools to function. However, you can minimize it once connected.
LLMS.txt documentation
With Webflow’s LLMS.txt file, you can access Webflow’s documentation in your AI client without needing to load the webpage in your browser. This optimized structure helps LLMs respond with accurate code snippets and multi-step sequences.
- LLMS.txt
Usehttps://developers.webflow.com/llms.txtto access the LLM-readable documentation. - Markdown docs
Additionally, you can access markdown versions of any page on the docs site to provide a more structured and context-rich experience for LLMs. To access the markdown version of a page, add.mdto the end of the URL. For example, this current doc is available as a markdown file athttps://developers.webflow.com/data/docs/ai-tools.md.
Using LLMS.txt docs with Cursor
https://developers.webflow.com/llms.txtOnce configured, reference Webflow’s documentation by typing @Docs in your chat window and selecting “Webflow” from the list.
FAQs and troubleshooting
Installation and authentication
Why is my MCP server not appearing in my AI client?
After installing the MCP server, you may need to restart your AI client to see the new server. Additionally, check to see that your client (for example, Cursor, Claude Desktop) is updated to the latest version.
How can I authenticate a different Webflow site?
To authenticate a different Webflow site, you’ll need to remove the existing authentication token by running the following command in your terminal:
After executing the command, a new authentication screen should appear, allowing you to select the site you want to authenticate with.
I'm getting an error when loading the remote MCP server
You may receive an 500 error when loading the remote MCP server.
-
Try refreshing your OAuth token with the following command and then restart your AI client:
-
Check your current Node.js version to ensure you’re using version 22.3.0 or higher:
If you can’t use versions 22.3.0 or higher as your default Node.js version, follow the Node.js compatibility section to troubleshoot compatibility issues.
Troubleshooting Node.js and NPM issues
Ensure Node.js and NPM are properly installed
- Verify Node.js and NPM installation by running:
- If you encounter issues with
npx, try clearing your NPM cache: - If
npm -vonly works withsudo, you may need to fix NPM global package permissions. See the official NPM docs for more information.
If the issue persists, see the Node.js compatibility section above for version requirements.
If you make changes to your shell configuration, you may need to restart your shell for changes to take effect.
The sites I want to authorized are greyed out on the authorization page
Currently, only site owners and admins can authorize the MCP server and app. If you aren’t a site owner or admin, you can’t authorize the MCP server and app.
Tools and prompts
The MCP Server can't connect to the Webflow Designer
To use the MCP server with the Webflow Designer, open the “MCP Bridge App” from the Apps panel. Once open, the app will automatically connect to the MCP server.
You must keep the companion app open in the Webflow Designer for the MCP server to connect.
What tools are available?
The open-source MCP server package includes tools for AI agents. View the complete list in the GitHub repository.
Some of these tools and capabilities include but are not limited to:
- Designer tools:
- Create and manage Webflow elements, sections, and whole pages on the canvas
- Create and manage styles, variables, and breakpoints
- Create and manage Webflow component structure and instancing on pages
- Manage Webflow assets, metadata (including alt text), and folders
- Build visually using your own design system in place
- Data tools:
- CMS
- Create and read collection data
- Create and update collection fields
- Create, update, and delete collection items (including locale-specific content)
- Note: You can create and delete items directly in the live site, or you can create queued/drafted items to publish later
- Localization
- Read and update static page/component content in secondary locales
- Read and update default component properties in secondary locales
- Read and update CMS item content in secondary locales
- Custom Code
- List registered scripts for a site and which of those scritps are applied to the site
- Register and apply custom code inline for a site
- Delete all scripts from a site
- Pages
- Retrieve a list of pages on the site
- Read and update page metadata (including SEO and Open Graph settings)
- CMS
- Developer docs tools:
- Ask any question about Webflow’s developer documentation
Can I use all available API endpoints and Methods with the MCP server?
Currently, the MCP server supports a limited set of tools for the Data and Designer APIs.
If you have specific endpoints and methods you would like to see supported, please open an issue or contact the Developer Relations team at developers@webflow.com.
Does Webflow need to be open to use the MCP server?
If you’re only using the Data API tools, you can use the MCP server to update content even if Webflow isn’t open in the browser.
If you’re using the Designer API tools, you need to keep the companion app open in the Webflow Designer for the MCP server to work.
Can I localize content with the MCP server?
Currently, the MCP server supports localizing static content, and updating existing localized CMS items. However, the MCP server doesn’t support creating new localized CMS items.
If you have specific endpoints and methods you would like to see supported, please open an issue or contact the Developer Relations team at developers@webflow.com.