How to bundle and upload your Designer Extension to Webflow
Once you’ve tested your Designer Extension locally, the next step is to upload it to Webflow to share with your Workspace. Each time you’re ready to share a new version, you can upload it by following this guide.
Before you begin
Make sure you have the following:
- A complete and tested Designer Extension.
- The Webflow CLI installed.
- Admin access to the Webflow Workspace where your app is registered.
- Two-Factor Authentication (2FA) enabled on your Webflow account.
Build and bundle your extension
First, create a production-ready build of your extension. In your terminal, run the build command for your project. If you used webflow extension init to start your project, you can run:
Depending on your project setup, this command compiles your code into a build or dist folder. You can specify this output directory in your webflow.json file. Learn more in our App Settings guide.
Next, use the Webflow CLI to bundle your build directory into a bundle.zip file. Run the following command from your project’s root directory:
This creates a bundle.zip file that is ready to be uploaded. The bundle must not exceed 5MB.
Working with Frameworks
If you’re using a framework like Next.js or Astro, run the framework’s production build command first, then run webflow extension bundle on the output directory. You can streamline this by combining these steps into a single script in your package.json.
Upload your extension bundle
With your bundle.zip file ready, you can upload it to Webflow.
-
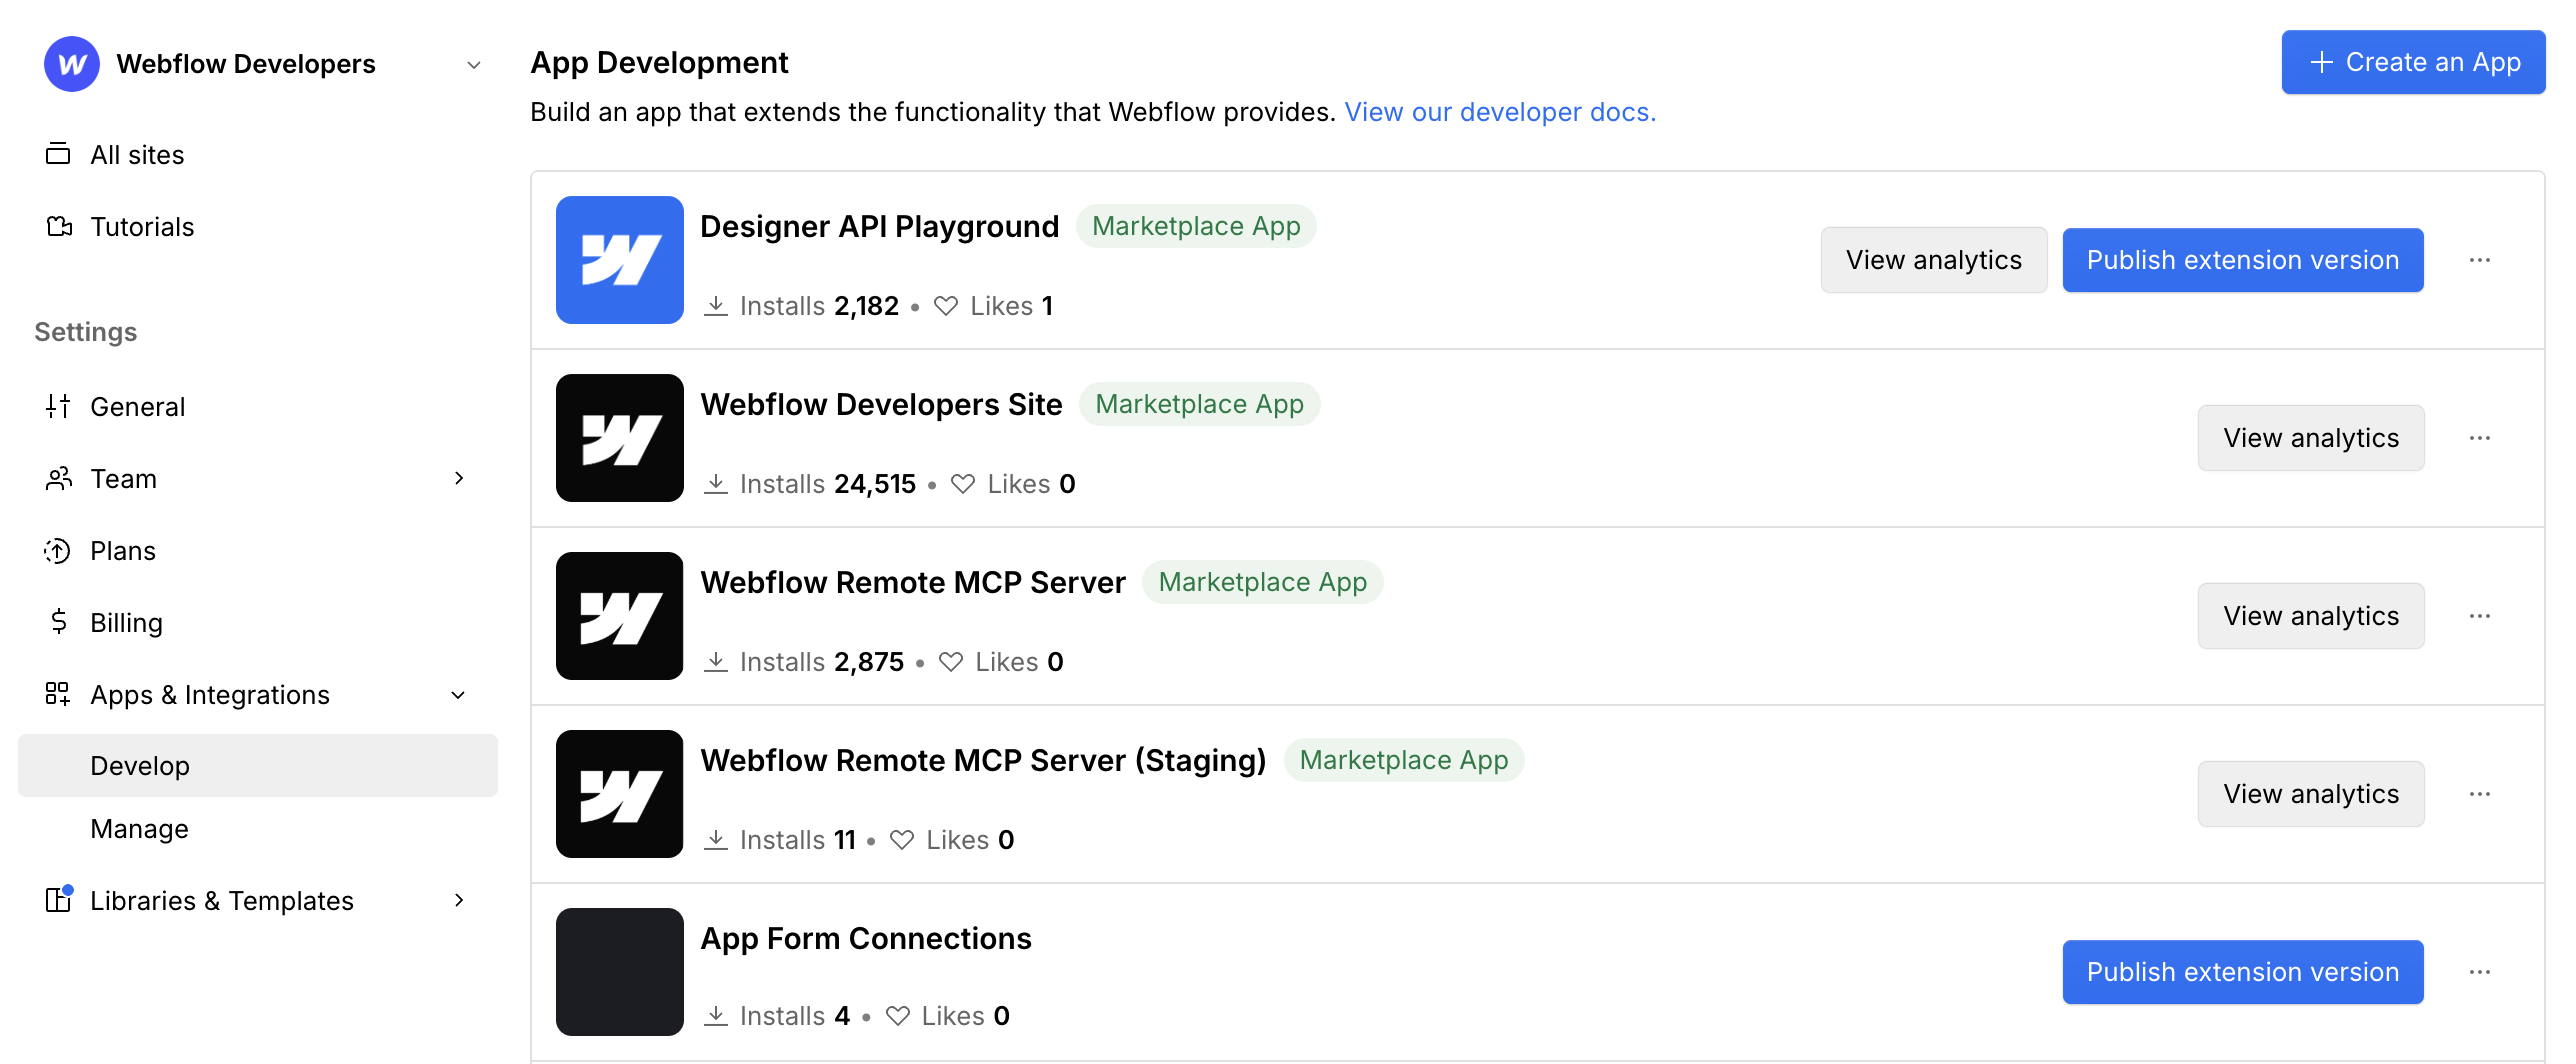
Navigate to your Workspace settings and click the Apps & Integrations tab.
-
Under the Develop section, find your app and click Publish extension version.
-
In the file dialog, select the
bundle.zipfile and add notes about the changes in this version.
After the upload is complete, you’ll see a confirmation message, and a new version will appear in your app’s version history.
Test your uploaded extension
Once your extension is uploaded, test it in your Workspace to ensure it works as expected.
- Open a Webflow site in your Workspace.
- Open your app and click the Launch App button.
- Verify that everything works as expected.
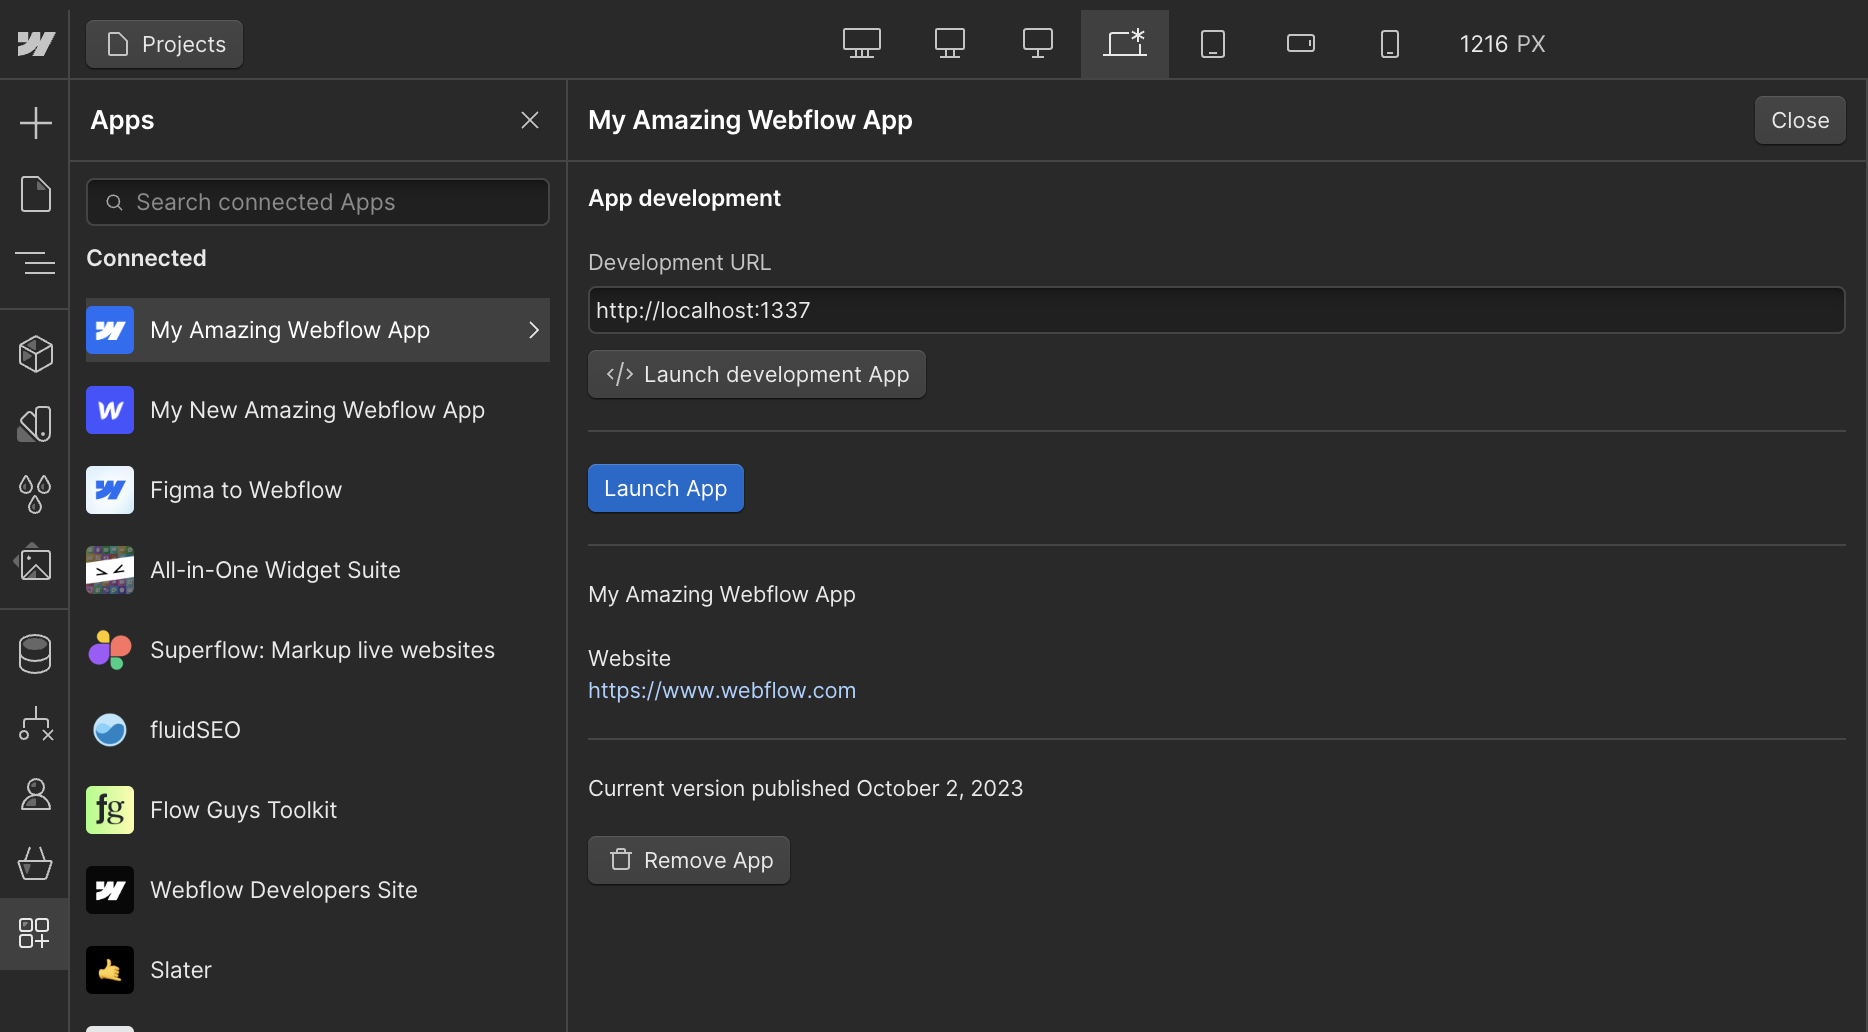
Be sure to click Launch App to test the uploaded version, not Launch development app, which loads your extension from your local development URL.
Submitting to the Marketplace
Once your extension is tested in your Workspace, you can submit it to the Webflow App Marketplace. The submission process involves providing marketing assets, support information, and a description of your app.
The Webflow team will review your submission to ensure it follows our Developer Terms of Service and meets our Marketplace Guidelines. This process can take a few days, and you’ll receive an email notification once it’s approved.
Learn more in our Marketplace Submission Guide.
Updating the extension
To update the extension, create an updated bundle.zip file and upload it as described in Upload your extension bundle.
Be sure to include notes about the changes in the new version, especially if the new version has new required scopes.
If you change the required scopes for an extension in a new version, the new version of the extension prompts users to re-authenticate.
Frequently asked questions
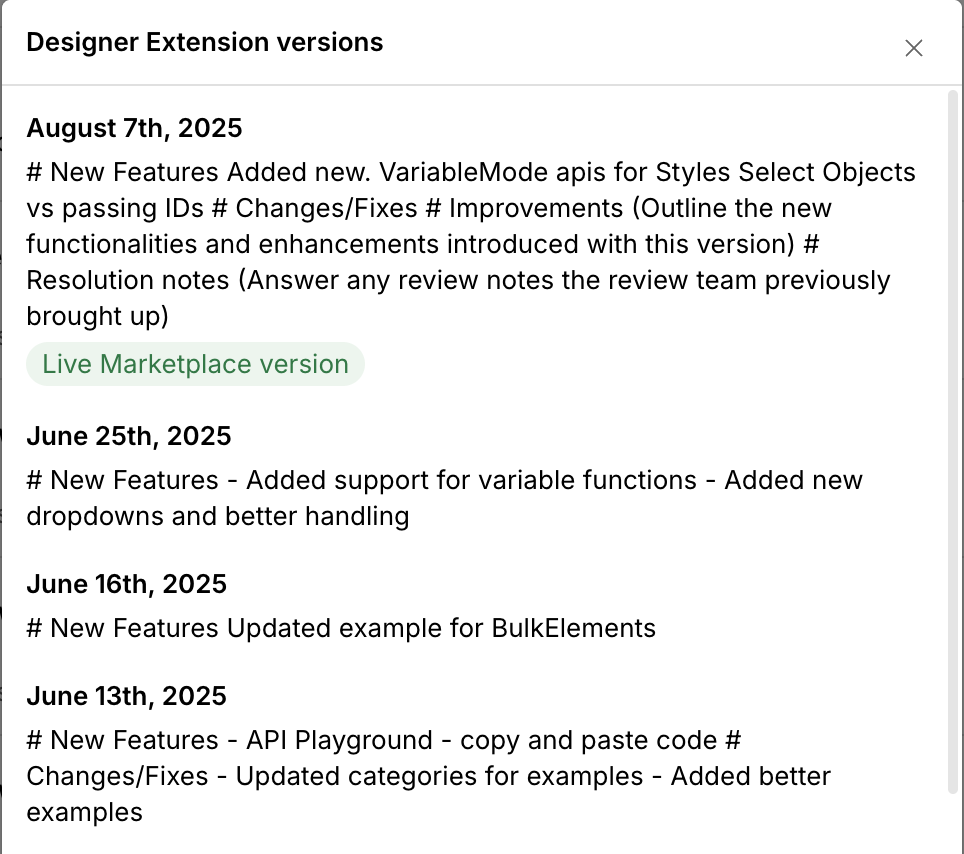
Are uploads to Webflow versioned?
Yes. Every time you upload a bundle.zip file, Webflow creates a new, versioned instance of your extension. You can add notes with each version to track new features, changes, and bug fixes. To see your version history, click the … button in your app’s settings and select Version History.
Can I revert to a previous version?
Webflow does not have a one-click rollback feature. However, since your bundle.zip files are generated from your local codebase, you can use your version control system (like Git) to check out a previous version of your code, generate a new bundle from it, and upload that bundle to Webflow.
Why is the 'Publish extension version' button disabled?
This button is disabled if you are not an admin of the Workspace or if you do not have Two-Factor Authentication (2FA) enabled on your account.
Where is my production app hosted?
Your production app is hosted on Webflow’s servers. When you upload your bundle.zip file, Webflow compiles your extension and serves it from a unique URL within an iframe in the Designer.
You can find this URL in your app’s settings by clicking the … button and selecting Edit App -> Building Blocks -> Designer Extension and see the section for Designer Extension URI.