Introduction
Webflow’s Designer APIs let you build apps that programmatically control the Webflow Designer. With these APIs, developers can create tools that automatically add elements to pages, apply styles, manage components, and streamline design workflows.
Getting started
To start using the Designer APIs, register a Webflow App and create a Designer Extension using the Webflow CLI. Once you have your Designer Extension running locally on a Webflow project, you can start using the Designer APIs to create elements, styles, components, and more.
Experiment with live API calls in our interactive playground environment
Working with the Designer APIs
The Designer APIs provide several objects and methods that give Apps control over the Webflow Designer. Each object serves a specific purpose and contains methods to help you design automated workflows for teams working in Webflow.
Create and manipulate elements on the canvas, including their properties, content, and styles.
Manage reusable CSS classes to control the visual appearance of elements across your site.
Create and modify reusable element groups to maintain consistency across your designs.
Define and manage global values for numbers, percentages, sizes, colors, and fonts.
Manage page properties, SEO settings, and site structure.
Utility methods to manage your extension’s behavior and interaction with the Designer.
How the Designer APIs work in Webflow
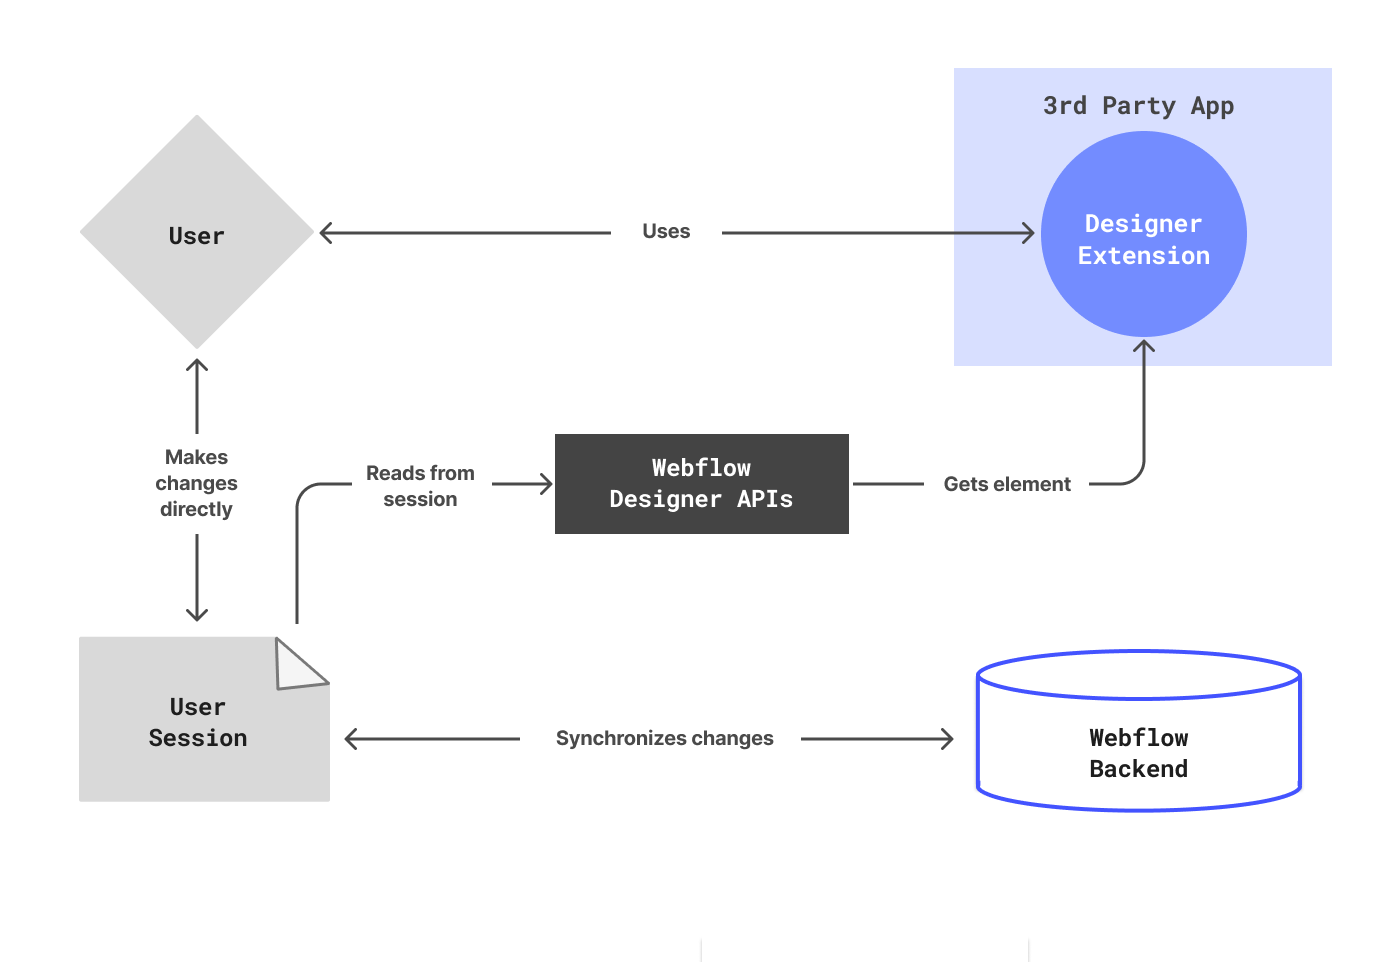
Designer APIs are client-side JavaScript APIs that execute in the browser via an iframe. They interact with Webflow just as a user would - creating elements, applying styles, and modifying properties. This client-side approach allows your apps to directly manipulate the Designer interface in real-time, creating a seamless integration between your code and the Webflow environment.
To work with objects in your Webflow project, you’ll need to reference the object using an appropriate method, and then make changes using the available methods.
Referencing objects
Modifying objects
-
Existing Objects: Get an existing object using an appropriate GET method. For example, to get the currently selected element, you can use the
webflow.getSelectedElement()method. You can see all the methods available for retrieving objects in the Designer API Reference. -
New Objects: Create a new object using an appropriate CREATE method. When you create a new object, Webflow will always return a reference to the new object. For example, to create a new element, you can use the
element.after()method. You can see all the methods available for creating objects in the Designer API Reference.

webflow.getSelectedElement() returns a reference to the currently selected element.