Quickstart
This guide will help you get started making requests to Webflow Optimize through the Browser API. It will walk you through the process of creating a script and adding Optimize methods as callbacks.
No installation required
The Browser API is automatically enabled on your site with no manual installation required. The Optimize methods are available through the globalwf object in your browser.Prerequisites
- A Webflow site with Optimize enabled
- Ability to add custom JavaScript to your site or use a tool like Google Tag Manager
Getting started with the Optimize Browser APIs
There are two main approaches to implementing your Optimize code:
- Add code directly to your site: Place your script in the
<head>section of your site using Webflow’s Custom Code feature. - Use Google Tag Manager: Add the API call when configuring a custom tag
Call wf.ready()
Since the Webflow Browser API loads asynchronously, you need to ensure your code runs at the right time by using wf.ready().
Add this call to the <head> section of your site or page using Webflow’s Custom Code feature. Or, if using a tool like Google Tag Manager, add the API call when configuring the tag. Adding the call early ensures you won’t miss any events on the page.
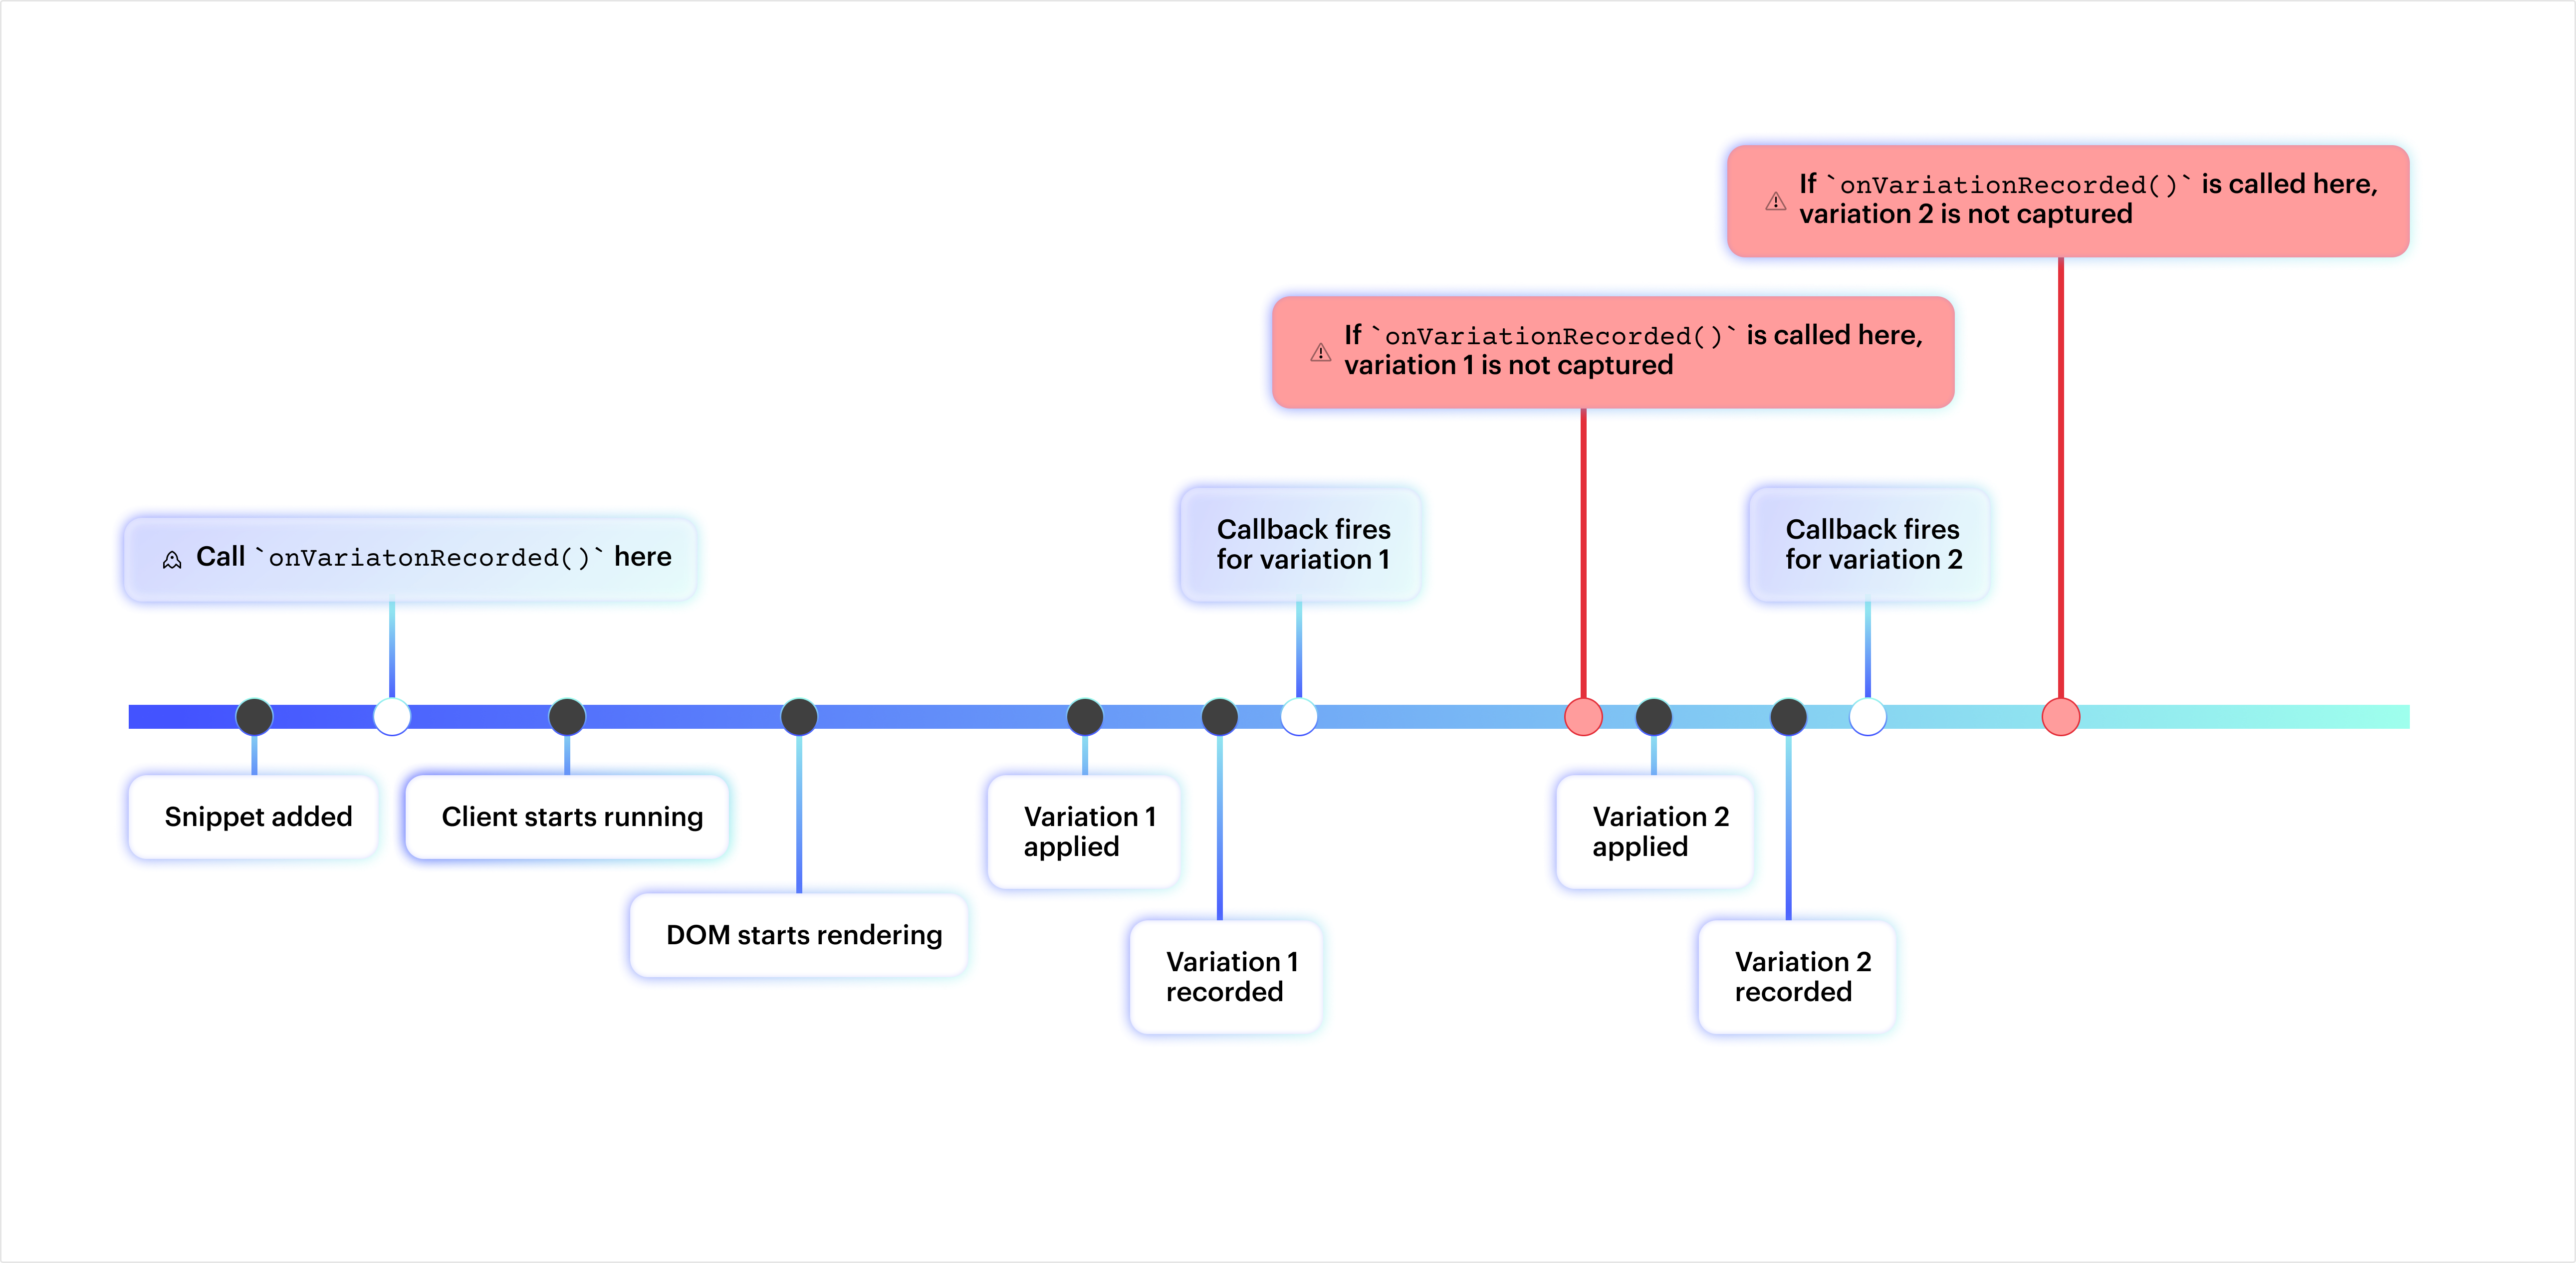
When should you call wf.ready() ?
To make sure your callback fires, call wf.ready() as early as possible to guarantee it’s registered before Webflow Optimize returns any time sensitive events. Preferably, before the DOM starts rendering. This prevents the callback from missing any events. To illustrate:
We recommend adding the API call in before the closing </head> tag on your site or page using Webflow’s Custom Code feature. Or, if using a tool like Google Tag Manager, add the API call when configuring the tag.
Add callbacks to wf.ready()
Now you can start adding callbacks to your script to retrieve variations and set custom attributes.
Multiple callbacks
Multiple API calls per page
You can add multiple callbacks in wf.ready() to handle different Optimize functionality in a single script. This enables you to efficiently manage multiple operations like retrieving variations and setting attributes in one place. Each callback will execute once the Webflow Browser API is ready.
Example:
Next steps
Now that you’re familiar with making requests to the Browser API, you can learn more about Optimize methods to add to your callbacks: