Getting started
The Webflow MCP server connects your AI agent directly to your Webflow projects. Webflow provides plugins that connect several popular agents directly to the MCP server, but you can also connect agents to the MCP server manually.
Then, you can authorize your agent to access your sites and start building with natural language prompts.
Setup overview
The installation process takes about 5 minutes and includes:
- Configure your AI tool - Add the Webflow connector to Claude Desktop, the Webflow plugin to Cursor, or add the MCP server manually to other tools like Claude Code or Windsurf
- Authorize sites - Connect the MCP server to your Webflow account via OAuth
- Launch Bridge App - To give the agent access to the Webflow Designer, open the Webflow MCP Bridge app in the Webflow Designer
- Start prompting - Use natural language to interact with your sites
What you’ll need
- AI client: We provide instructions for Claude Code, Claude Desktop, Cursor, or Windsurf
- Webflow account: With at least one site you can access
Estimated time: 5 minutes
For local installation options, see the NPM package documentation.
Installation
Select your AI tool below to begin:
Claude Desktop
Claude Code
Cursor
Postman
Windsurf
Webflow provides a connector that provides Claude Desktop with direct access to the Webflow MCP server. If you prefer, you can connect manually, as described in Connecting Claude Desktop manually.
Using the Claude connector
Open the list of connectors
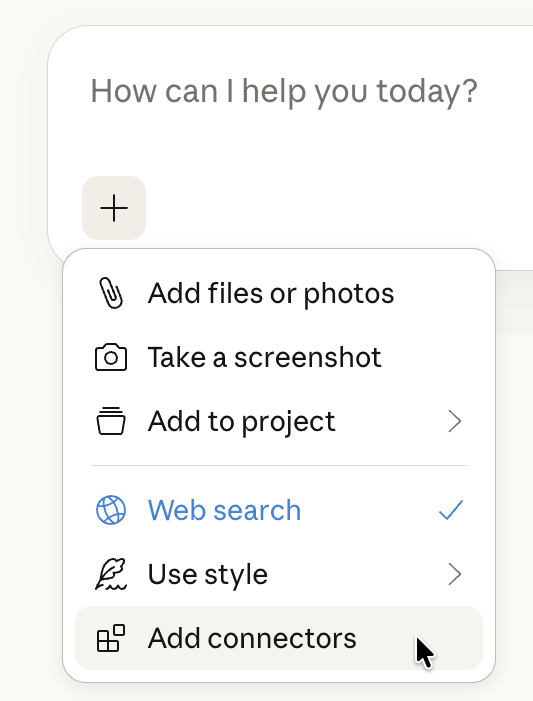
In the Claude chat window, click the + symbol and then click Add connectors.
Find the Webflow connector
Search for the Webflow connector by name. You may need to select All instead of Featured to see it.
Grant access
Grant Claude access to your Webflow account and log in to your Webflow account if you are prompted to do so.
Select sites or Workspaces
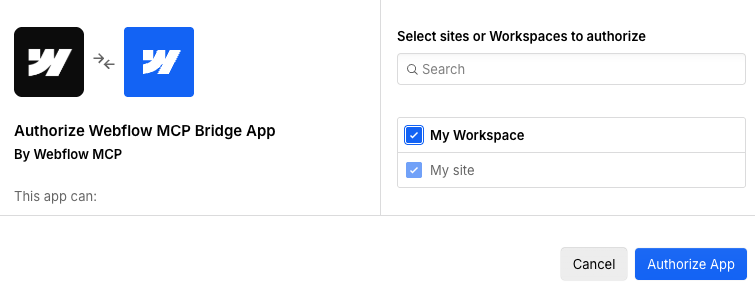
Select the Webflow sites and Workspaces to give Claude access to and then click Authorize App.

Connecting Claude Desktop manually
To add the MCP server to Claude Desktop manually, follow these steps:
Enable developer mode
In the menu bar, click Help -> Troubleshooting -> Enable Developer Mode to enable developer mode.
Open the configuration file
Open the configuration file in a text editor.
You can find the configuration file by opening the Claude Desktop settings, going to Developer, and clicking Edit Config. You may need to create the file if it does not exist.
Add the MCP server URL
Add the Webflow MCP server to the mcpServers section of the configuration file, as in this example:
Grant access
Grant Claude access to your Webflow account and log in to your Webflow account if you are prompted to do so.
Select sites or Workspaces
Select the Webflow sites and Workspaces to give Claude access to and then click Authorize App.
MCP Bridge App installation
The MCP Bridge App installs automatically during OAuth authorization. It’s not available on the public Webflow App marketplace.
Connecting to the MCP server manually
If Webflow does not provide a connector or plugin for your agent, or if you want to connect to the MCP server manually, you can use the server URL https://mcp.webflow.com/mcp.
If you use the mcp-remote NPM package to connect manually, Node.JS 22.3.0 or later is required.
Managing multiple Claude Code connections
You can set up separate projects in Claude Code to manage authentication and settings for different sites. For example, if you are working on multiple Webflow sites, you can create a separate project for each, which keeps the authentication for each project separate and can help you track your token usage for each site.
Follow these general steps to set up projects in Claude Code and give them access to specific Webflow sites or Workspaces:
-
Create a folder on your computer for the Claude Code project. This project doesn’t need to have any site-related code in it; instead, it holds the Claude Code configuration for the project.
-
In the project folder, open Claude Code and run this command to connect to the Webflow MCP server in a configuration file that is limited to this folder:
Replace the variable
$PROJECT_NAMEwith a name for the project, such aswebflow-1ormy-webflow-site.The
-s projectargument tells Claude Code to add this MCP server to a configuration file that is scoped to this folder, instead of adding the server to the global Claude Code configuration. -
Reload Claude Code:
-
If you are using Claude Code in a terminal window, exit and reopen Claude Code.
-
If you are using Claude Code in an IDE, reload the IDE window. For example, if you are using VSCode, press Ctrl+Shift+P and run the command
Developer: Reload Window.
Claude Code does not have access to the updated local configuration until you reload Claude Code.
-
-
In a Claude Code window, run the command
/mcpto list the MCP servers. -
Select the Webflow MCP server and authenticate to it as usual, including selecting the Webflow sites or Workspaces to give the Claude Code project access to.
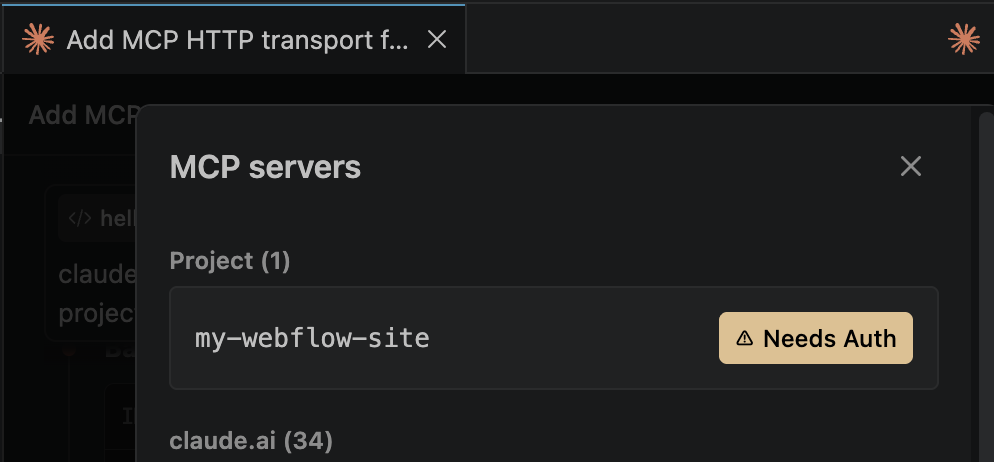
Be sure to select the MCP server in the project and not one of the default servers in the
claude.aidomain.For example, this screenshot shows the project-specific MCP server configuration in VSCode:
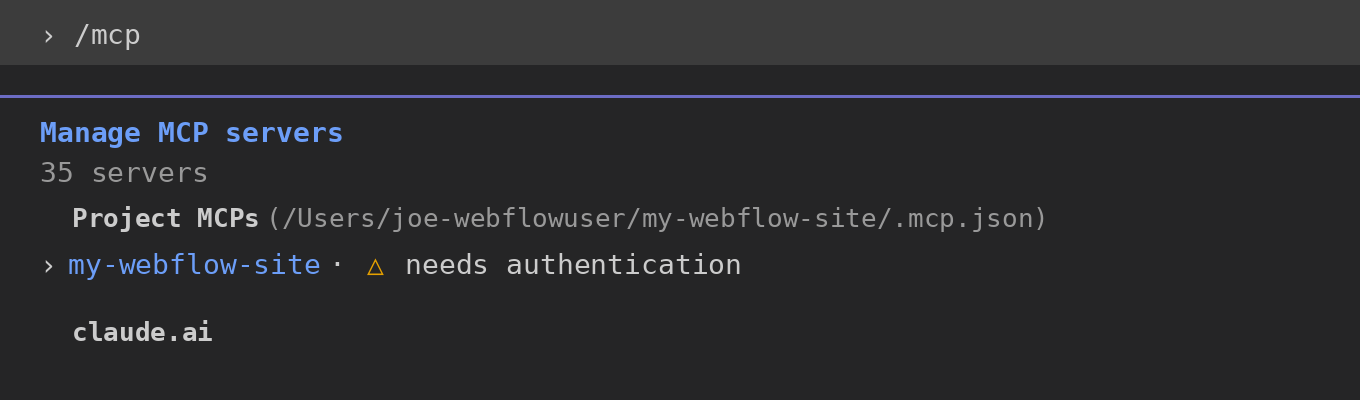
Similarly, this screenshot shows the project-specific MCP server configuration in Claude Code in a terminal window:
-
Verify that the instance of Claude Code has access to only the scope that you authenticated it to, such as by asking it to list the sites it has access to or the CMS collections in that site.
Now you can create multiple project folders, each with different access permissions to Webflow sites and workspaces.
Next steps
Now that you’ve installed the MCP server, explore what you can do:
Browse ready-to-use prompts for image optimization, SEO audits, style refactoring, and more.
Install skills that help you accomplish common Webflow tasks through natural language.
Understand the architecture, authentication, and how the MCP server connects to Webflow’s APIs.
Connecting to the Beta server
The Beta MCP server contains functionality that is being developed and may change. Access to the server will be available soon.