This is an overview of the changes to the Webflow APIs and related tools. To filter the list, select one or more tags.
This is an overview of the changes to the Webflow APIs and related tools. To filter the list, select one or more tags.
It’s now easier to deploy Astro and Next.js applications to Webflow Cloud. You can click this button to walk you through the process of deploying a project from a GitHub repository to Webflow Cloud:

You can also pass the URL of the GitHub repository to Webflow Cloud, as in this example: https://webflow.com/dashboard/cloud/deploy?repo=https://github.com/Webflow-Examples/hello-world-nextjs.
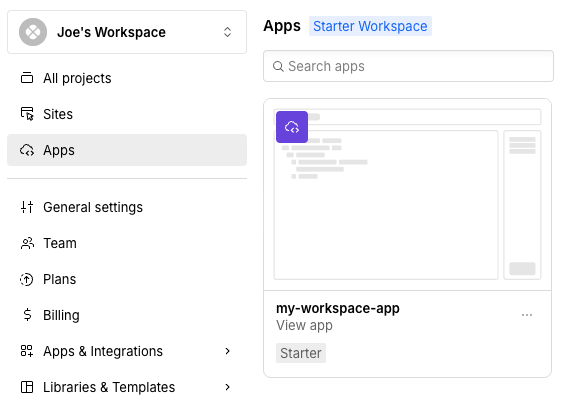
You now have the option to deploy applications to Webflow Cloud without connecting them to a Webflow site. Note that your Workspace now shows sites and these independent applications separately, as in this screenshot:
Applications that are part of a site are still shown in that site’s settings, as in this screenshot:
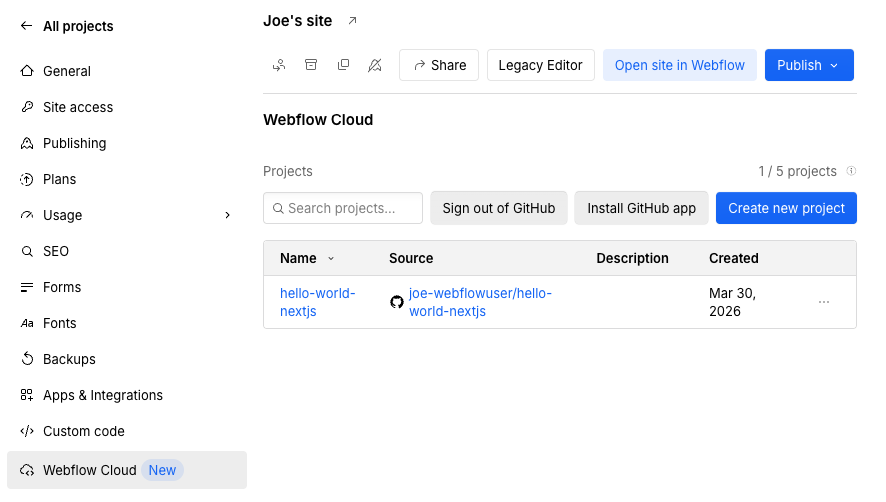
For more information, see Bring your own app.
CLI v2.0.0: Renamed commands and Node.js 22 minimum version
CLI 2.0 consolidates the webflow library command group into webflow devlink and raises the Node.js minimum version to 22.13.0.
The commands from the previous version still work but emit deprecation warnings because they will be removed in a future version.
Node.js minimum version raised to 22.13.0.
Verify your Node.js version with node --version before upgrading.
Run this command to upgrade the Webflow CLI to version 2.0:
Then, verify the version of the CLI by running this command:
These commands have been renamed. The commands work the same way and take the same options. Be sure to update scripts and CI to use the new commands.
For full options and examples, see the command reference.
DevLink Component Export now ships interactions built with the new GSAP-powered Interactions engine. Animations defined on a component, including triggers, timelines, and GSAP plugins, are exported and run in your React project with no extra setup.
For every component that has Interactions, DevLink now emits:
useIX3Interactions hook.webflow_modules/devlink-gsap.js) that contains only the GSAP plugins your site actually uses, such as ScrollTrigger, SplitText, and CustomEase.
Plugin dependencies such as CustomBounce → CustomEase and ScrollSmoother → ScrollTrigger are resolved automatically.webflow_modules/devlink-ix3.js) that initializes GSAP and registers interaction data.GSAP plugin selection is driven by the site itself. No CLI flag or configuration is needed.
The <DevLinkProvider> component now wraps both Classic Interactions (IX2) and the new GSAP-powered Interactions (IX3).
There is no separate <IX3Provider> component to compose:
Existing Classic Interactions setups keep working unchanged.
The IX3 runtime and GSAP bundle load on demand, only after a component that uses useIX3Interactions mounts.
Sites that don’t use interactions, and pages that don’t render an animated component, pay zero runtime cost: nothing is fetched and the bundles are never executed.
client:load directive on the wrapping component.
Two separate client:load islands won’t share IX3 context.@webflow/webflow-cli v1.19.0 or laterUpdate your Interactions so that they are scoped to the component that you’ll export.
Then re-run the webflow devlink export command to pick up IX3 animations from your site.
No changes are needed in the webflow.json file.
For more information, see What’s exported.
MCP v1.3: Components, branching, and expanded authoring tools
Version 1.3 of the Webflow MCP server adds over 30 new tools and actions across component authoring, branch management, styles, elements, and comments. If you are already using the MCP server, your agents and prompts automatically use this version. To start using the MCP server, see Getting started.
Agents can now work with components end-to-end. They can create blank components, define and manage props, set and reset prop values on instances, bind props to element settings and text, manage variants (including variant-scoped style variable modes), duplicate components, reorder variants, and unlink component instances. They can now read and edit Text and Rich Text prop content. In many cases they can set CMS field bindings as component props.
Component query results are now richer: responses can include props, instance counts, and variants. Library components and code components (with their read-only and runtime flags) are now included in component lookup results.
Agents can now create, inspect, and delete page branches. They can retrieve branch details and IDs for the currently active page.
Agents can now query styles by ID, name path (including combo classes), and CSS properties, with options to include breakpoint and property data. They can create and update styles from raw CSS.
Agents can now query elements using a range of filters (ID, type, text content, style, tag, attributes, component name, and slot), delete elements from the canvas, and reposition elements relative to an anchor without deleting and recreating them. The element builder now supports a much broader set of element types, including rich text, form elements, media embeds, tabs, sliders, CMS collections, page slots, and dropdowns.
Agents can now read and add site comments: listing threads and replies, replying to threads, and looking up workspace users by email. Comments at the element level are also now supported.
Agents can now unpublish CMS items.
Agents now understand which Designer mode the user is in.
The current mode is exposed in tool responses, ModeForbidden errors are surfaced clearly, and tool descriptions include mode constraints to prevent unnecessary failures.
Guide content has been updated for Build mode workflows.
The MCP server now supports MCP resources.
In supported clients such as Claude and Cursor, you can @-reference resources directly without calling a tool first.
The Webflow Guide is now available as a resource.
Pages API: read and write JSON-LD schema markup
The Data API now exposes endpoints for managing the JSON-LD schema markup attached to a page. Schema markup powers rich search results such as FAQ snippets, breadcrumbs, organization cards, and product listings. Previously, schema markup could be edited only one page at a time in the Designer.
All four endpoints are available under the /v2/beta/ prefix.
Each endpoint accepts an optional localeId to target a secondary locale.
When a secondary locale has no schema markup of its own, the response returns the primary locale’s schema markup and sets isInherited to true.
The bulk read endpoint accepts up to 100 page entries per request. The bulk update endpoint accepts up to 25 page entries per request. Each entry in a bulk request can target a different locale, so you can update the same page across multiple locales in a single call.
The jsonLdSchema field accepts a JSON object, a raw JSON string, or a string wrapped in a <script type="application/ld+json"> tag.
Pass null to clear the schema markup for the targeted page or locale.
Each entry is validated against the following limits:
Pages API: slug field is now silently ignored when it can’t be changed
Update Page Metadata no longer returns an error when the slug field can’t be applied. The request now returns 200 OK with the slug field silently ignored — all other fields in the update apply as expected.
404, password, search) previously returned 400 Bad Request ("Slug of index pages can't be updated", "Collection Template page slugs cannot be updated", or "Utility page slugs cannot be updated") when a slug was included. They now return 200 OK with the slug ignored.403 Forbidden when a slug was included. They now return 200 OK with the slug ignored.If your integration relied on the previous 400 or 403 responses to detect page-type or plan restrictions, switch to comparing the returned page’s slug against the value you sent — they’ll differ when the slug was ignored.
The Custom Fonts API adds seven new OAuth v2 endpoints under /v2/sites/{site_id}/custom_fonts.
Apps can now manage a site’s custom fonts programmatically — uploading, listing, updating, replacing, and deleting fonts without any manual steps in the Webflow Designer.
For information on using custom fonts in sites, see Custom fonts.
Foundry and font-platform apps. Apps that license fonts can provision the licensed binaries straight into a customer’s Webflow site. Your user browses your library, selects a face, and the font appears in the site’s typography picker.
Brand-system and multi-site management apps. Agencies managing many sites under one workspace can keep the same brand fonts in sync across every site. Push a new corporate typeface to all client sites in one batch, or remove a deprecated weight from all of them just as easily.
AI and MCP agents. An AI assistant can now complete a site’s typography setup end-to-end — upload the brand’s custom font and it is immediately available across the site’s surfaces, with no manual handoff.
The API reuses the existing sites:read and sites:write OAuth scopes.
No new scopes are required, and existing app installations don’t need to re-authorize.
Font uploads use the same presigned-S3 handshake as the Assets API.
202 Accepted with a customFont object and a presigned upload object.upload.url as multipart/form-data, including every key from upload.fields.
The binary goes in a field named file, which must be the last field in the form.
S3 returns 201 Created on success.The font is immediately available in the site’s typography picker after the S3 upload completes.
409 Conflict.List Assets: folder filtering and per-asset folder context
You can now scope the List Assets endpoint (GET /v2/sites/{site_id}/assets) to return assets that are in a specified folder.
In the same way, the response to this endpoint includes the folder that an asset is in.
folderIdPass a folder’s ObjectId to receive only assets in that folder and all of its descendant folders.
When folderId is omitted, the endpoint returns all assets on the site as before.
pagination.total reflects the filtered count, so paginated UIs get correct totalsfolderIdEvery asset in the response to this endpoint now includes a folderId field.
The value is the ObjectId of the folder the asset belongs to, or null when the asset is at the site root.
folderId appears only in the response to the GET /v2/sites/{site_id}/assets endpoint.
The single-asset GET /assets/{asset_id} and PATCH /assets/{asset_id} responses are unchanged.
MCP v1.2.1 - Improved connection reliability and Gemini compatibility
Version 1.2.1 of the Webflow MCP server improves connection reliability and fixes compatibility with Gemini-based AI clients. If you are already using the MCP server, your agents and prompts automatically use this version.
element_builder and component_builder tools.
Gemini’s strict OpenAPI 3.0 validation rejected array schemas that were missing an items type definition.
Claude-based clients were unaffected.v1.21.0: Forms commands
v1.21.0 adds a forms command group for reading form data and exporting submissions.
webflow forms listLists all forms on a site with their ID, display name, and slug. Supports --fields to customize columns and --json for machine-readable output.
webflow forms submissionsLists all submissions for a specific form. Submissions can be output as a formatted table, JSON, or exported directly to CSV with --output.
Required OAuth scope: forms:read