Register an App
Registering an App with Webflow allows you and other users to use that App on Webflow sites and in the Designer. You specify the capabilities of the App, such as whether to make it appear in the Webflow Designer and what access it has to the user’s CMS, if any.
Watch: How to register a Webflow App
Prerequisites
- A Webflow account.
- A Webflow Workspace with Admin permissions.
Admin access required
Only Workspace admins can create Apps, view client secrets, upload bundles, and modify App settings.
Register an App
App installations for external users
New Apps are available only to users in your App’s Workspace. By default, external users can’t install your App until it’s approved and published in the Webflow Marketplace.
You can test your App with external users before submitting for review. See the user testing instructions for details.
Choose a Workspace
Select the Workspace for your App. While you can use any workspace, it’s recommended to create a dedicated development workspace to keep your Apps organized and separate from production environments.
New to Webflow?
Get started with Webflow’s free Developer Workspace designed for testing and developing Apps.
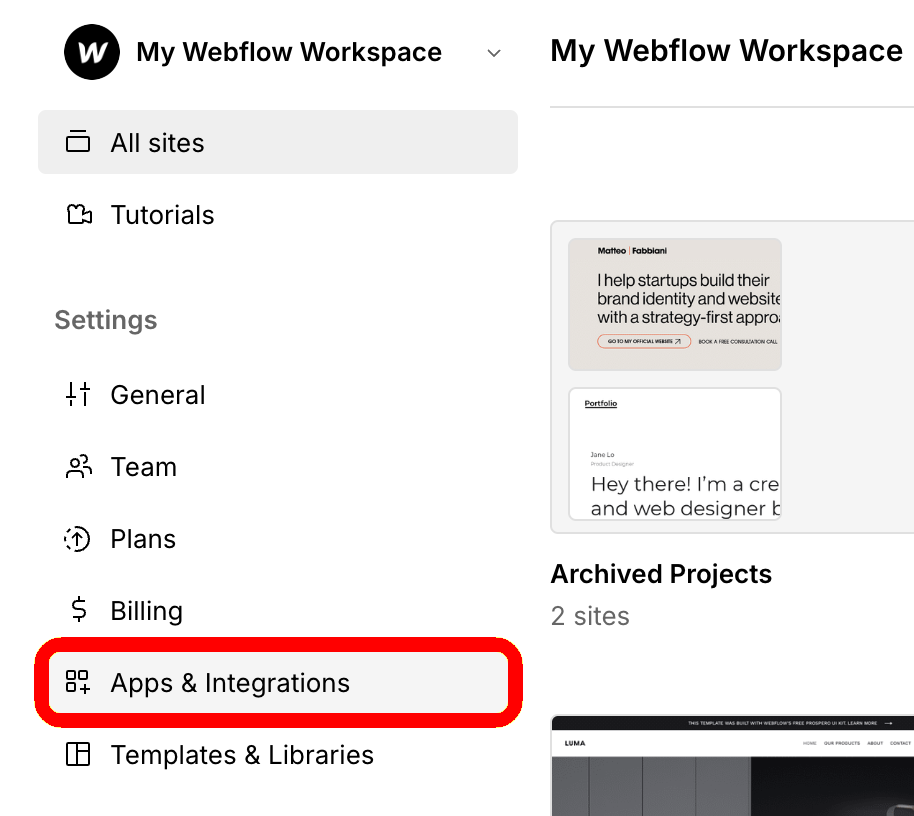
Navigate to Workspace settings
From the Settings menu on the left sidebar, select the Apps & Integrations tab. Go to the App Development section and click Create an App. The Create App window opens.

Add App details
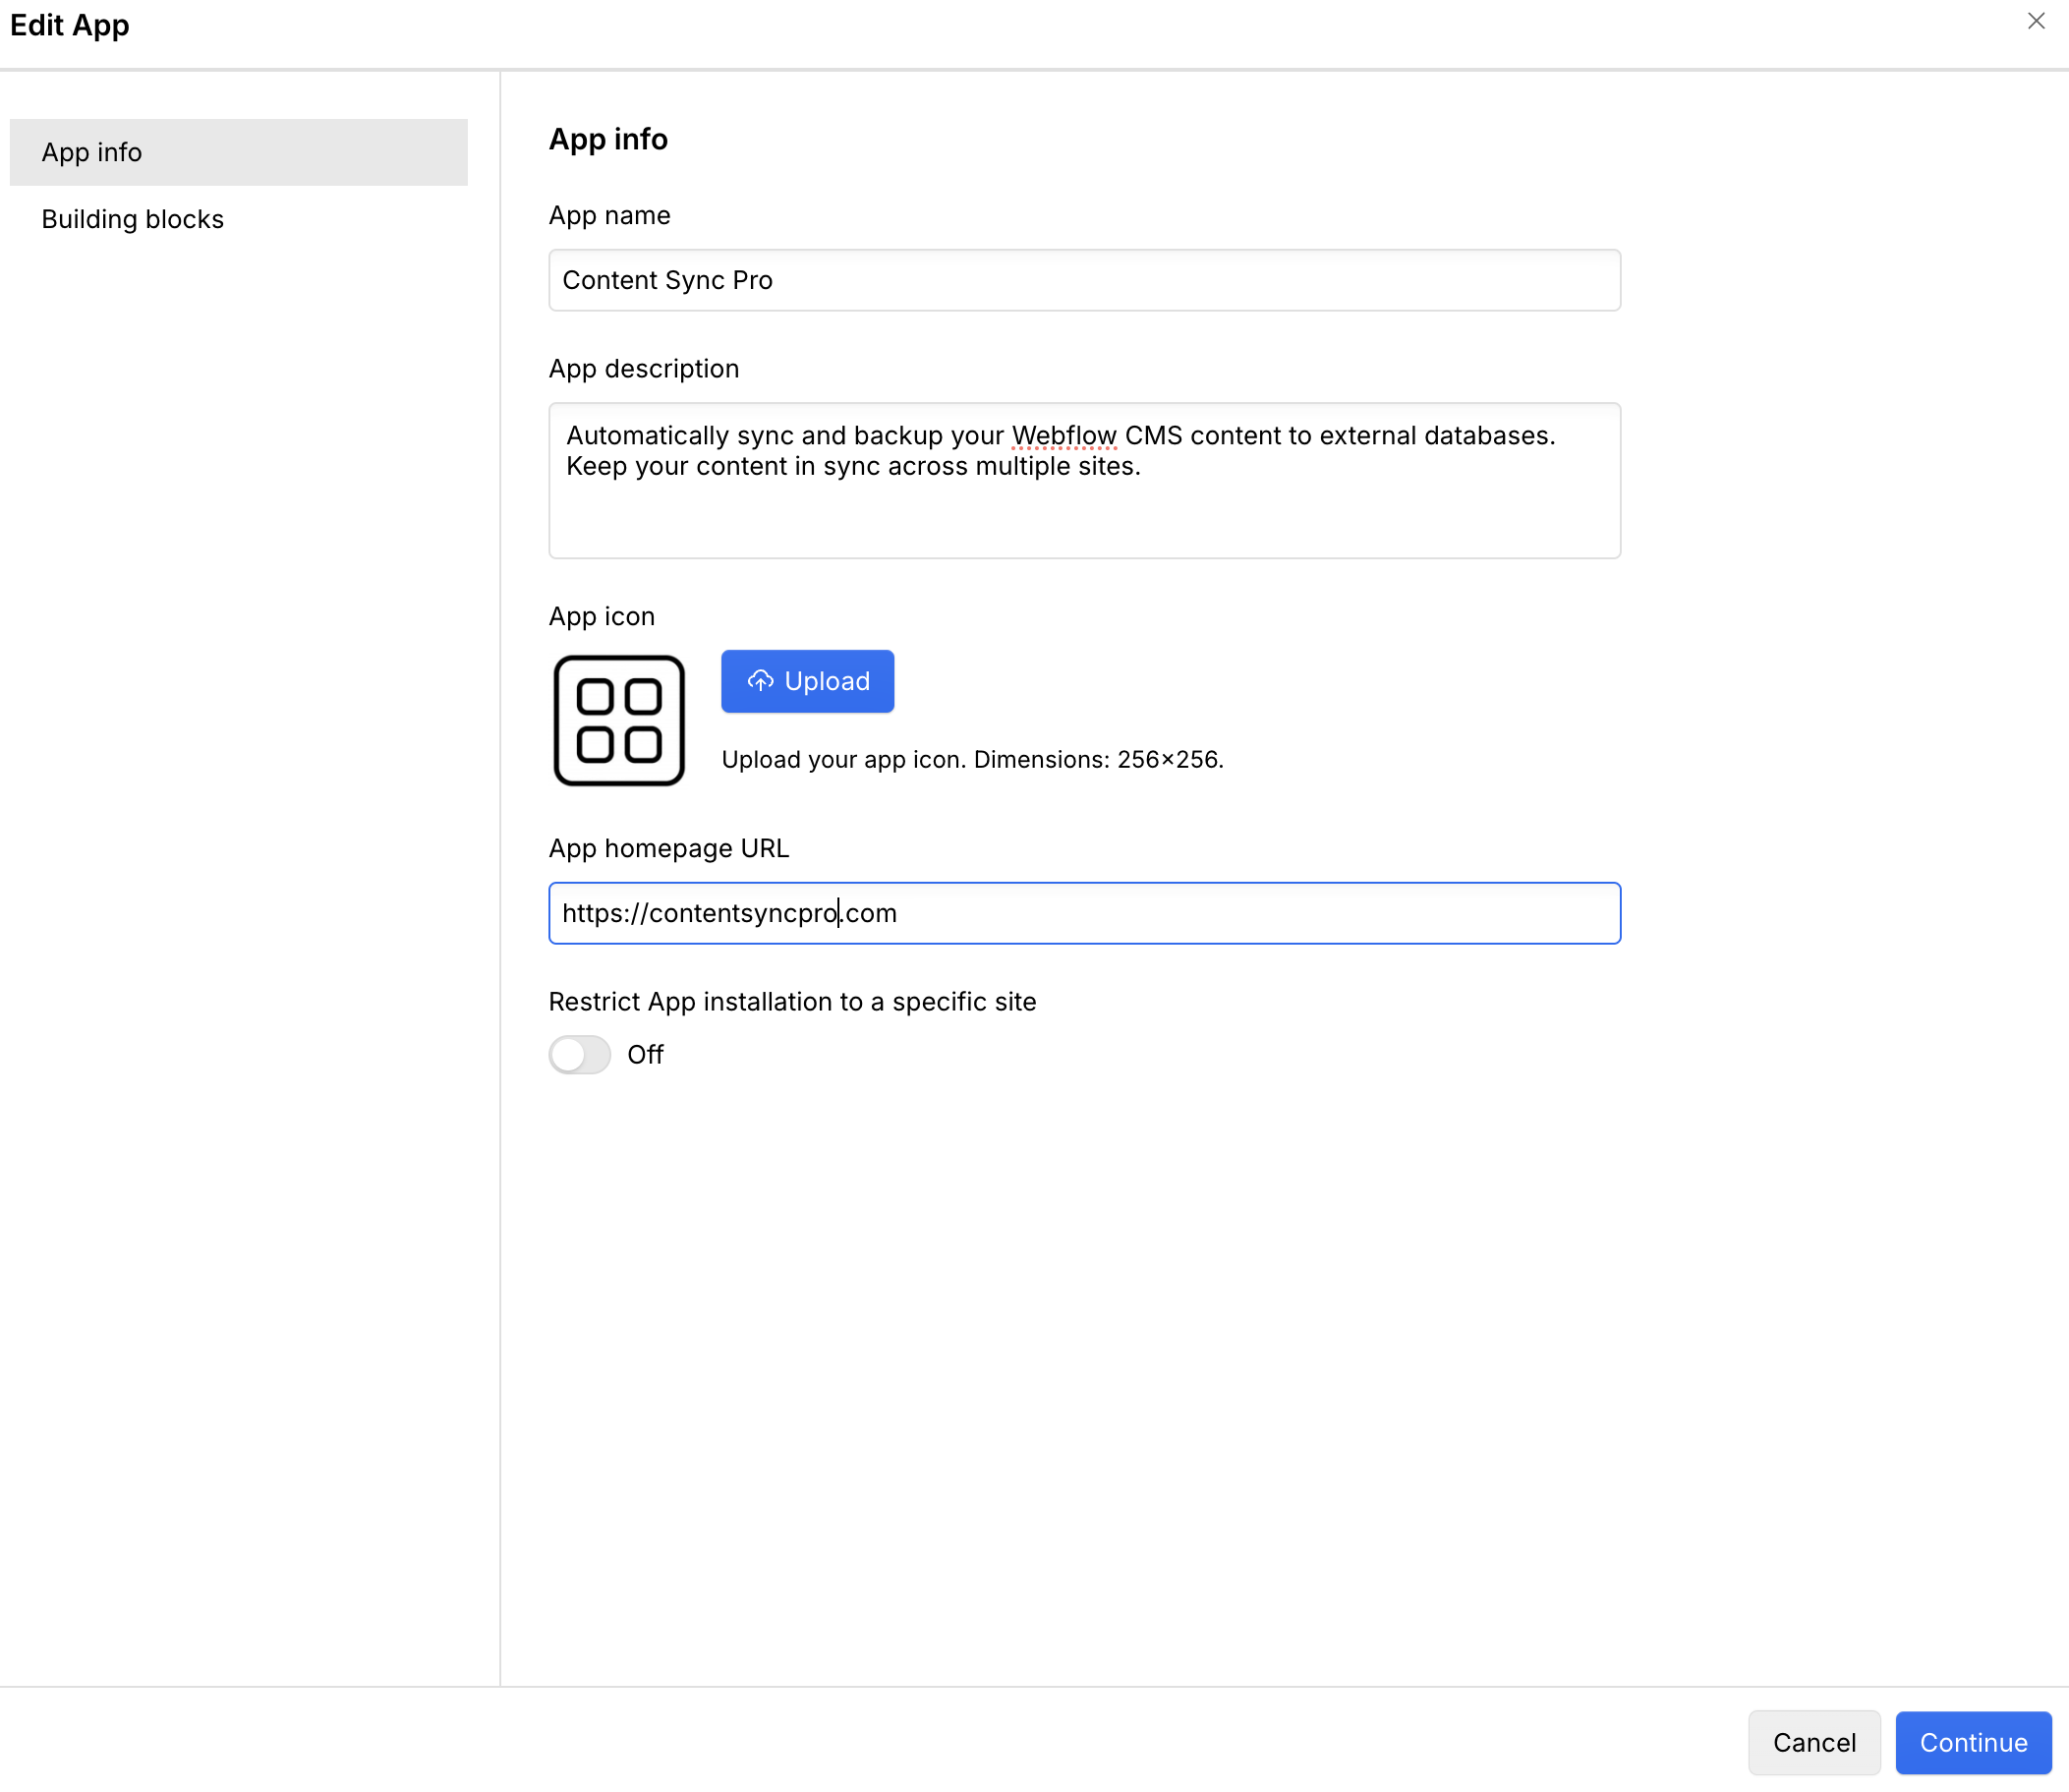
- Name:The name of your App
- Description:A brief summary of your App’s purpose (140 characters max)
- Icon:An icon to represent your App
- Homepage URL:A valid HTTPS link to your App’s website
For more details on how your App will appear in the Marketplace, see the App listing guide.
Installation settings (optional)
You can configure your App’s installation scope by toggling the “Restrict app installation to a specific site” option. When enabled, users can authorize your App for only a single site at a time, providing more granular control over permissions. When disabled (default), users can authorize your App for multiple sites or their entire Workspace at once, which is convenient for Apps that need broader access. Choose the option that best aligns with your App’s security requirements and user experience.
Define App building blocks
Click the “Continue” button to set up the App’s building blocks.
Select the capabilities of the App and the permissions it needs. Apps can have either or both of two capabilities:
- Designer Extension: Designer Extensions can show an overlay directly in the Webflow Designer and manipulate sites and the Designer via the Webflow Designer API.
- Data Client: Data Clients can read and write site data and connect to third-party infrastructure with OAuth via the Webflow Data API.
Apps that use both building blocks are called Hybrid Apps.
Data Client: OAuth configuration
If you selected the Data Client building block, you must configure its OAuth settings:
-
Add redirect URI: Enter a valid HTTPS URL to direct users to after they authorize your App for their site. This is a critical security component of the OAuth flow that ensures authorization codes are sent only to trusted destinations. For more information about OAuth authentication for Webflow Apps, see OAuth. You can add or modify redirect URIs later as needed.
-
Select scopes: Choose the specific API permissions that your App needs. Each scope grants access to different Webflow resources such as sites, collections, and assets. For more information about these scopes, see Scopes.
After configuring the App’s capabilities and OAuth settings, click “Create app” to finalize the registration process.
Review the App
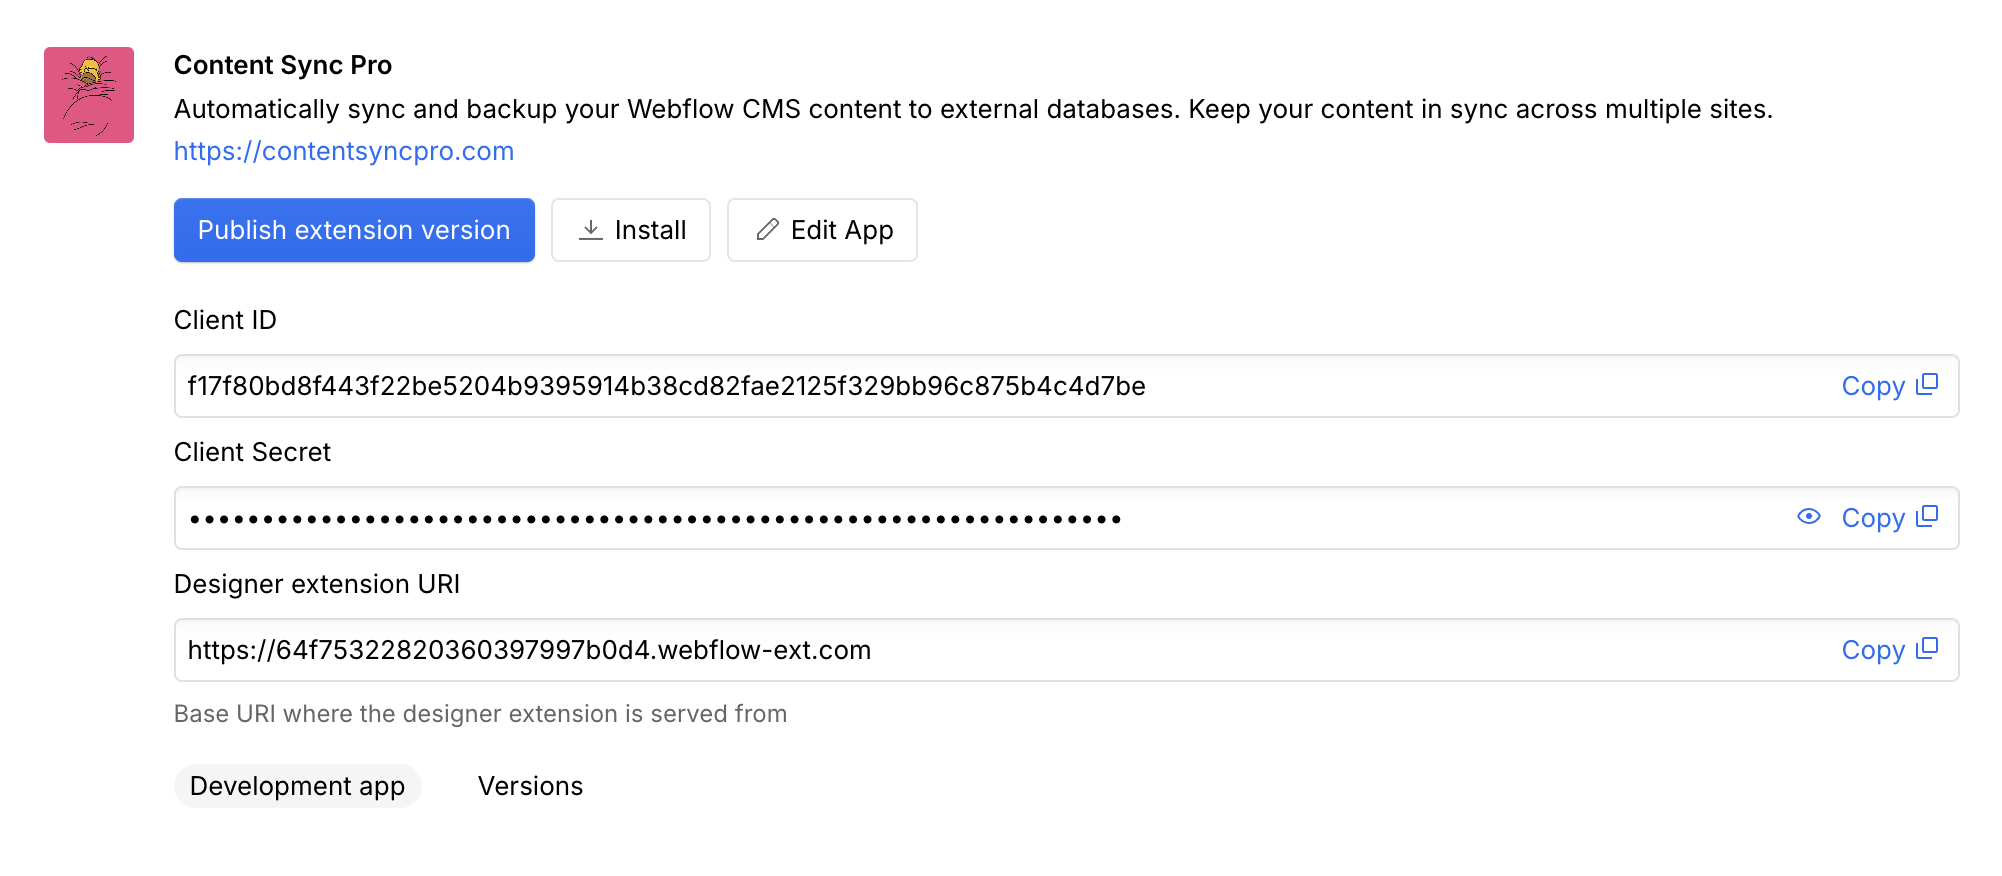
Congratulations! You’ve successfully registered your App in Webflow. On successful registration, your App is listed in the Apps & Integrations tab, in the App Development section. You’ll see key details including the Client ID and Client Secret. From here, you can also update the App’s details, capabilities, and installation settings.
Designer Extension: App information
If you’ve selected the Designer Extension capability, you’ll see additional information specific to Designer Extensions:
-
Publish Extension Version: Use this button to upload a new version of a Designer Extension. For detailed publishing instructions, see our How to bundle and upload your Designer Extension to Webflow.
-
Designer Extension URI: The URI where your extension will be served within the Webflow Designer iframe. This URI is important when configuring CORS settings for your extension.
-
Versions: View all previously published versions of your Designer Extension. This helps you track your extension’s version history and roll back to an older version if needed.
App Security
- Never commit your Client Secret to version control
- Rotate your Client Secret if it’s ever exposed
- Store secrets in environment variables or a secure secret management system
- Implement proper CORS policies for Designer Extensions
Updating the App
To update a Designer Extension, upload a new version as described in How to bundle and upload your Designer Extension to Webflow.
You can update a Data Client App by submitting the update to the form at https://developers.webflow.com/submit. However, you cannot add new scopes; the scopes section of the App building blocks is locked after the App is published.
If the App requires new scopes, you must go through the approval process again. Follow these general steps:
-
Register a copy of the App so you can test it with the new scopes without interfering with the production version.
-
When you are sure that the new version works, go to the App submission form as described in Submitting Your App to the Webflow Marketplace, set the submission type to App Update, and include the new scopes in the form.
-
When Webflow approves the update, the scopes in the App settings are updated to include the new scopes.
-
Update the Webflow OAuth URL to include the new scopes in the
scopequery parameter. As a result, the App prompts users to re-authorize the App to provide access to their sites and Workspaces with the updated scopes.
Do not update the Webflow OAuth URL before the App update is approved and you see the scopes update in the App settings. If you do, users see a scopes mismatch error that prevents them from authorizing the App.
If you add scopes, consider adding error handling to identify prior installations of the App that do not have the new scopes. In this case, you may need to prompt users to re-install the App to authorize it for the new scopes.
Troubleshooting
Why am I getting an Invalid Redirect URI error?
When you receive an “Invalid Redirect URI” error during OAuth authorization, it typically means there’s a mismatch between the URI you’re using and what you registered. To resolve this:
- Ensure the redirect URI matches exactly what you registered
- Check for trailing slashes -
https://example.com/callbackandhttps://example.com/callback/are treated as different URIs - If using localhost for development, make sure the port number matches exactly
- For Ngrok or other tunneling services, remember that the URL changes each time you restart the tunnel - update your registered URI accordingly
Why can't I see the app development section in my workspace settings?
Verify that:
- You’re in the correct Workspace
- You have Admin permissions on the Workspace (only Workspace admins can view and manage apps)
- Your account has been verified via email and has 2-factor authentication enabled
- You’ve navigated to Workspace Settings > App Development (not Site Settings)
- Your Webflow plan supports app development (available on Team and Enterprise plans)
If you’ve confirmed all these requirements and still can’t see the App Development section, try clearing your browser cache or using a different browser, then contact Webflow Support if the issue persists.
Why can't external users install my app?
New apps are only available to users in your app’s workspace. External users can’t install your app until it’s approved and published in the Webflow Marketplace.
You can invite external test users to your app before submitting for review. See the user testing instructions for details.
Next steps
To see your new App in action, follow these Quickstart guides, which will get your App up and running in Webflow.
Access and manipulate Webflow site data including CMS collections, items, assets, and form submissions through secure API endpoints.
Create extensions that automate design tasks, manipulate elements, and enhance the Webflow Designer experience.
Use both the Data Client and Designer Extension in tandem.