Site API Token
Create a personal access token to use in place of a password with the API.
Your site API Token is considered sensitive personal information, and should be treated like a password.
If you think your access token has been compromised, navigate to your Site's integration details and click the "Generate new API token" button to generate a new token.
To access Webflow's APIs, you can use a Site API Token (sometimes called an “API key” or “access token”) as an alternative to a password for authentication. If you are developing a private integration to Webflow and you are only interacting with your own account, you may want to create a Site API Token as a way to get started quickly. However, if you're building an integration that will be used by others, you should use a Webflow App to authenticate via OAuth 2.0.
Site API Tokens are generated for each Webflow site. If you need visibility into multiple sites, you'll need to authenticate via a Webflow App.
In this guide, we'll walk through the following steps to get a Site API Token, and make a call to the Sites API.
- Create a site using the Grit template
- Generate a Site API Token
- Get your
Site IDusing the Sites API - View usage of your API Token
- Regenerate a new Site API Token to replace your existing one
1. Create a New Site
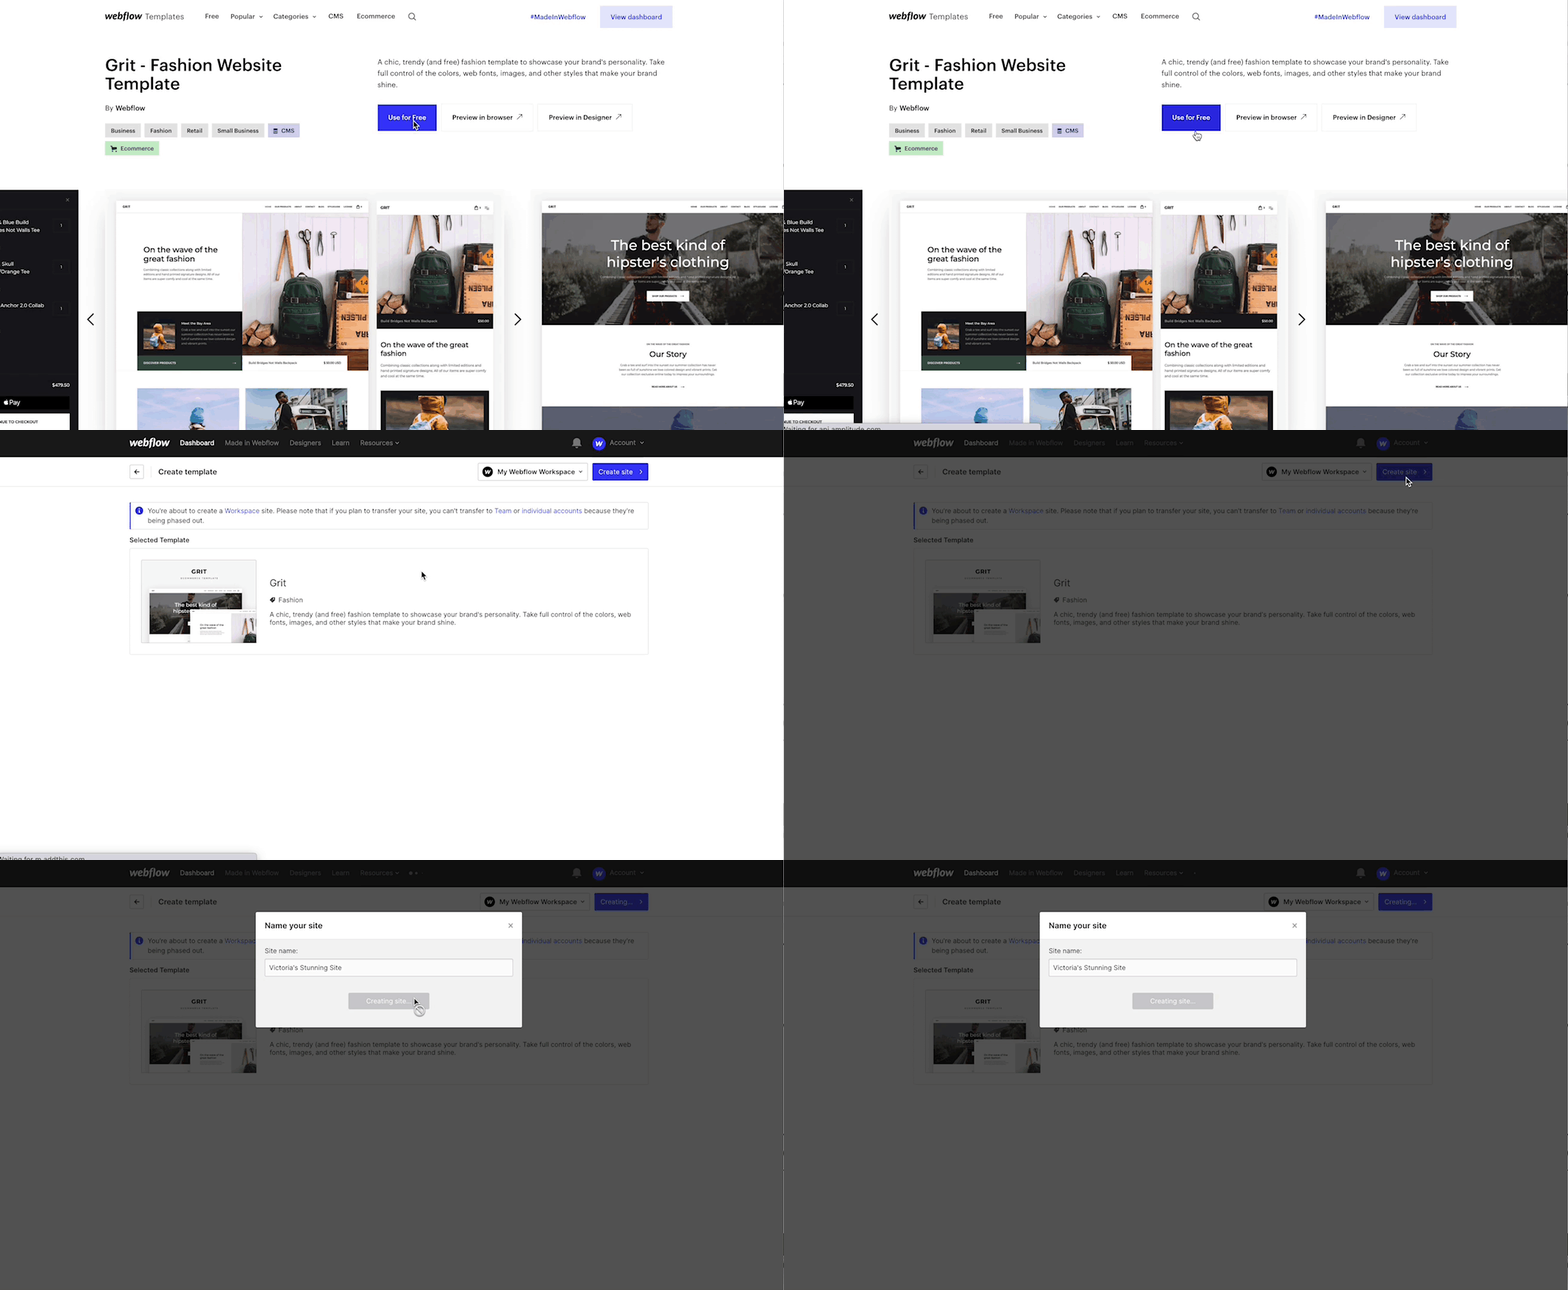
In this guide, we'll be using the Grit - Fashion Website Template, which comes with a built-in CMS collection. You can follow along by using your own site if you'd like.
- Navigate to the Grit template
- Click the "Use for Free" button to create a new site.
- In the dashboard, choose the workspace where you'd like to add the site and click "Create Site" and give your new site a name.

2. Generate an API Token
Let's generate a Site API Token for our new site.
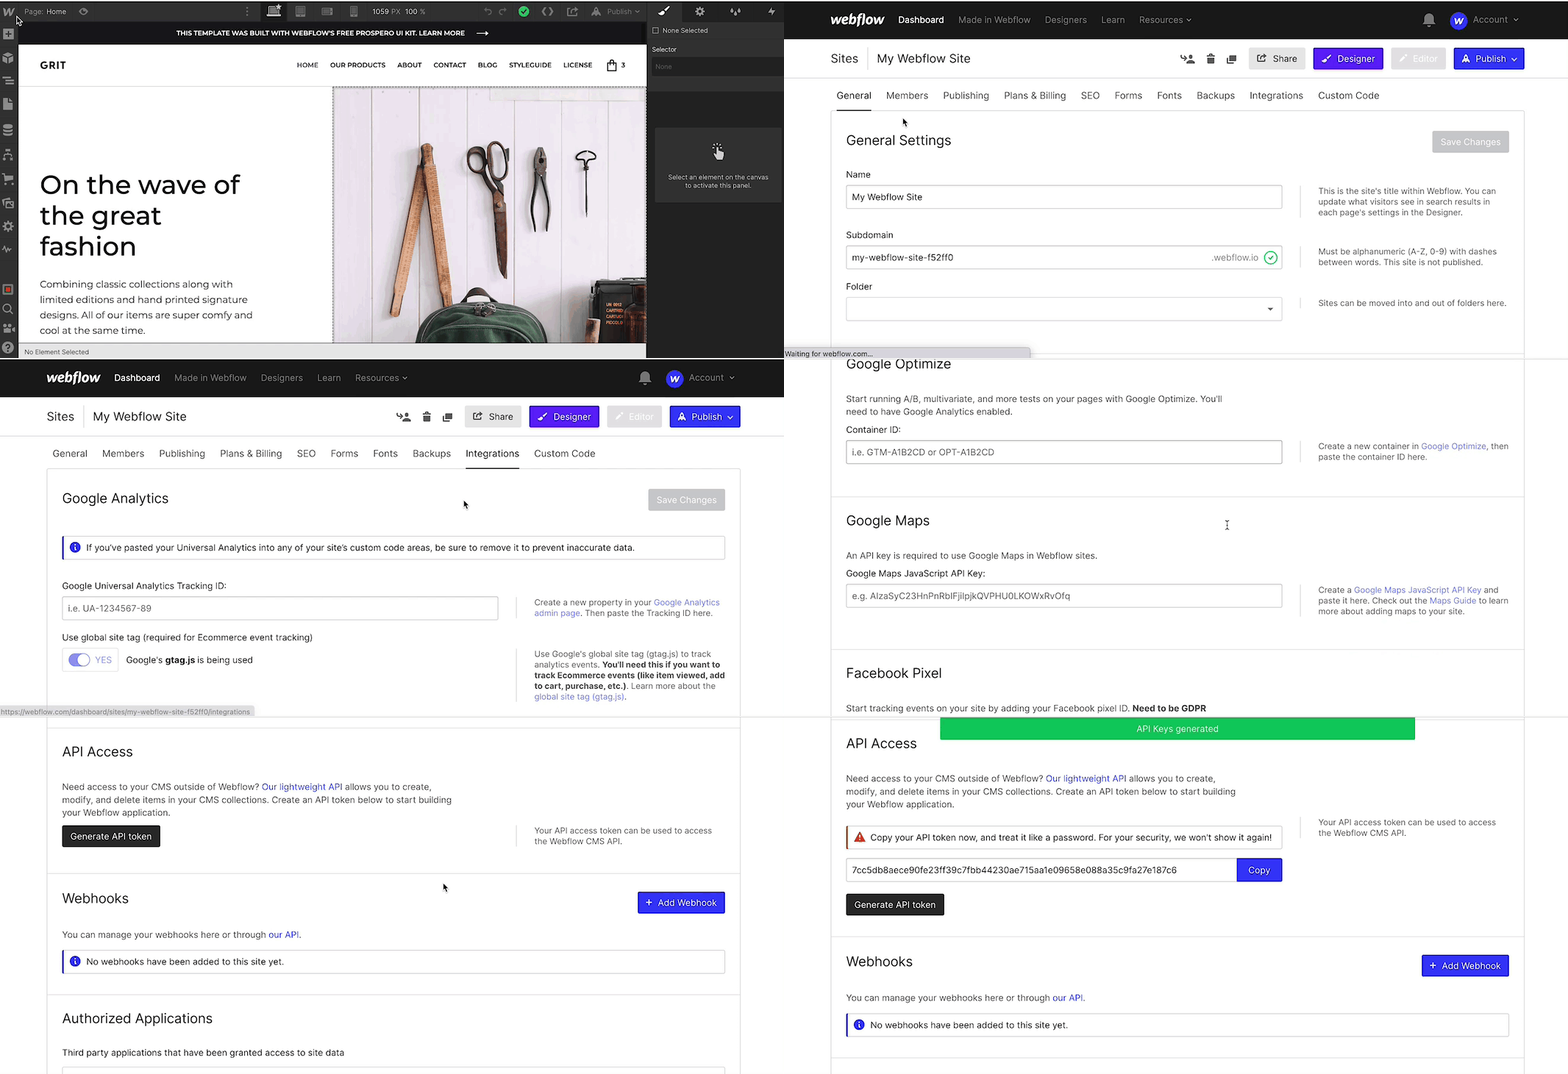
- Navigate to your project/site settings, by clicking in the top left of the designer and clicking the "Project Settings" button.
- In the settings navigation menu, click "Integrations"
- Scroll down to the section titles "API Access"
- Click the "Generate API Token" button
- Copy the token to your clipboard

Securely store your API Token
Webflow will only show your API Token once, so be sure to copy it and store in a secure location.
3. Get Site ID from the API
Besides your API Token, one of the most important pieces of information you'll need when working with the API is your site ID. This is a unique identifier that lets Webflow know which site you'd like to access.
To get your site ID, you'll first need to make an authenticated GET request to the List Sites endpoint of the Sites API using your API Token.
You can make the request directly from the interactive API Reference, or make a call using the example code below, and replace the YOUR_API_TOKEN variable with your own API Token.
curl --request GET \
     --url 'https://api.webflow.com/sites' \
     --header 'accept: application/json' \
     --header 'authorization: Bearer YOUR_API_TOKEN'
const YOUR_API_TOKEN = 'abcdefghijklmnopqrstuvwxyz1234567890'

const options = {
  method: 'GET',
  headers: {
    accept: 'application/json',
    authorization:`'Bearer ${YOUR_API_TOKEN}`
  }
};

fetch('https://api.webflow.com/sites', options)
  .then(response => response.json())
  .then(response => console.log(response))
  .catch(err => console.error(err));
import requests

url = "https://api.webflow.com/sites"
YOUR_API_TOKEN = 'abcdefghijklmnopqrstuvwxyz1234567890'

headers = {
    "accept": "application/json",
    "authorization": f'Bearer {YOUR_API_TOKEN}'
}

response = requests.get(url, headers=headers)

print(response.text)
4. View usage of your API Token and authorized Apps
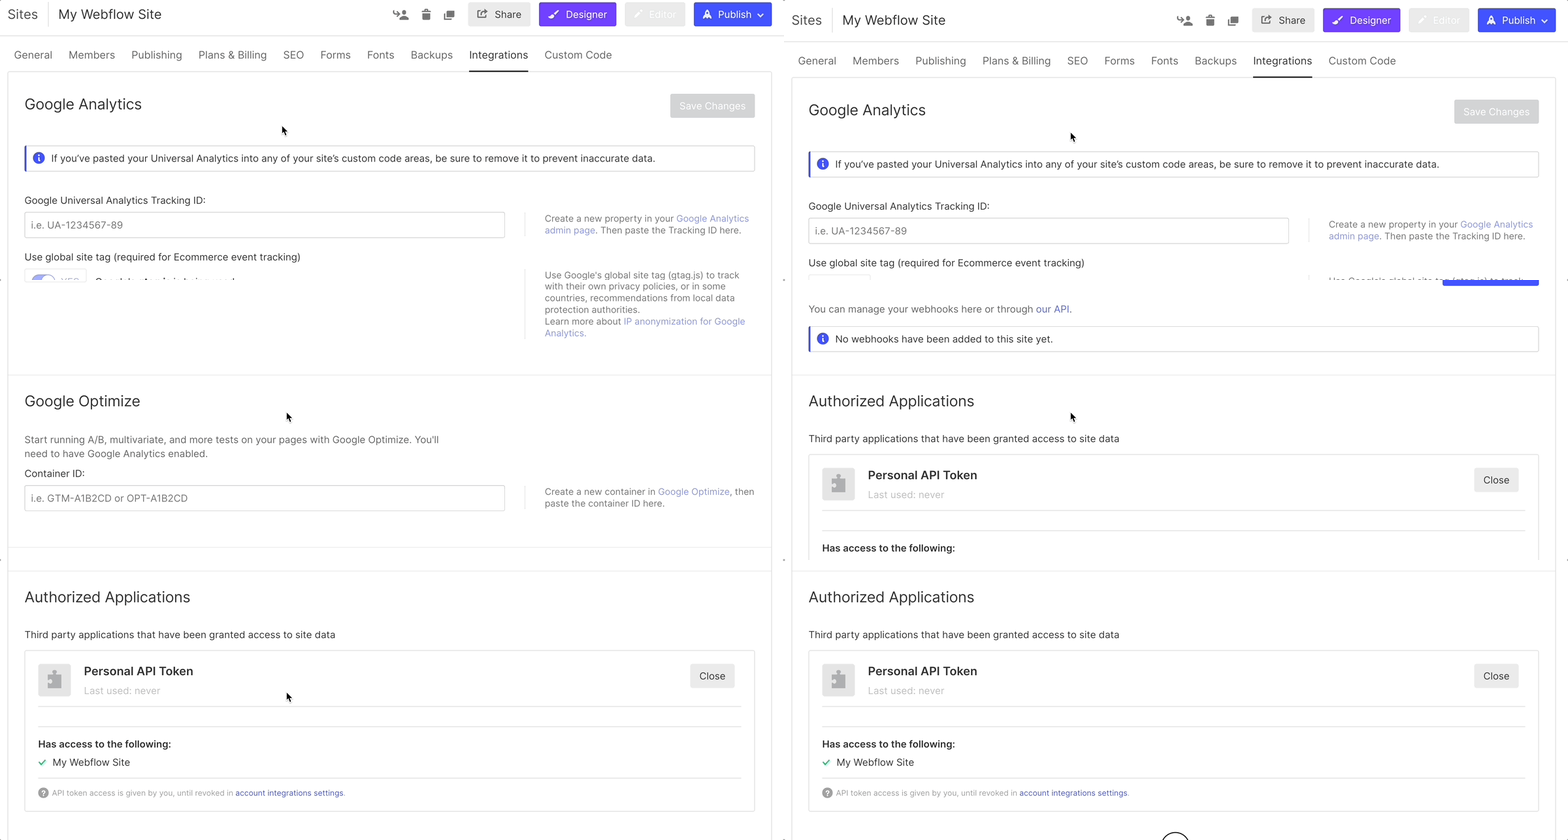
To view which integrations and application have access to your Site, navigate to the "Authorized Applications" section of the Integrations details page in your site settings.
Authorizing multiple services
Currently, Webflow only generates a single API Token per-site.
If you plan on creating multiple integrations and would like to have more fine-grained visibility into which services are accessing your site, consider authenticating each integration with separate access tokens created via Apps.
For more information, review our getting started with Apps guide.

5. Regenerate a new API Token
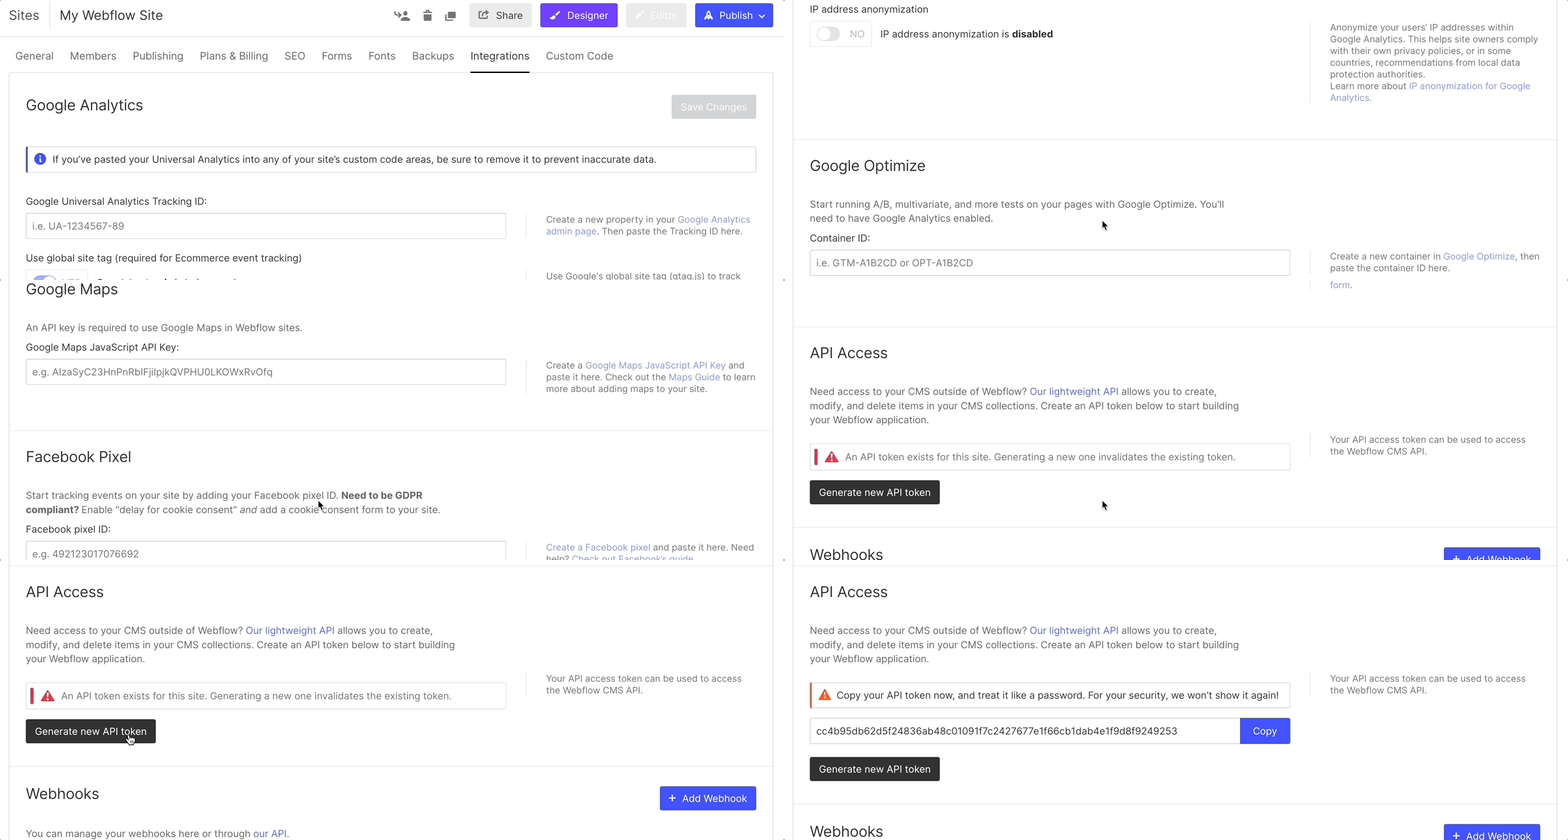
If you think your API Key has been compromised, or would like to break all integrations on your site, you can generate a new API Token. Generating a new API Token will invalidate the existing API Token, which will break any integrations using the existing API Token.
- Navigate to your project/site settings, by clicking in the top left of the designer and clicking the "Project Settings" button.
- In the settings navigation menu, click "Integrations"
- Scroll down to the section titles "API Access"
- Click the "Generate new API Token" button - this will invalidate your existing API token, and create a new one to use in your integrations.
- Copy the token to your clipboard

Updated almost 2 years ago
Now that you have a credentials, get started making requests to the API
