Working with the CMS
What you’ll build
This guide will walk you through using a Data Client app to interact with Webflow’s CMS APIs. A Data Client enables you to make calls to Webflow’s backend APIs, and through this guide, you’ll learn how use the API to:
- Create collections and fields
- Create, read, update, and delete items
- Publish and unpublish collection items
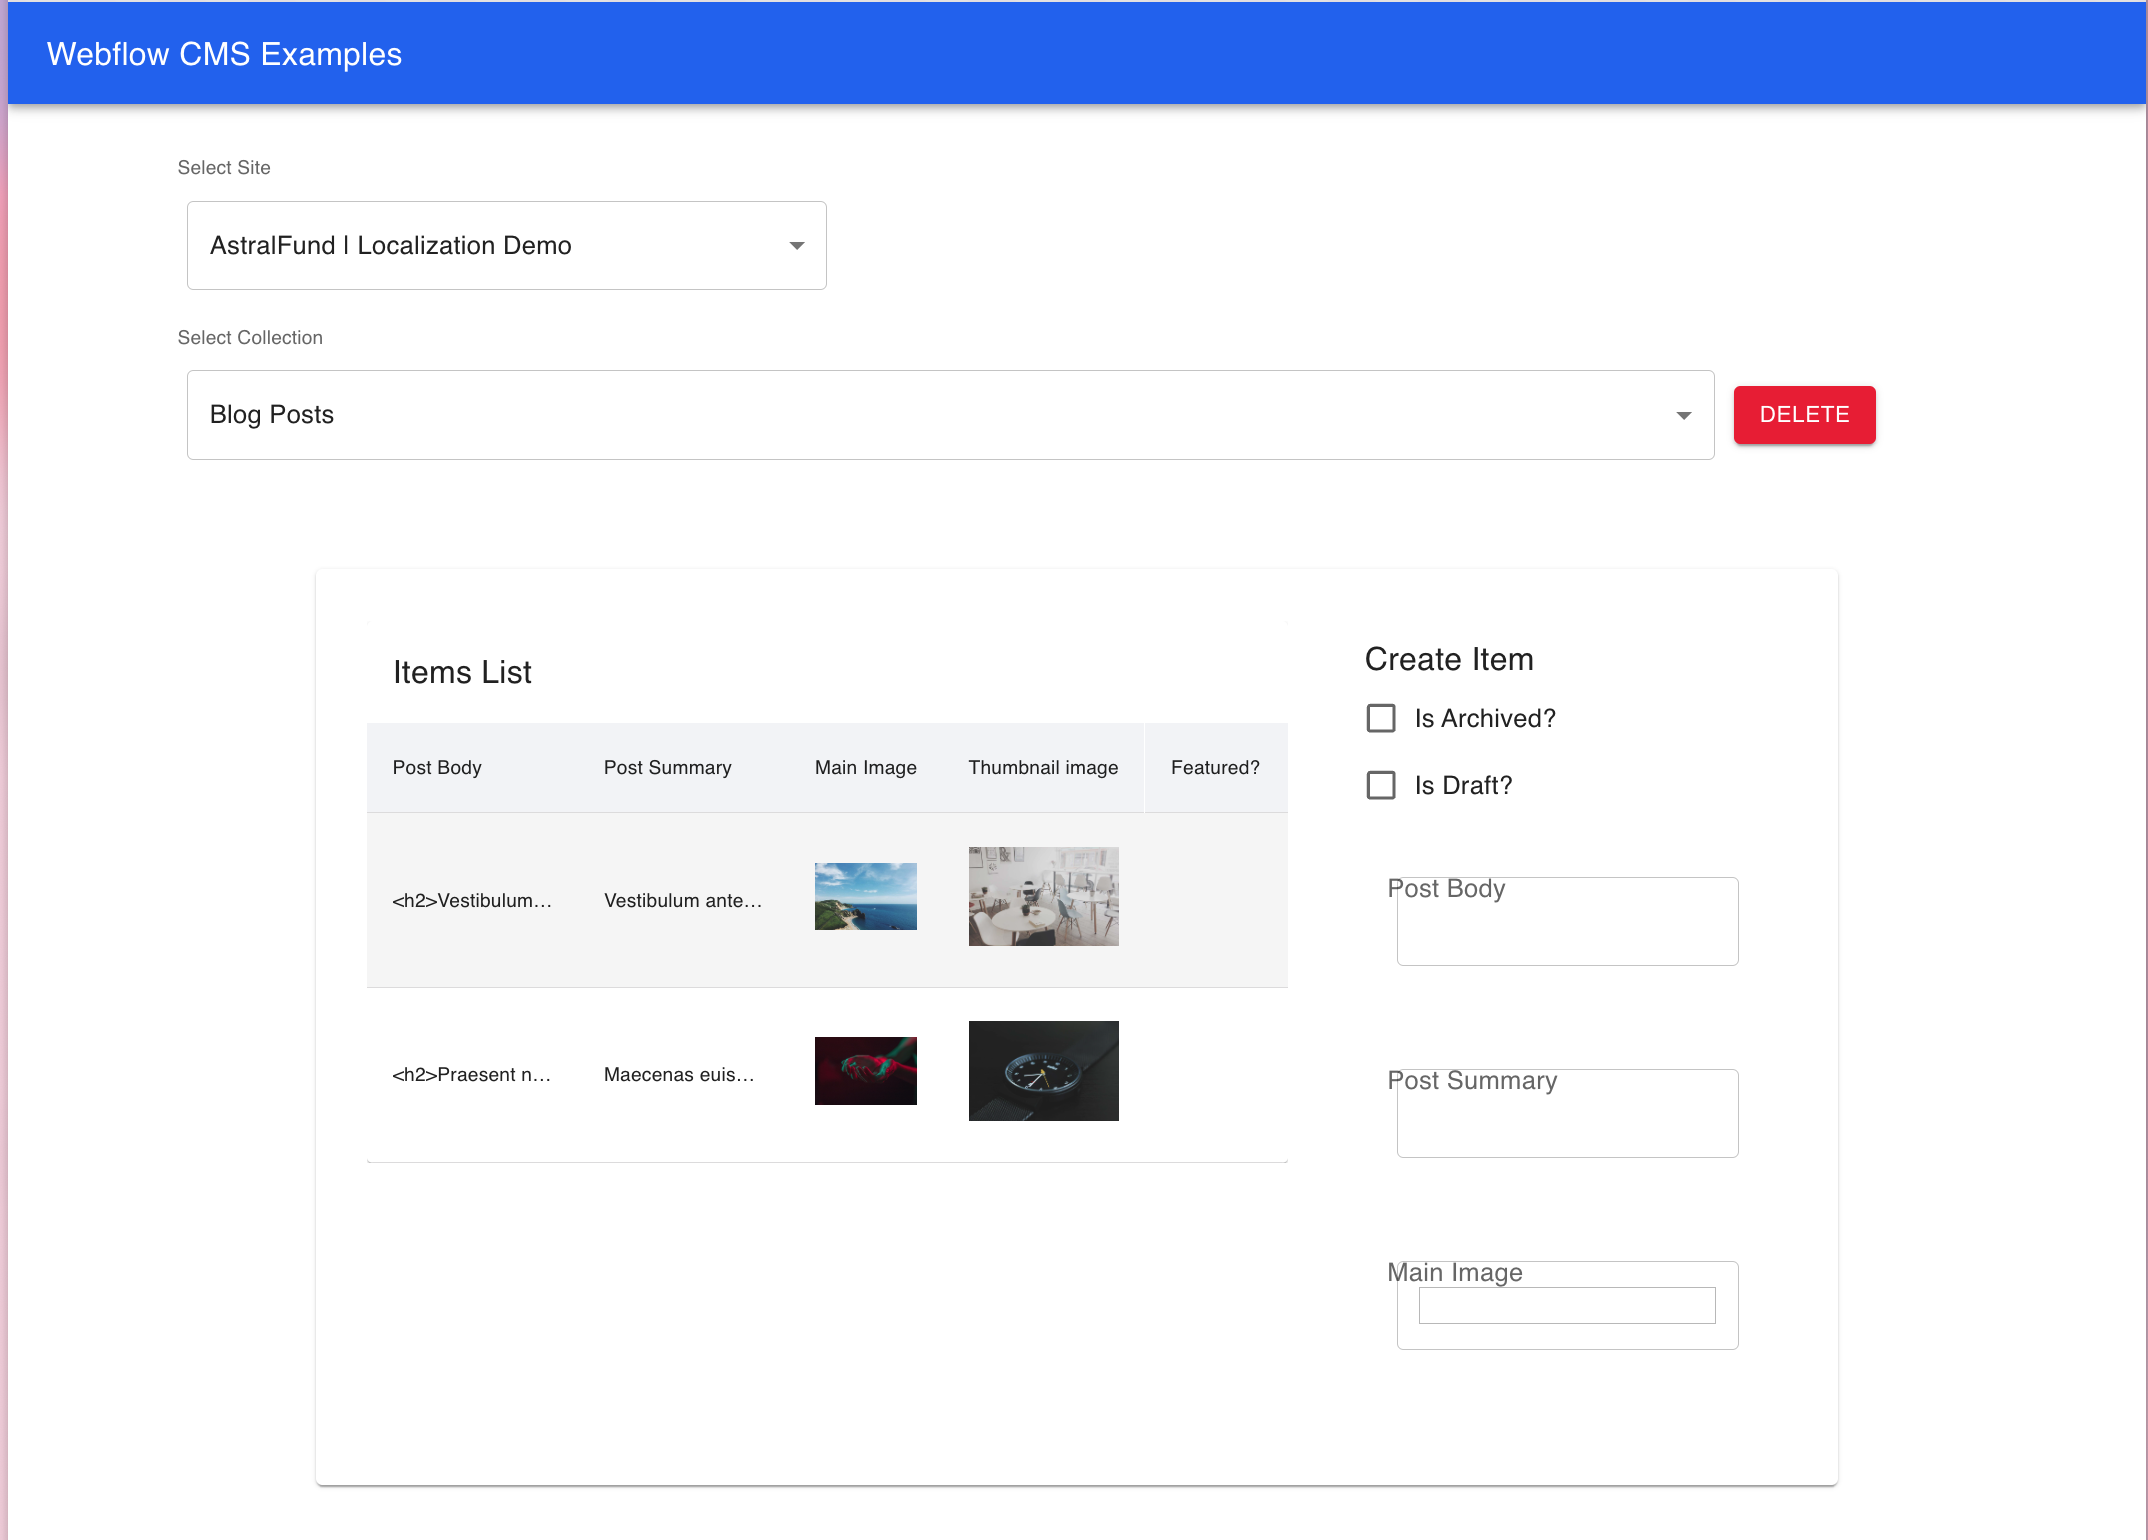
To make visualizing your Collections and Items easier, you’ll also build a simple frontend using React.
Prerequisites
- A Webflow site. If you’re not sure where to start, clone the Astral Fund site with defined CMS collections.
- A registered Webflow App or a Site Token with the following scopes:
sites:read,cms:read, andcms:write - An Ngrok account and an authentication token
- Node.js and an IDE of your choice
- Additionally, you should have basic knowledge of Node.js and Express
1. Quickstart
Reference the starter code for to follow along with the guide. This code already takes care of the OAuth Handshake and initializes the Webflow Client as shown in the Authentication guide. You’ll be able to start this App, authenticate the App, and start making requests to the Webflow CMS API.
-
Clone the starter code. Run the following commands in your IDE to clone the example repository and install dependencies:
Shell -
Add Environment Variables Add your credentials to the
.envfile. If you’re using an App, input your App’sCLIENT_IDandCLIENT_SECRET. If using a Site Token, input the token asSITE_TOKEN. -
Add Ngrok Auth Token Ngrok is required because Webflow Apps must run on
https://URLs, and Ngrok provides a secure tunnel for your local server.Get your Ngrok auth token from the Ngrok dashboard. Then, add your token to your environment variables in
.env:Shell -
Start the Server Start the server by running
npm startin your terminal.This will output list of URLs in the terminal to access your server and your frontend.

-
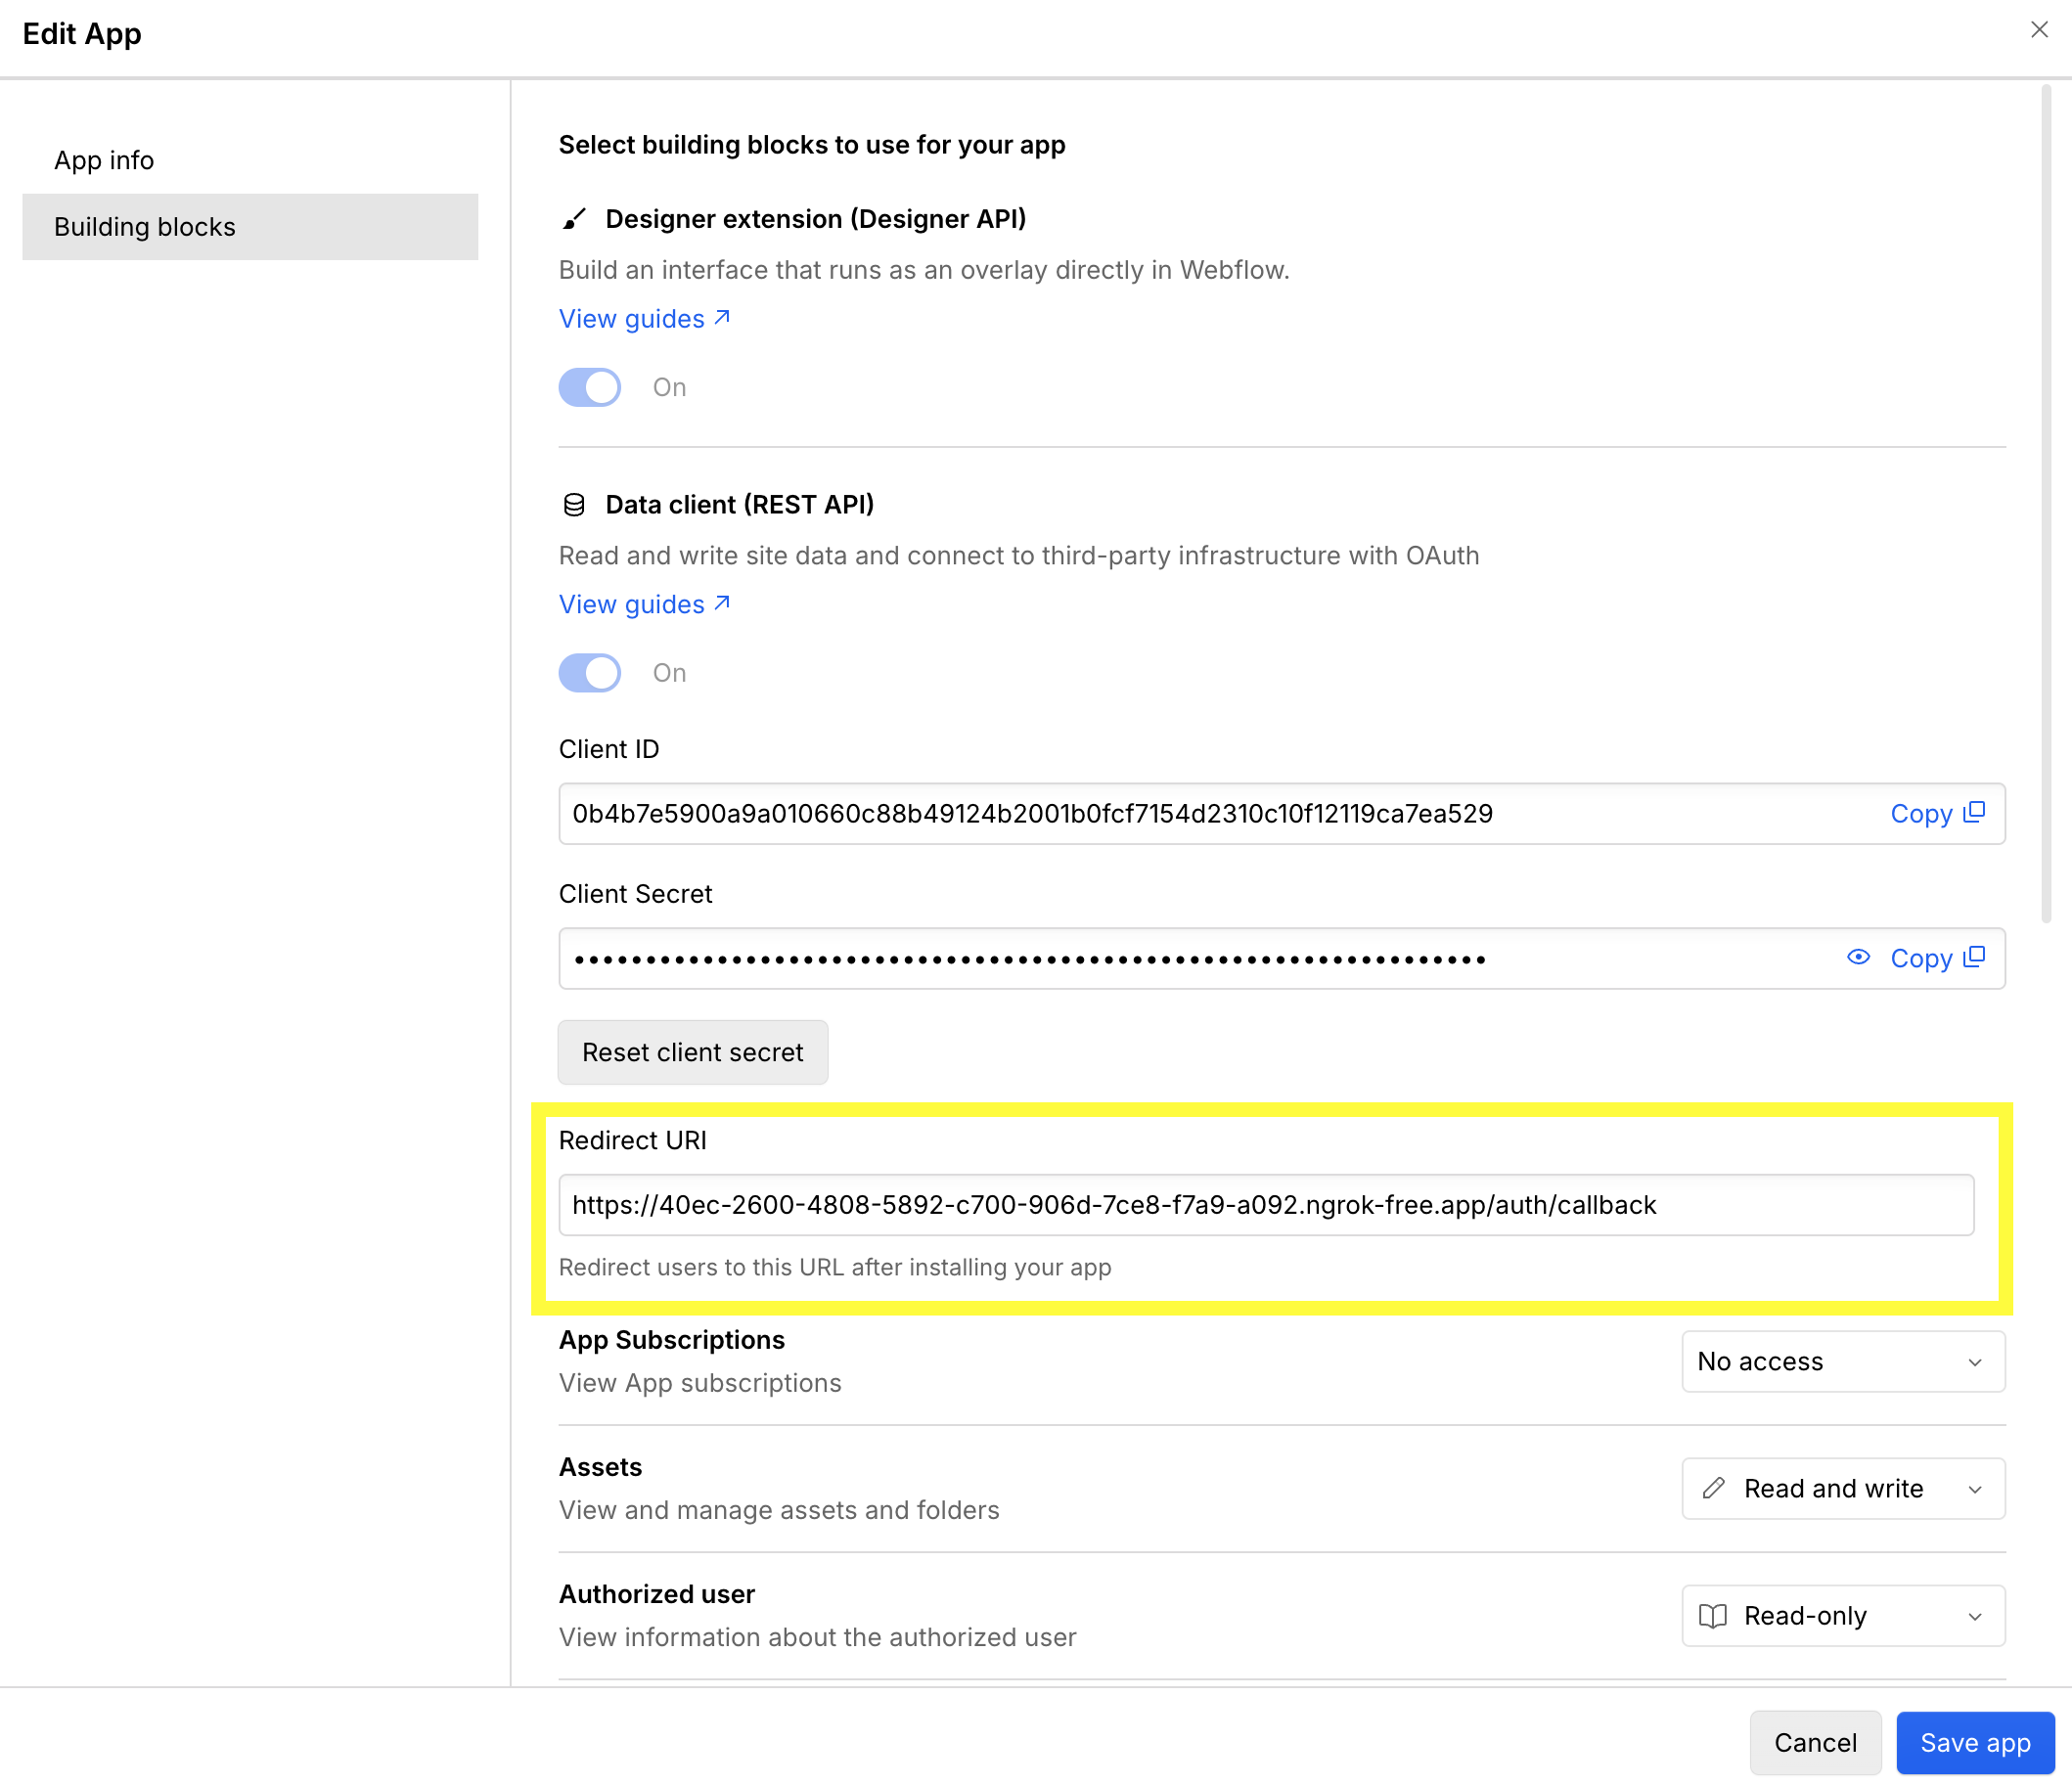
Update your Redirect URI in Webflow Copy the redirect URI from your terminal output. Navigate to your App in the Webflow Dashboard Settings and update the Redirect URI to the URL of your server.
-
Authenticate the App Open the URL of your server in the browser. You’ll be prompted to authenticate the App with Webflow. You have the option to authenticate a single site or all sites on a single workspace.
-
Start making requests Once authenticated, you’ll be redirected to the App frontend where you can select an authorized site and start making requests to the Webflow CMS API.
2. Shaping requests
The backend is built using Express and Node.js, and designed to handle requests from the frontend.
When a request the server receives a request, it’s first passed to the middleware function defined in webflowClientMiddleware.js. This function initializes and authenticates the Webflow Client and attaches it to the request object, so you don’t have to re-authenticate in each request. This client is then used in the controllers to make requests to the Webflow CMS API.
In the controller files, requests are prefixed with req. followed by the standard Webflow SDK methods. For example, to interact with collections you would use req.webflow.collections.items.listItems().
3. Creating collections and fields
Now that you’ve handled setting up authorized requests, take a look at how the app makes requests to interact with collections and fields. All of the logic for interacting with the Webflow CMS API is located in the Controllers folder.
collectionsController.js has defined five methods for interacting with collections. Review each method in detail:
4. Creating collection items
With our collections set up, we can start creating items within them. In itemsController.js, we’ve defined methods for creating, reading, updating, and deleting items.
5. Publishing items
Lastly, we’ll take a look at how we can publish and unpublish items using the Webflow CMS API.
Publishing items
- A full site publish: When you publish your entire site, any collection items with
isDraftset tofalsewill be published. You can publish the site through Webflow or using the publish site endpoint. - Single-item publish: You can publish an item immediately, without publishing the full site, using the publish item endpoint. Even if an item is set to
isDraft: true, it will be published when using this endpoint. - Live Item Creation: The CMS API offers two options for item creation, creating a staged item or a live item. Creating a staged item will set the
isDraftproperty totrue, while creating a live item will set it tofalseand immediately publish the item upon creation. This endpoint is useful for immediately publishing items from an external CMS or other data sources.
Unpublishing items
Webflow also allows you to unpublish collection items by using the unpublish item endpoint. This will remove the item from the live site, and set the isDraft property to true.
Updated publishing behavior
Starting December 2024, Webflow is introducing an improved publishing workflow for collection items. When a live item’s isDraft property is set to true, it will continue to remain published on the live site even after a full site publish. This allows users to make updates to the collection item in a draft state without changing what is visible on the live site.
To remove an item from the live site, you must now explicitly call the unpublish endpoint. This change gives developers more precise control over the publishing state of individual items.
Publishing 'Status' in Webflow
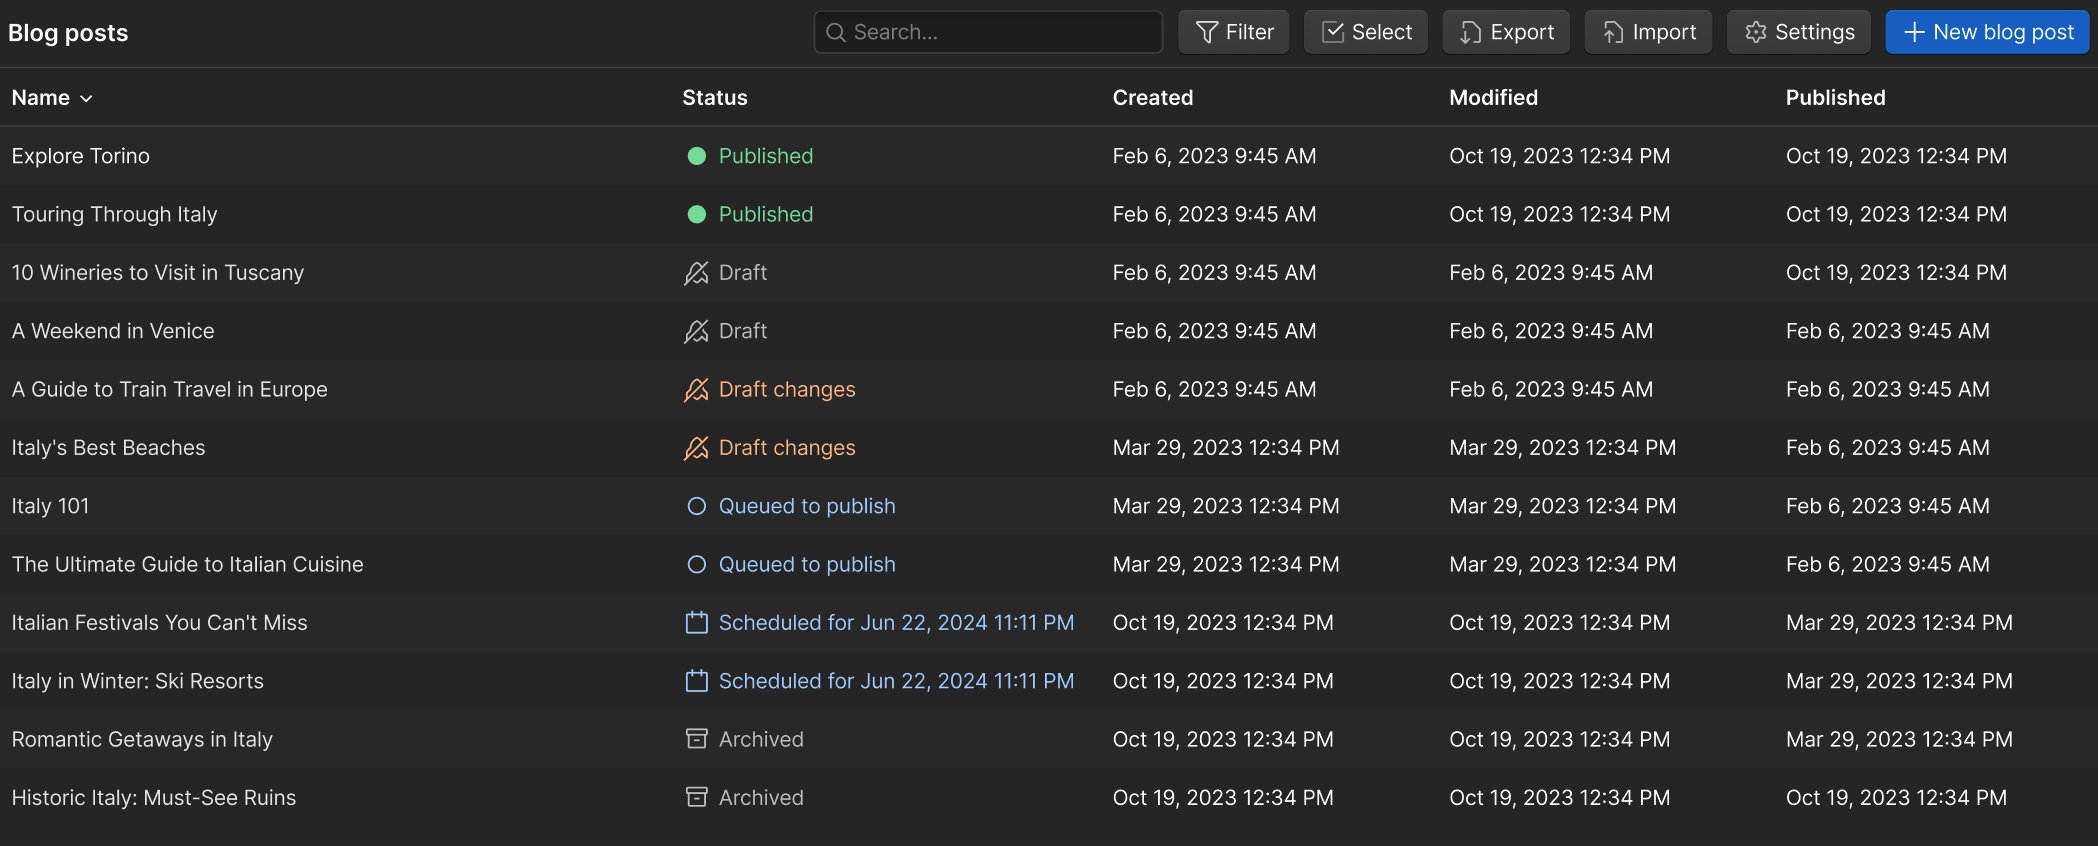
The Webflow UI shows a status for each collection item. This status is derived from the isDraft and lastPublished properties of the item. See the table below for more details of which status is shown based on these properties.
Conclusion
Congratulations! You’ve successfully navigated through the process of setting up and using the Webflow API with a fully functional backend and frontend application. Here’s a quick recap of what you’ve accomplished:
- Webflow Client and Backend Configuration: You configured the WebflowClient, set up middleware, and created routes and controllers for managing collections and items.
- Working with Collections: You learned how to create, retrieve, and delete collections, including handling different field types.
- Working with Items: You explored how to create, retrieve, update, and delete items within a collection, managing various item states and field types.
- Publishing and Unpublishing: You learned how to publish and unpublish items, and how the
isDraftproperty affects the publishing state of items.
Next Steps
- Extend Functionality: Enhance your application by adding new endpoints - try updating an item - or incorporating additional data processing logic.
- Explore Localization: Managing content localization is a crucial part of working with the Webflow CMS. Check out our localization guide for more details on how to localize your content effectively.