Bring your own app
Webflow Cloud deploys your app using the Edge runtime, enabling fast, globally distributed hosting. Before deploying to Webflow Cloud, your app may require some configuration to ensure compatibility with the Edge environment.
These instructions guide you through deploying an existing Next.js or Astro app to Webflow Cloud.
Get Started with Webflow Cloud
To familiarize yourself with Webflow Cloud, try the walkthrough in Get started with Webflow Cloud first.
Time Estimate: 30 minutes
Prerequisites
- A Webflow account
- A GitHub account
- One of the following applications in a GitHub repository:
- An Astro app (version 5 or higher)
- A Next.js app (version 15 or higher)
- Node.js 22.0.0 or higher and
npminstalled- Note: Currently, Webflow Cloud supports only the
npmpackage manager
- Note: Currently, Webflow Cloud supports only the
Fast path: one-click deploy
To deploy an application from a GitHub repository quickly, click this button and follow the steps to deploy it to Webflow Cloud:

The process prompts you to select a GitHub repository, install the GitHub app that gives Webflow access to the repository, and specify how to deploy it to Webflow Cloud.
To generate a one-click deploy button, see Deploy with one click.
Deploying an application from GitHub
Follow these steps to deploy an application from a GitHub repository:
-
Log in to Webflow and go to your dashboard.
-
From your Workspace, click New Project > App and authorize Webflow to access your GitHub account.
-
Expand Import a GitHub repository, specify the GitHub organization and repository, and click the Import button next to the repository, as in this picture:
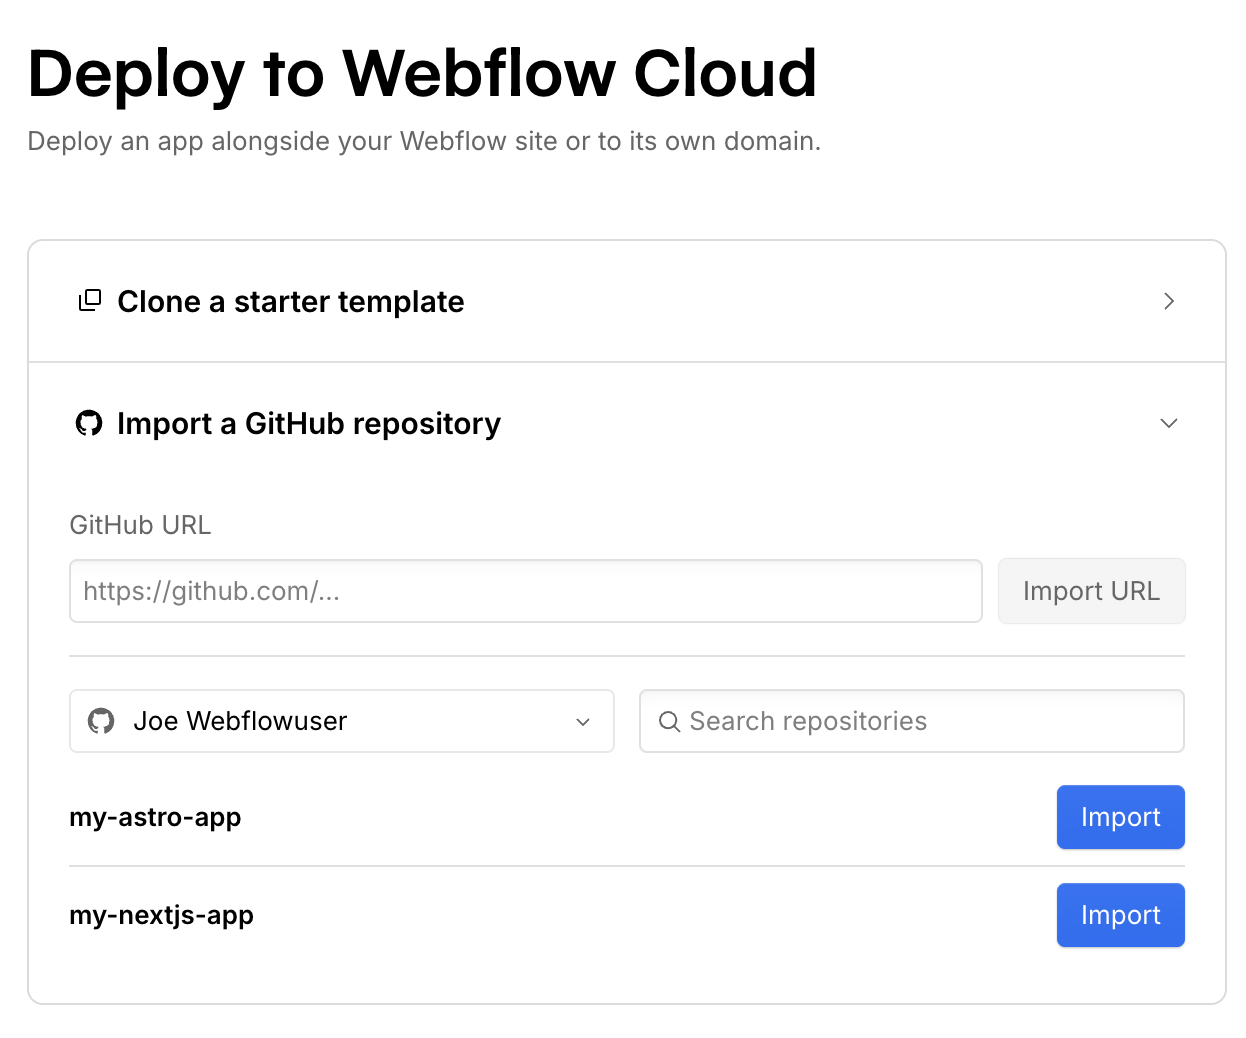
-
Give the app a name for Webflow Cloud and select the branch to deploy as in this picture:
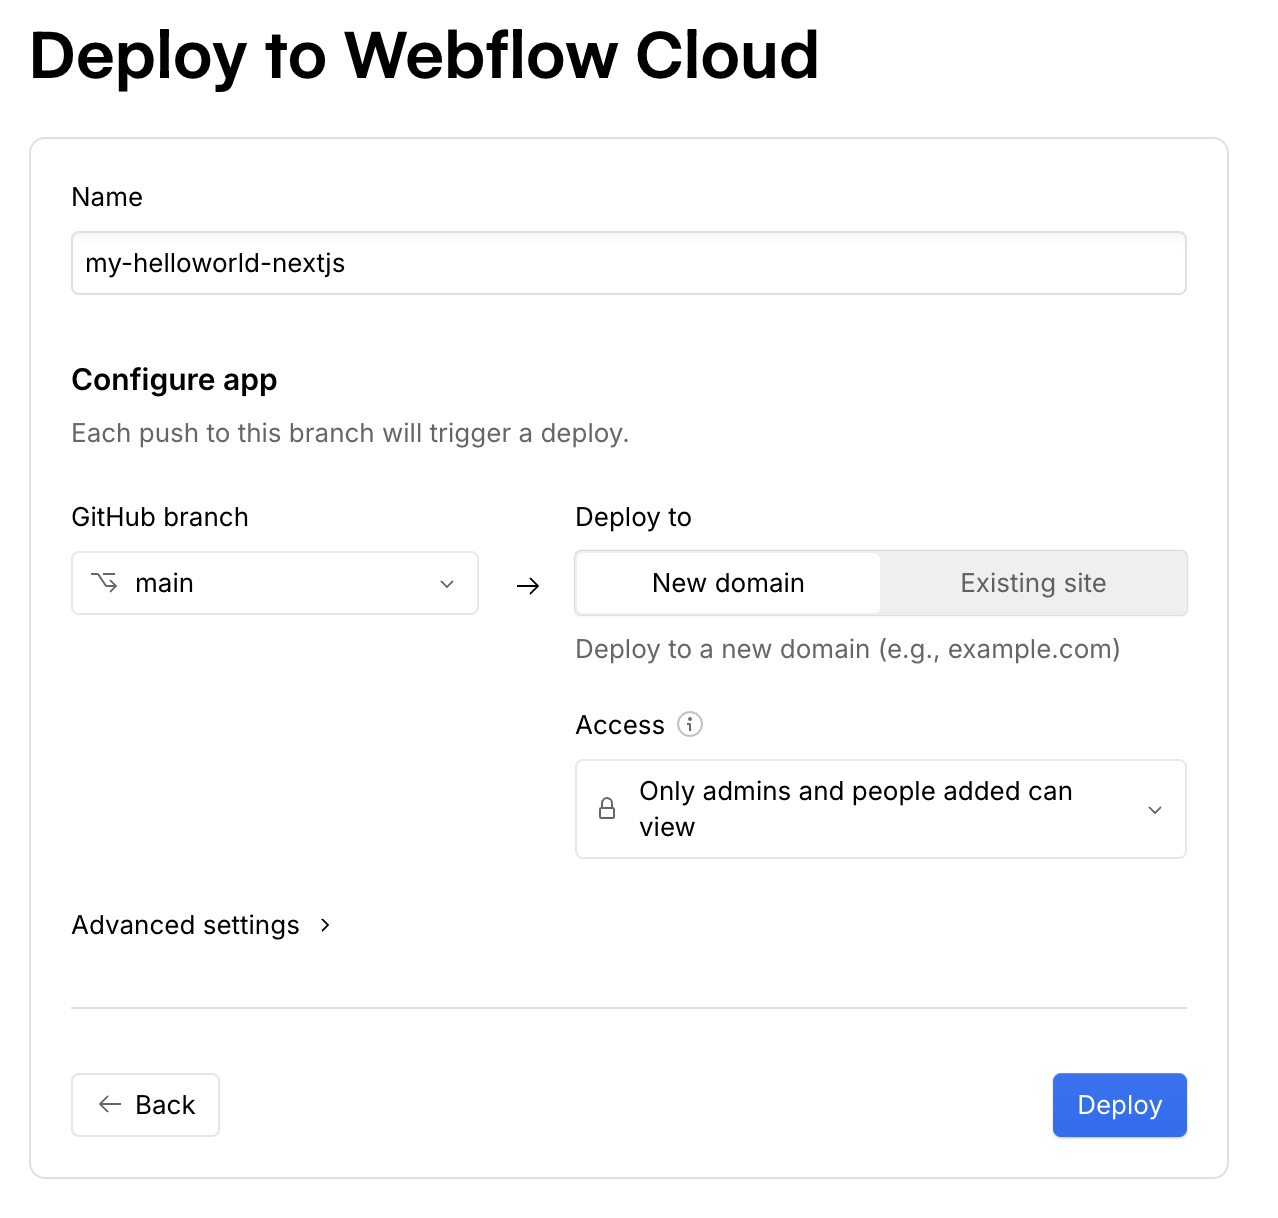
-
Optional: Under Advanced settings, select the path to the root of the application and add any environment variables that the app needs.
-
Click Deploy.
Webflow publishes the application and shows information about it.
-
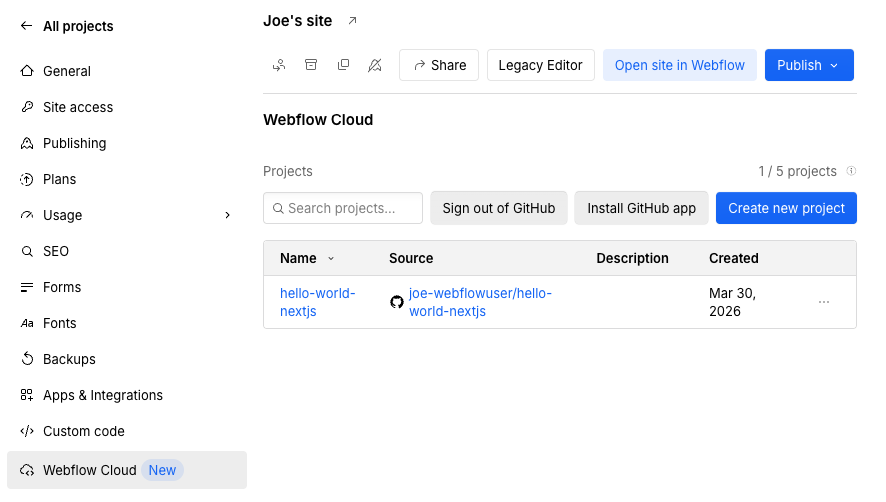
To see information about applications that are part of a site, go to the site settings and click Webflow Cloud. The applications that are part of this site are listed. Then you can click an application to see information about its environments and deployments.
-
To see information about applications that are not within a site, go to the Workspace settings, where applications are listed next to sites. You can filter the list by clicking All projects > Apps.
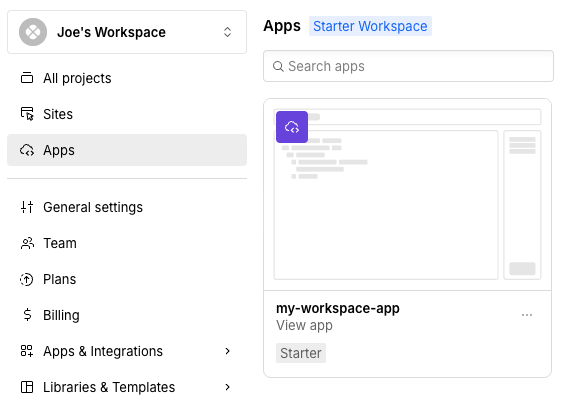
To get to its environments and deployments, open the application’s settings and then click Webflow Cloud.
Configuring applications for Webflow Cloud
These sections describe how to ensure that your application runs properly on Webflow Cloud.
Configure your app
Webflow Cloud deploys your app on the Edge runtime, enabling fast, globally distributed hosting. The Edge runtime environment differs from traditional Node.js servers, requiring specific configurations for compatibility.
The following steps outline common migration patterns to help you adapt your application for Webflow Cloud. Depending on your application’s specific requirements, you may need to make additional adjustments beyond these configurations.
Next.js
Astro
Webflow Cloud is compatible with Next.js 15 and higher
Webflow Cloud is compatible with Next.js 15 and higher. If you’re using a version of Next.js lower than 15, please upgrade to the latest version.
Configure your base path
In Webflow Cloud, your application is served from the mount path you configured in your environment settings. For example, if your mount path is /app, your application will be accessible at yourdomain.webflow.io/app. To ensure proper routing and asset loading, you must configure the basePath and assetPrefix properties in your next.config.ts file to match this mount path exactly.
Install and configure OpenNext
OpenNext is an adapter designed specifically for deploying Next.js applications to cloud environments like Webflow Cloud. By using OpenNext, you can deploy your Next.js app without managing complex infrastructure configurations yourself.
-
Install OpenNext
In your terminal, navigate to your app and run the following command to install OpenNext: -
Configure OpenNext
Create a new configuration file namedopen-next.config.tsin your app’s root directory. This file configures OpenNext to work with Webflow Cloud’s deployment environment.open-next.config.ts
Set up local testing for Webflow Cloud
Webflow Cloud uses Wrangler - Cloudflare’s CLI tool - to bridge the gap between local development and cloud deployment. By integrating Wrangler into your workflow, you can identify and resolve compatibility issues early, significantly reducing debugging time after deployment.
-
Install Wrangler
To get started, install and configure Wrangler as a dev dependency in your app. -
Set up your Wrangler configuration
Create awrangler.jsonfile in your app root that defines how your application will run in development.wrangler.jsonSee the Cloudflare documentation for more details on how to configure Wrangler.
-
Create a Cloudflare environment file
Create a new file namedcloudflare-env.d.tsin your app’s root directory. This file will allow you to use environment variables defined in your Webflow Cloud environment.cloudflare-env.d.ts -
Add the development preview command
Add this script to yourpackage.jsonfile to enable local testing with Wrangler. This command builds your Next.js app and immediately serves it using the Edge runtime, giving you an exact preview of how your app will perform in production on Webflow Cloud:package.json
Managing assets and APIs
Next.js
Astro
Asset references
How you reference assets depends on which component you’re using:
Next.js Image component: Local images are automatically optimized and served through Webflow’s CDN.
Plain img tags: Must include assetPrefix to load correctly and enable CDN caching.
APIs
When using Next.js with a configured base path, there’s an important distinction between API route definitions and client-side requests:
- Server-side API route handlers are automatically mounted at your base path by Next.js. To ensure your API routes run on the Edge runtime, add the
export const runtime = 'edge';directive to your API route. - Client-side fetch calls must manually include the base path to correctly reach your endpoints
Without these adjustments, your API routes will not build properly and your client-side fetch calls will fail by targeting the wrong URL. Implement these patterns in all your APIs and client-side data fetching functions:
Edge Runtime: Use fetch API
The Edge runtime has limited API support. Stick to fetch for API calls and avoid third-party clients like axios which may not be compatible.
Configuring environment variables
Access environment variable settings
In Webflow Cloud, navigate to your app’s environment settings:
-
If the application is in your Workspace:
- Open the Dashboard, go to your Workspace settings, and click All projects > Apps.
- Click the application to open its settings and then click Webflow Cloud.
- In the table of apps, click the app.
- In the table of environments, click the environment.
- In the table, go to the Environment variables tab.
-
If the application is in a site:
- Open the site settings and click Webflow Cloud.
- In the table of apps, click the app.
- In the table of environments, click the environment.
- In the table, go to the Environment variables tab.
Add and configure environment variables
Add each environment variable that your application requires:
- Click Add Variable
- Enter a name for the variable, such as
DATABASE_URLorAPI_KEY - Enter the value for the variable
- Toggle Secret Variable for sensitive values that should be encrypted, such as API keys and tokens
- Click Add variable
Repeat this process for all required variables.
Environment variables are only available at runtime
Environment variables in Webflow Cloud are injected at runtime only and are not accessible during the build process. Keep the following in mind to avoid build failures:
- Do not include environment variable validation or required checks that run during build time
- Use conditional logic to handle cases where environment variables might be undefined during builds
Deploying applications
After configuring your app:
Test your app in the local preview environment
Before deploying, test your app locally in an environment that simulates Webflow Cloud. The preview script uses Wrangler to serve your app from the correct mount path.
Your app will be available at http://localhost:PORT/YOUR_MOUNT_PATH, where PORT is the port number shown in your terminal and YOUR_MOUNT_PATH is the one you configured.
Authenticate with Webflow
In your terminal, run the following command to authenticate with Webflow:
This command opens a browser window to authenticate your Webflow account. After you grant access, the CLI saves a WEBFLOW_API_TOKEN to a .env file at the root of your app. The first time you run webflow cloud deploy, the CLI prompts you to choose the deploy target (site-attached or standalone) and the specific site or workspace — it does not pick one for you at login.
You can skip this step and let webflow cloud deploy trigger the OAuth flow on demand.
Deploy using the Webflow CLI
After authenticating, run the following command to deploy your app:
On the first run, the CLI prompts you to identify the deploy target — choose Existing site to attach the app to a Webflow site (mounted at a path like /app), or New domain to deploy as a standalone app hosted on its own subdomain. To skip these prompts in CI/CD, pass --no-input together with --site-id (site-attached) or --workspace-id (standalone). See the webflow cloud deploy reference for all flags.
Additionally, when you commit your changes to your GitHub branch, Webflow Cloud will automatically detect the changes and deploy your app to your environment. Learn more about deployments in the documentation.
Your deployment may take up to 2 minutes to complete
View your deployment in the “Environment Details” dashboard. Review the status of your deployment by viewing the build logs.
Next steps
Now that you’ve successfully deployed your app on Webflow Cloud, here’s what you can do next.
Learn how to use DevLink to sync your Webflow styles, variables, and components with your app
Explore how to optimize and tailor your deployment for the best experience on Webflow Cloud.
Explore deployment options and Webflow Cloud’s CI/CD integration with GitHub to streamline your release process
Add a SQLite database to your app to store and retrieve user data.
Troubleshooting
I'm seeing a 404 error when I try to access my app
For an app on its own domain, verify that the latest deployment succeeded.
For an app on a site, if you have never published your site before, publish it now. If you have already published your site, check your mount path, confirm the environment exists, and verify that the latest deployment succeeded.
A deployment doesn't start when I push to my Github repo
The Webflow Cloud GitHub App may not have access to your repository. To check, go to the Webflow Cloud tab in your Webflow site settings and click “Install GitHub App.” Follow the prompts on GitHub to ensure Webflow has access to read from your repository. Once you grant access, try committing to the branch that Webflow Cloud should be monitoring for deployments in your app.
My assets or API routes aren't loading correctly
Check that you’re correctly using the base path in all asset and API references. Look for fixed paths that might be missing the base path prefix.
Authentication isn't working properly
Verify that your callback URLs include the correct base path and that you’re not duplicating the base path in your code references.
My build is failing in Webflow Cloud
Check your app’s build logs in the Webflow Cloud dashboard. Common issues include:
- Incompatible Node.js version
- Environment variables not configured correctly
- Missing or incorrect framework configuration in the following files:
webflow.jsonnext.config.jsorAstro.config.jswrangler.jsoncloudflare-env.d.tsorworker-configuration.d.ts
- Custom build commands not supported (Webflow Cloud only uses
Astro buildornext build)
Caching is not working as expected
Webflow Cloud overrides custom cache headers from your application. Once content is cached, you can’t control caching behavior through standard HTTP headers like Cache-Control. See more on header behavior limitations here.
This means traditional cache invalidation methods won’t work - you’ll need to work within Webflow Cloud’s caching behavior rather than trying to override it.