Deployments
Deployments automatically build and publish your application to Webflow Cloud. Each deployment creates a new version of your app in the associated environment. Webflow Cloud automatically triggers deployments when you push changes to the branch linked to that environment.
Learn more about environments →
See the below documentation for guidance on:
- Continuous deployment
- Deployment process
- Deployment history
- Build logs
- Runtime logs
- Rolling back deployments
Continuous deployment
Webflow Cloud supports continuous integration and deployment (CI/CD) through GitHub. When you connect your GitHub repository, Webflow Cloud automatically:
- Watches for changes in your connected branches
- Triggers new deployments when changes are detected
- Updates your environments with the latest code
Deploying using the Webflow CLI
You can also manually deploy your local environment using the Webflow CLI. In your terminal, run the following command to deploy your app to Webflow Cloud:
Setting up continuous deployment with GitHub
- Navigate to Webflow Cloud and select your app
- Click “Log in to GitHub”
- Follow the instructions to connect your GitHub repository or multiple repositories
- Select a GitHub repository to connect your Webflow Cloud app to
- Create or select an environment to deploy to
- Choose the branch you want to deploy to the selected environment
If you have access to over 100 repositories, you may not see a list of your repositories to select from. In this case, paste the link to your repository into the GitHub repository field.
Manual deployments
There are two ways to manually deploy your environment:
-
Deploy using the Webflow CLI
Run the following command in your terminal: -
Deploy in the Webflow Cloud dashboard
Navigate to your environments dashboard and click the “Deploy latest build” button.
Deployment process
Webflow Cloud serves your app through a streamlined deployment process:
- Clones your GitHub repository
- Detects your app’s framework
- Installs dependencies
- Builds your application
- Deploys to your specified environment
Each step is logged and available for review in the build logs.
Deployment history

Each deployment appears in your environment’s deployment history. The history provides:
- Deployment status (building, deploying, success, cancelled,failure)
- Deployment date and time
- Build and deployment duration
- Build and runtime logs
In the event of a failed deployment, your environment continues running your last successful deployment, ensuring zero downtime.
Build logs
Build logs provide detailed information about how Webflow Cloud builds and deploys your app. To view build logs:
- In Webflow Cloud, click your app to open the Environments Dashboard.
- Click the environment name to open the Deployment Dashboard.
- Click the Deployment ID (Commit SHA) to view the build log for that deployment.
Build logs are particularly helpful for:
- Debugging failed deployments
- Optimizing build performance
- Understanding dependency installation issues
- Tracking build progress
Runtime logs
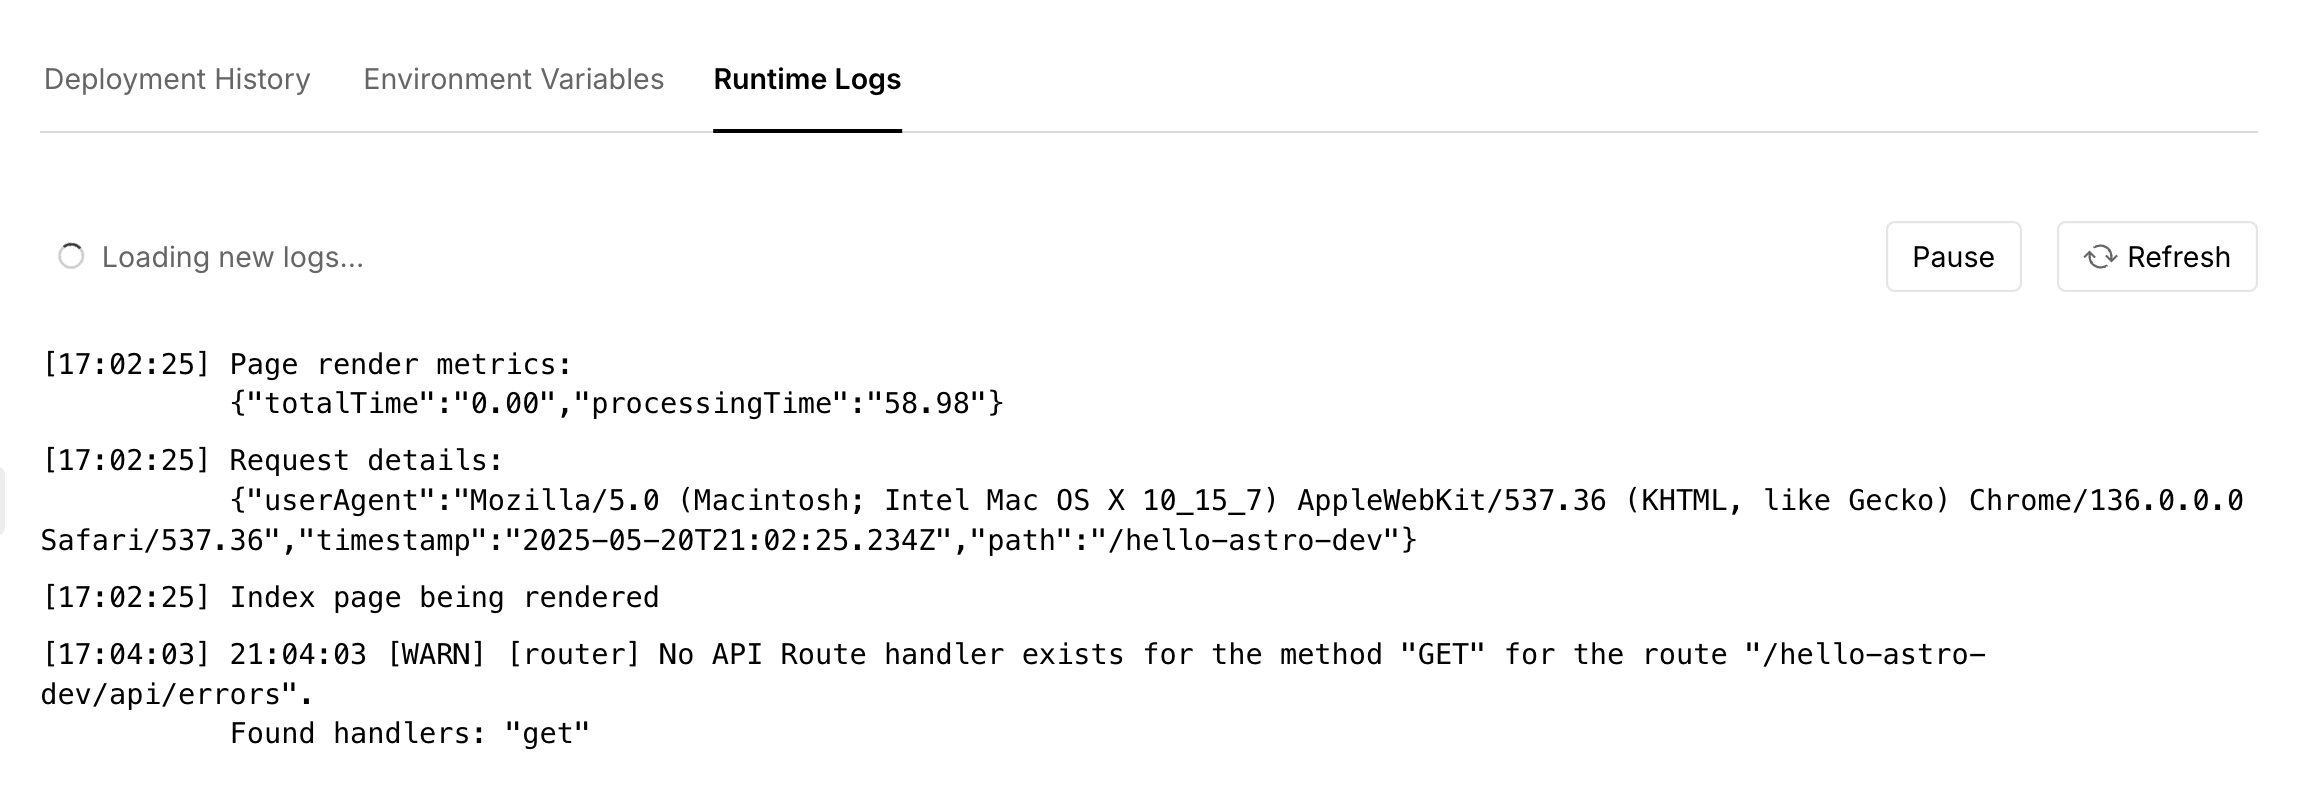
Runtime logs show you what’s happening on your application’s server after deployment. These logs capture server-side activity, including:
- Server-side function execution
- Application errors and exceptions
- Server-side console logs and debugging output
For example, if your application includes an API endpoint and a user makes a request to that endpoint, you’ll see the corresponding server-side activity in the runtime logs.
To view runtime logs:
- In Webflow Cloud, click your app name to open the Environments Dashboard.
- Click the environment name to open the Deployment Dashboard.
- Select the “Runtime Logs” tab.
Runtime logs are helpful for debugging server-side issues and monitoring your application’s API behavior in production.
Rolling back deployments
If you need to revert to a previous version of your app:
- Navigate to your GitHub repository
- Revert your working branch to the desired commit
- Push the changes to trigger a new deployment
Rolling back a deployment creates a new deployment with the previous code version. It doesn’t restore the exact state of the previous deployment.
Deployment locations
Frequently asked questions
Build issues
Why is Webflow Cloud not identifying my app at build?
Webflow Cloud currently supports Next.js and Astro apps. Make sure:
- Your app is using one of these frameworks
- You have included a configuration file (
next.config.jsorastro.config.mjs) with the necessary Webflow Cloud-specific configurations.
Why aren't my environment variables used at build?
Environment variables are only available at runtime, not during the build process.
Why are my assets not showing up?
This is typically related to base path configuration. Check your asset paths and ensure they’re configured for your environment. For more information on base path configuration, see base path configuration section of the Bring Your Own App documentation.
Which build runs on my production site if I had a successful build followed by a failed build?
The most recent successful build will continue running. Failed deployments never impact your live site.
Deployment issues
How do I rollback to a previous deployment?
To rollback to a previous deployment:
- Revert your branch to the desired commit in GitHub
- Push the changes to trigger a new deployment with the previous version
Why can't I see my latest deployment in my dashboard?
Try refreshing your page - new deployments may not appear immediately in the dashboard.
Can I preview specific deployments?
No, only the most recent successful deployment for each environment can be previewed.
Why doesn't a deployment start when I push to my Github repo?
The Webflow Cloud GitHub App may not have access to your repository. To check, go to the Webflow Cloud tab in your Webflow site settings and click “Install GitHub App.” Follow the prompts on GitHub to ensure Webflow has access to read from your repository. Once you grant access, try committing to the branch that Webflow Cloud should be monitoring for deployments in your app.
Publishing issues
Will my Webflow Cloud app deployment automatically publish my Webflow site, and vice versa?
No, the deployment process for Webflow Cloud apps does not automatically publish your Webflow site, and publishing your Webflow site does not trigger a Webflow Cloud deployment.