Components
Webflow Components are customizable blocks created from Elements. They serve as the foundation for structuring visual hierarchies on a Webflow site, ensuring that designs are modular, reusable, and consistent.

Key concepts
Component definition
Also known as the component object, the component definition is the blueprint for a component. It defines the structure of elements within the component, as well as properties that can be used to customize the component instance. Any modifications made to the component definition will propagate to all associated component instances. This ensures consistency across instances while allowing for centralized changes.
Component instance
A component instance is a “carbon-copy” of the component definition. While it retains the core design and structure of the definition, each instance can be customized through unique properties. This allows designers and users to assign custom values to a component instance’s properties, tailoring its appearance and behavior, without modifying the underlying component definition.
Component properties
Component properties are pre-defined attributes within a Component Definition that can be assigned a specific value in the Component Instance. They allow designers or users to modify specific aspects of an Instance - text, images, links, and more - without affecting its foundational design.
Component properties are not yet supported
Currently, our APIs don’t support the creation and management of Component Properties.
We understand the importance of this feature for our users, and we’re excited to share that it’s on our development roadmap. We’re committed to enhancing our API capabilities and will provide updates as we make progress. Thank you for your patience and understanding!
Methods
Create a component definition
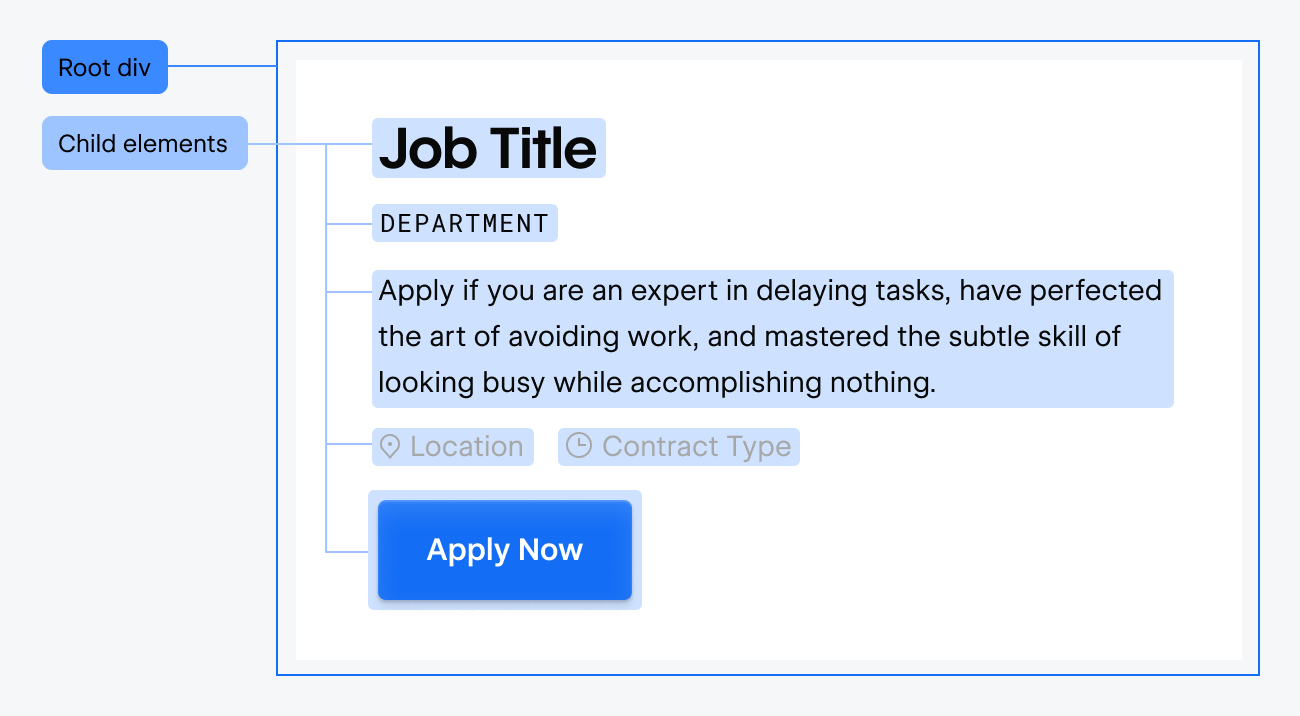
To create a component definition you’ll need a root element - or top-level element - that has child elements within its element hierarchy.
After identifying the root element, you can use webflow.registerComponent(rootElement) to register the component definition. In the above card component example, the root element would be the container DIV element, which has the img, div, and button as child elements.
Edit a component definition
To make changes to a component definition, its component instance must be present on the page. You’ll then need to get the Component Instance, and use the enterComponent method to focus Webflow on the component definition. Once the component definition is in focused, you can get the root element of the component, and then insert / remove child elements from the root element.
Add a component instance to a page
Use webflow.createInstance(componentDefinition) to add a component instance to the page. Component instances can be nested as part of element hierarchies, including under other component instances.