

Getting started with DevLink
In this guide, you’ll use the Webflow CLI to create an Astro or Next.js app, export a Webflow site’s design system with DevLink, and deploy the app to Webflow Cloud. Use this workflow when you want to scaffold locally and work with exported Webflow styles, variables, and components. If you already have a Next.js or Astro app, see Bring your own app.
Time Estimate: 30 minutes
Prerequisites:
- A Webflow account
- A GitHub account and basic familiarity with GitHub
- Node.js 22.0.0 or higher and
npminstalled
Getting started with DevLink
1. Install the Webflow CLI
In your terminal, run the following command to install the CLI globally:
You can run the command webflow --version to verify that the CLI installed successfully.
2. Create a Webflow site
Create a Webflow site by cloning the Astral Fund template. This site is pre-configured with styles, variables, and components optimized for Webflow Cloud and DevLink.
- Open the Astral Fund template.
- Click Clone in Webflow and in the next window click Create site.
- Give the site a name and specify who should have access to it. Remember the site’s name because you’ll need it to connect the Webflow Cloud application to it. The new site opens in Webflow.
- Optionally, review the styles, variables, and components included in the site. You will export these styles and components to your new app in the following steps.
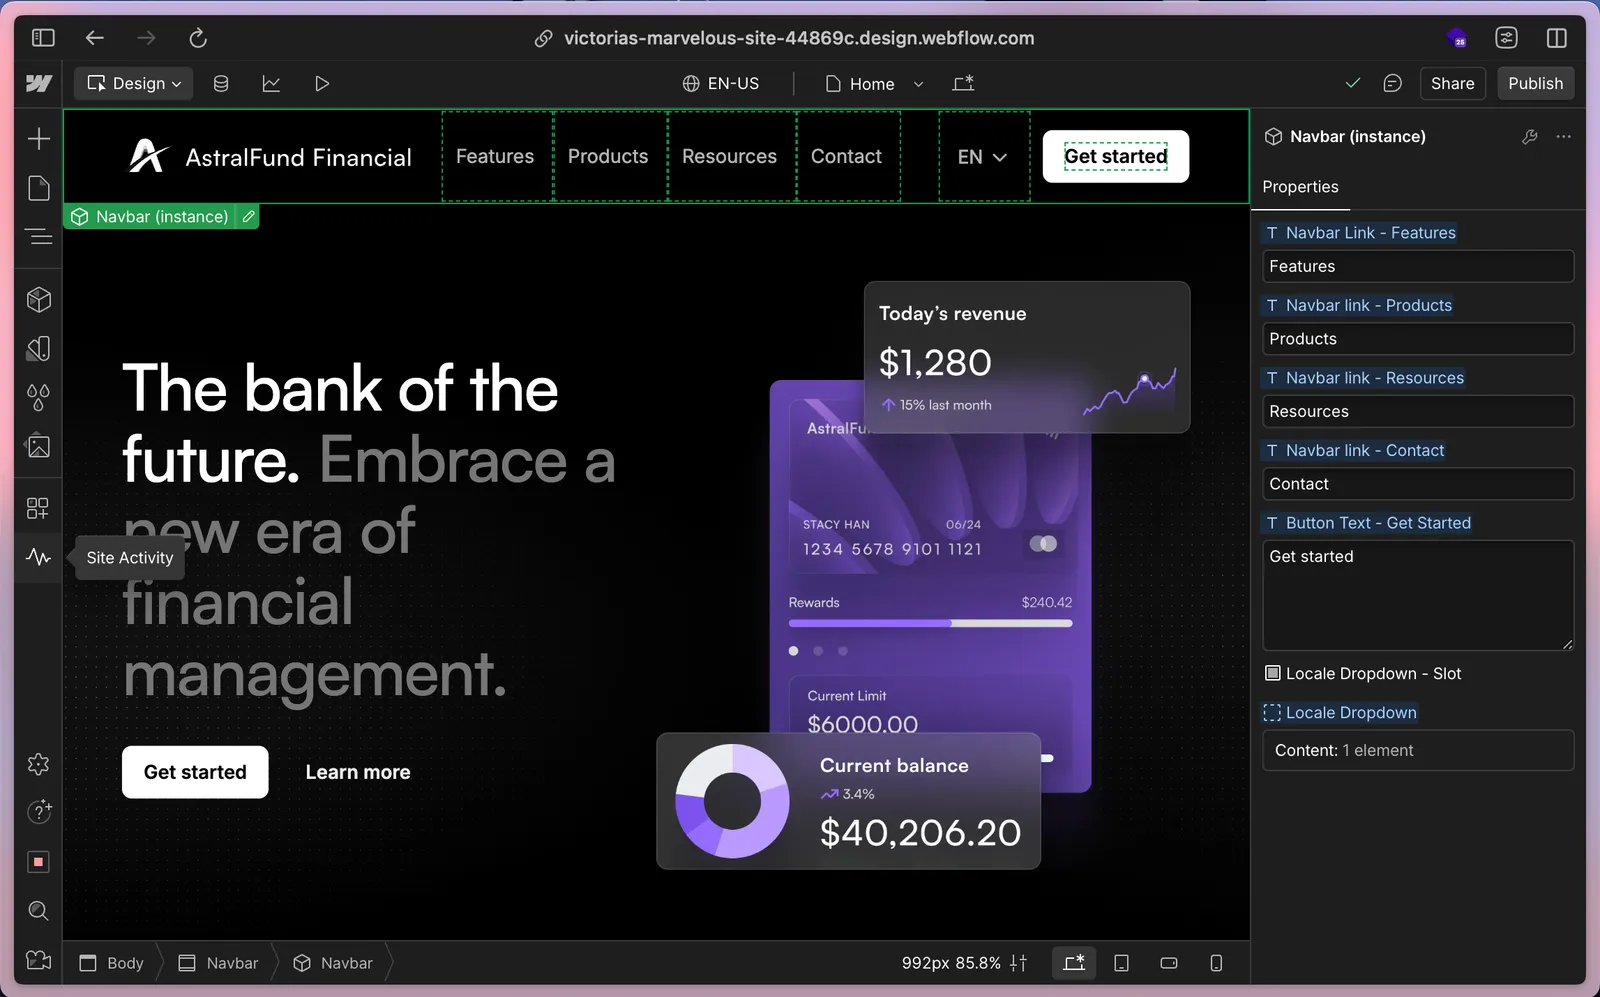
The template site looks like this:
3. Create an app
In these steps, you use the Webflow CLI to create an Astro or Next.js application. The CLI generates an app scaffold and exports your Webflow site’s design system into it through DevLink.
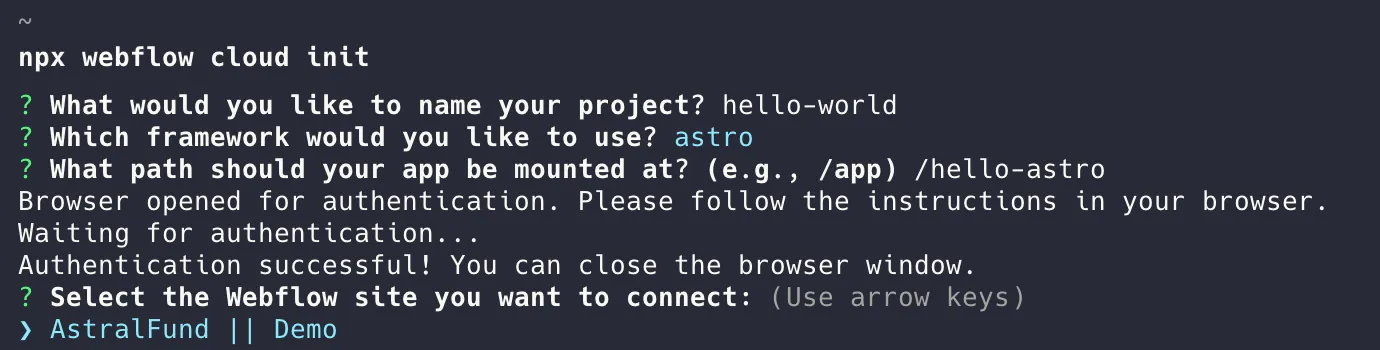
The following steps walk you through this CLI setup:
-
Start creating the app by running this command:
-
At the Where do you want to deploy this app? prompt, select Existing site.
The default option is New domain, which creates a standalone app that is not attached to any Webflow site. For this guide, choose Existing site so the app can use components from the site you cloned in the previous step.
-
At the Which framework would you like to use? prompt, select astro or nextjs.
-
At the What would you like to name your app? prompt, enter a name such as
my-webflow-cloud-app. -
At the What path do you want to use locally? prompt, enter the mount path for the application (default:
/app). For example, if you specify the mount path/app, Webflow Cloud hosts the application atmysite.webflow.io/app, wheremysite.webflow.iois the URL of the Webflow site. -
If you are not already authenticated, the CLI opens a browser window for you to log in to Webflow. After you grant access, return to your terminal.
-
At the Search for a Webflow site: prompt, search for and select the template site that you cloned in the previous section. The CLI then scaffolds the app and exports the site’s components into it via DevLink.
If your workspace has only one Webflow site, the CLI skips this prompt and uses that site automatically.
-
Push the app to a GitHub repository. For more information, see Adding locally hosted code to GitHub.
Run this step non-interactively (for CI/CD)
You can skip all prompts by passing the required flags up front. See the webflow cloud init reference for the full list of options.
In the next section, you add the application as a Webflow Cloud app as part of the site.
4. Create a Webflow Cloud app and environment
Webflow Cloud apps can be part of a site or independent apps in your Workspace. Because this application contains components from the site you created, these steps cover creating an app as part of the site. Then, you configure the app to deploy updates automatically.
-
In Webflow, navigate to your site’s settings and select Webflow Cloud from the sidebar.
-
If Webflow is not yet connected to your GitHub account, click Login to GitHub to connect your GitHub account and then click Install GitHub app. Follow the instructions to enable Webflow Cloud to access your GitHub repositories.
-
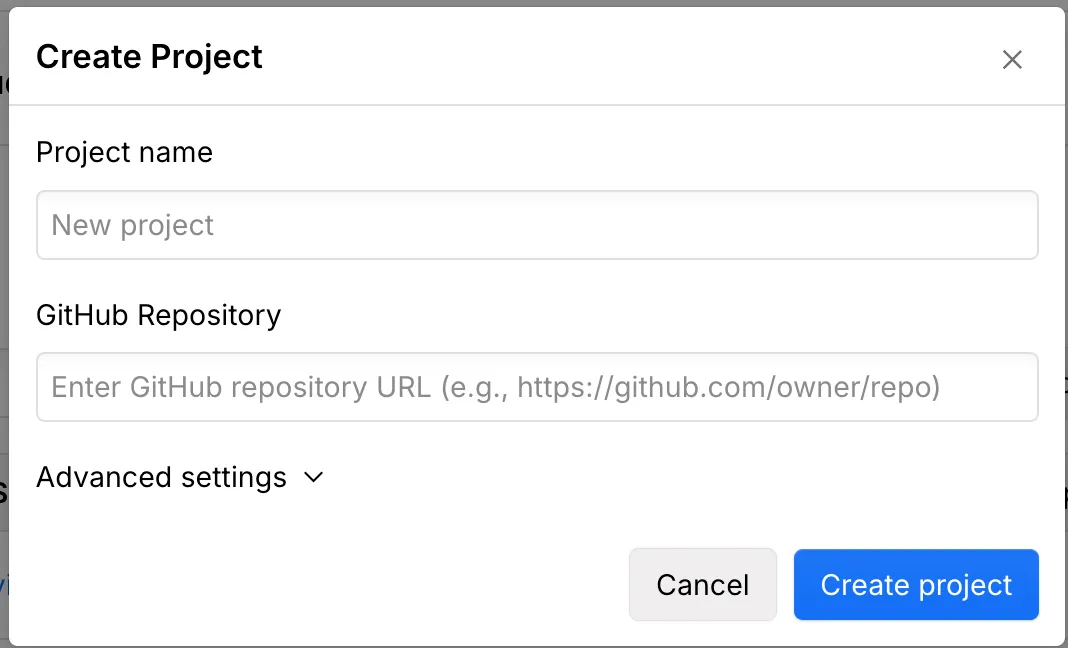
Click New project > Create app.
-
Expand Import a GitHub repository and select your GitHub organization and repository.
-
Specify a name for the Webflow Cloud app, the branch to deploy, and the path to deploy the application to. You can deploy other branches to other paths later, such as if you want to have separate staging and production environments.
-
Click Deploy and wait for Webflow to import the repository and set up the Webflow Cloud app.
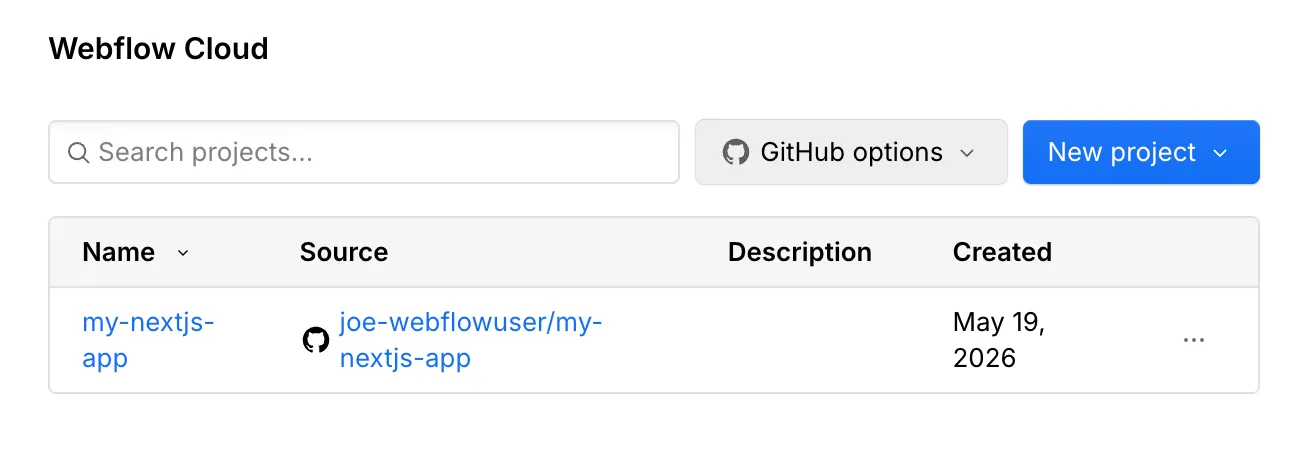
The new app appears in the Webflow Cloud section of the site’s settings, as in this example:
The app also has an environment that is based on the branch and path that you specified when you created the app. To see it, click the app’s name in the Name column. The environment looks like this, showing the name of the environment and the history of builds and deployments:
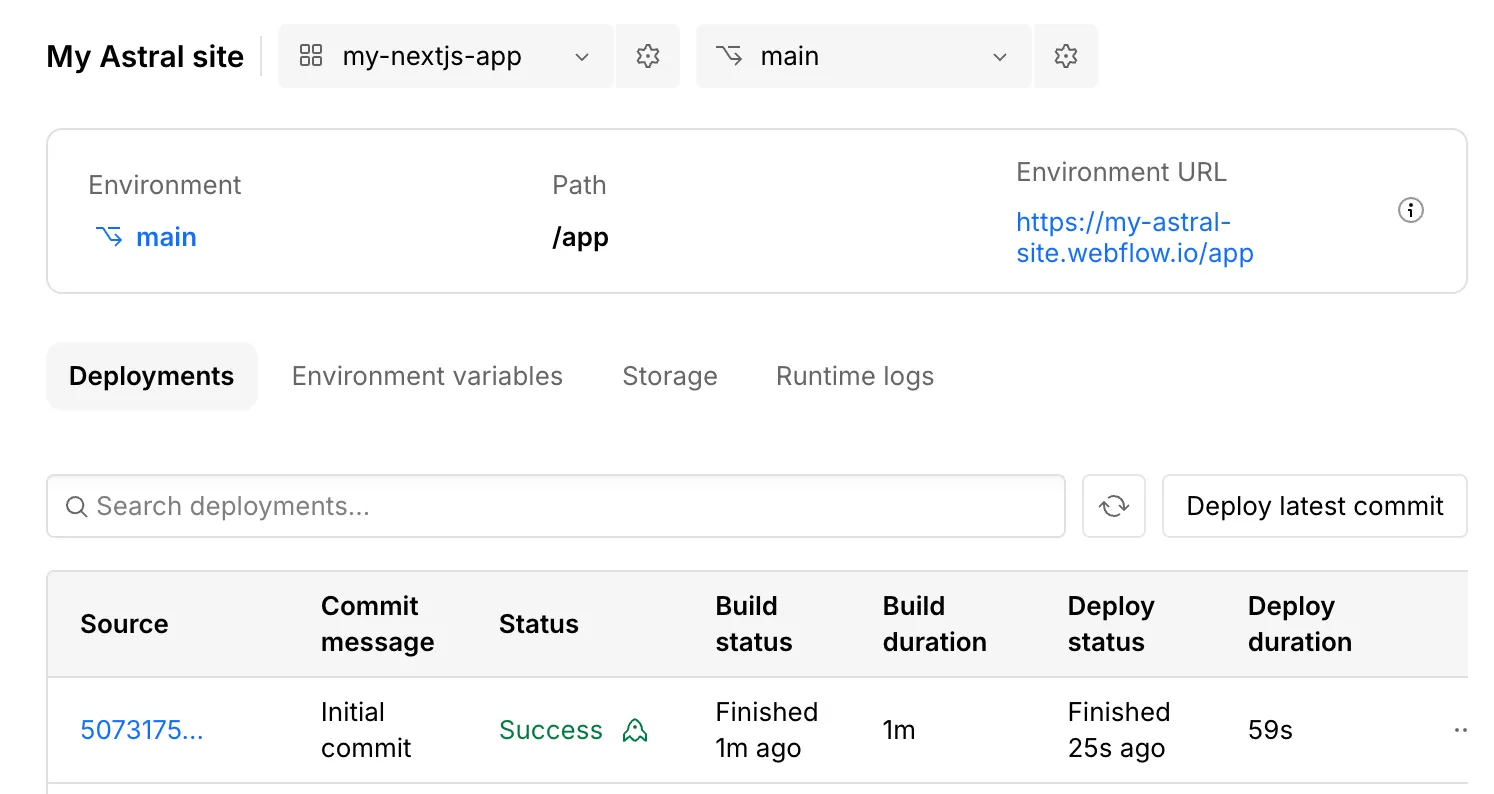
-
If you have not published the site yet, publish it now by going to the General settings page and clicking Publish.
-
View the deployed app by opening its environment in the Webflow Cloud settings and clicking its link under Environment URL. Note that the URL includes the deployment path.
Now the application is deployed and updates automatically when you update the repository.
Deployments may take up to 2 minutes to complete. You can view the status of deployments and build logs on the environment page.
5. Add your Webflow design system to your Webflow Cloud app
The webflow cloud init command added several things to the application in the /webflow folder via DevLink, including:
- The site’s global styles
- Assets exported from the site
- Foundational React components that Webflow sites use
For more information on what DevLink exports from sites into applications, see What’s exported.
To use these exported styles and components, you must import them in the app by adding the DevLinkProvider component to manage Webflow interactions in your app’s layout files.
The webflow cloud init command automatically added this component to the application, as in these examples:
Next.js
Astro
If you created a Next.js app, the src/app/layout.tsx file wraps the content of the application in the DevLinkProvider component, as in this example:
Follow the steps for your application platform:
Astro
Next.js
Install dependencies and run your app locally
Run the following commands in your terminal:
npm package manager.Add Webflow components to your Astro app
In the pages directory, update index.astro to include the Navbar and Footer components from the webflow folder in the root of your app.
This example imports the components and includes them within the page structure:
You may need to add the @webflow alias to the tsconfig.json file as in this example:
Then, add the alias to the astro.config.mjs file as in this example:
Add the client:load directive to each component to indicate that Astro should load this component on the page.
Now you can create components in the Webflow site, export them, and use them in the application.
Next steps
Now that you’ve successfully created and deployed a Webflow Cloud app, here’s what you can do next.


Learn about configuration options to work seamlessly with Webflow Cloud, and add advanced functionality to your new app.


Learn how to manage environments for different stages of development.


Explore deployment options and Webflow Cloud’s CI/CD integration with GitHub to streamline your release process.


Add a SQLite database to your app to store and retrieve user data.
Troubleshooting
My build failed
If you’re not sure why your build failed, or why there is an error in the CLI, see the log for detailed resolution information. Some common failure points include:
- Authentication timeout: Run the deployment again
- Build failures: Try building the app locally and checking and sanitizing symbols in app names and files
- Component visibility: Check and resolve import paths
I'm seeing a 404 error when I try to access my app
If you have never published your site before, publish it now. If you don’t see the app, check your mount path, confirm that the environment exists, and verify that the latest deployment succeeded.
A deployment doesn't start when I push to my GitHub repo
The Webflow Cloud GitHub App may not have access to your repository. To check, go to the Webflow Cloud tab in your Webflow site settings and click Install GitHub app. Follow the prompts on GitHub to make sure Webflow has access to read from your repository. After you grant access, try committing to the branch that Webflow Cloud should be monitoring for deployments in your app.
I can't see assets in my app
If the app references assets, you must reference the mount path of your app (such as /app → mysite.webflow.io/app) to serve them correctly.
I need to change my export folder
You can change the directory that components are exported into with the rootDir option in webflow.json.
For other configuration options, see Configuration options.