Cursor
Webflow provides a plugin that provides Cursor with direct access to the Webflow MCP server. If you prefer, you can connect manually, as described in Connecting Cursor manually.
Using the Cursor plugin
Grant access
The first time you use the Cursor plugin, grant Cursor access to your Webflow account and log in to your Webflow account if you are prompted to do so.
Connecting Cursor manually
To connect Cursor manually, click the Add to Cursor button below or follow the instructions below:


Install the MCP server on Cursor
-
Go to
Settings → Cursor Settings → MCP & Integrations -
Under MCP Tools, click
+ New MCP Server/Add Custom MCP -
Paste the following configuration into
.cursor/mcp.json(or add thewebflowpart to your existing configuration):.cursor/mcp.jsonUse project-specific MCP configuration to avoid repeated auth prompts
Configure
mcp.jsonper project instead of using Cursor’s global settings. This prevents repeated authentication prompts when opening multiple Cursor windows without being authenticated. -
Save and close the file
Authorize the MCP server and app
- Go to
Settings → Cursor Settings → MCP & Integrations - Authorize Webflow MCP by clicking the Connect button
- Cursor automatically opens an OAuth login page where you authorize the Webflow sites you want to access and install the MCP Bridge App.
- When authorization is complete, the Webflow MCP indicator turns green.
Limit authorized sites
Limit the number of sites for security and performance. To reauthorize, click Logout by expanding Webflow MCP.
Start with a fresh project for better MCP performance
MCP servers perform more efficiently with smaller codebases. In Cursor, create a project when using the MCP server to reduce tool call overhead and improve response times.
Re-authenticating to Cursor
You can re-authenticate and choose different sites and Workspaces to access later by following these steps:
-
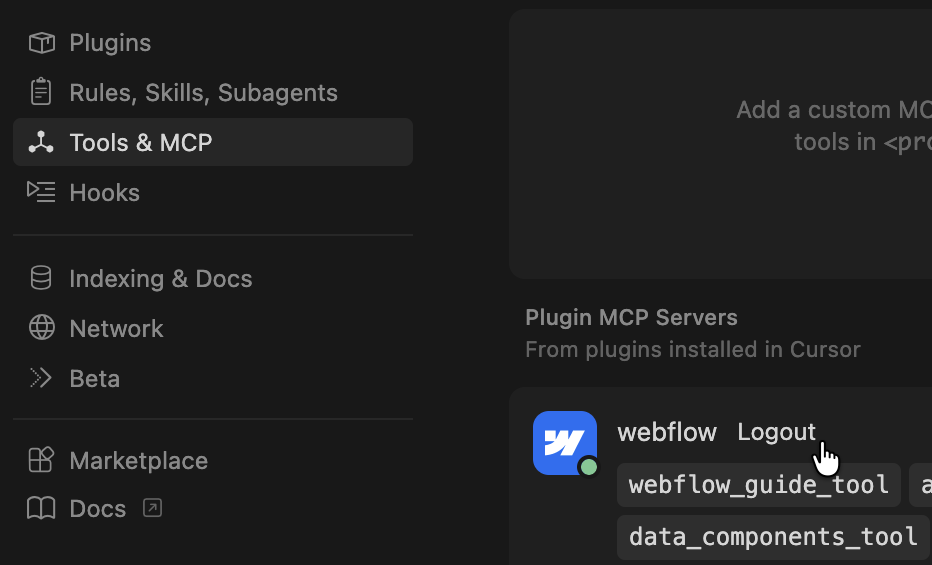
In the Cursor settings, click Tools & MCP.
-
In the Webflow MCP server, expand the list of tools to reveal the Logout button:
-
Click Logout. Cursor logs out of the MCP server and shows a Connect button.
-
Click Connect and follow the prompts to log in to your Webflow account and connect sites and Workspaces again.
Next steps
Now that you’ve installed the MCP server, explore what you can do:
Browse ready-to-use prompts for image optimization, SEO audits, style refactoring, and more.
Install skills that help you accomplish common Webflow tasks through natural language.
Understand the architecture, authentication, and how the MCP server connects to Webflow’s APIs.