

Azure Blob Storage
This guide walks you through configuring Azure Blob Storage as a destination for your Webflow Analyze and Optimize data export.
Configuration steps
Create Azure storage account
-
In the Azure portal, navigate to the Storage accounts service and click + Create.
-
In the “Basics” tab of the “Create a storage account” form, fill in the required details.
-
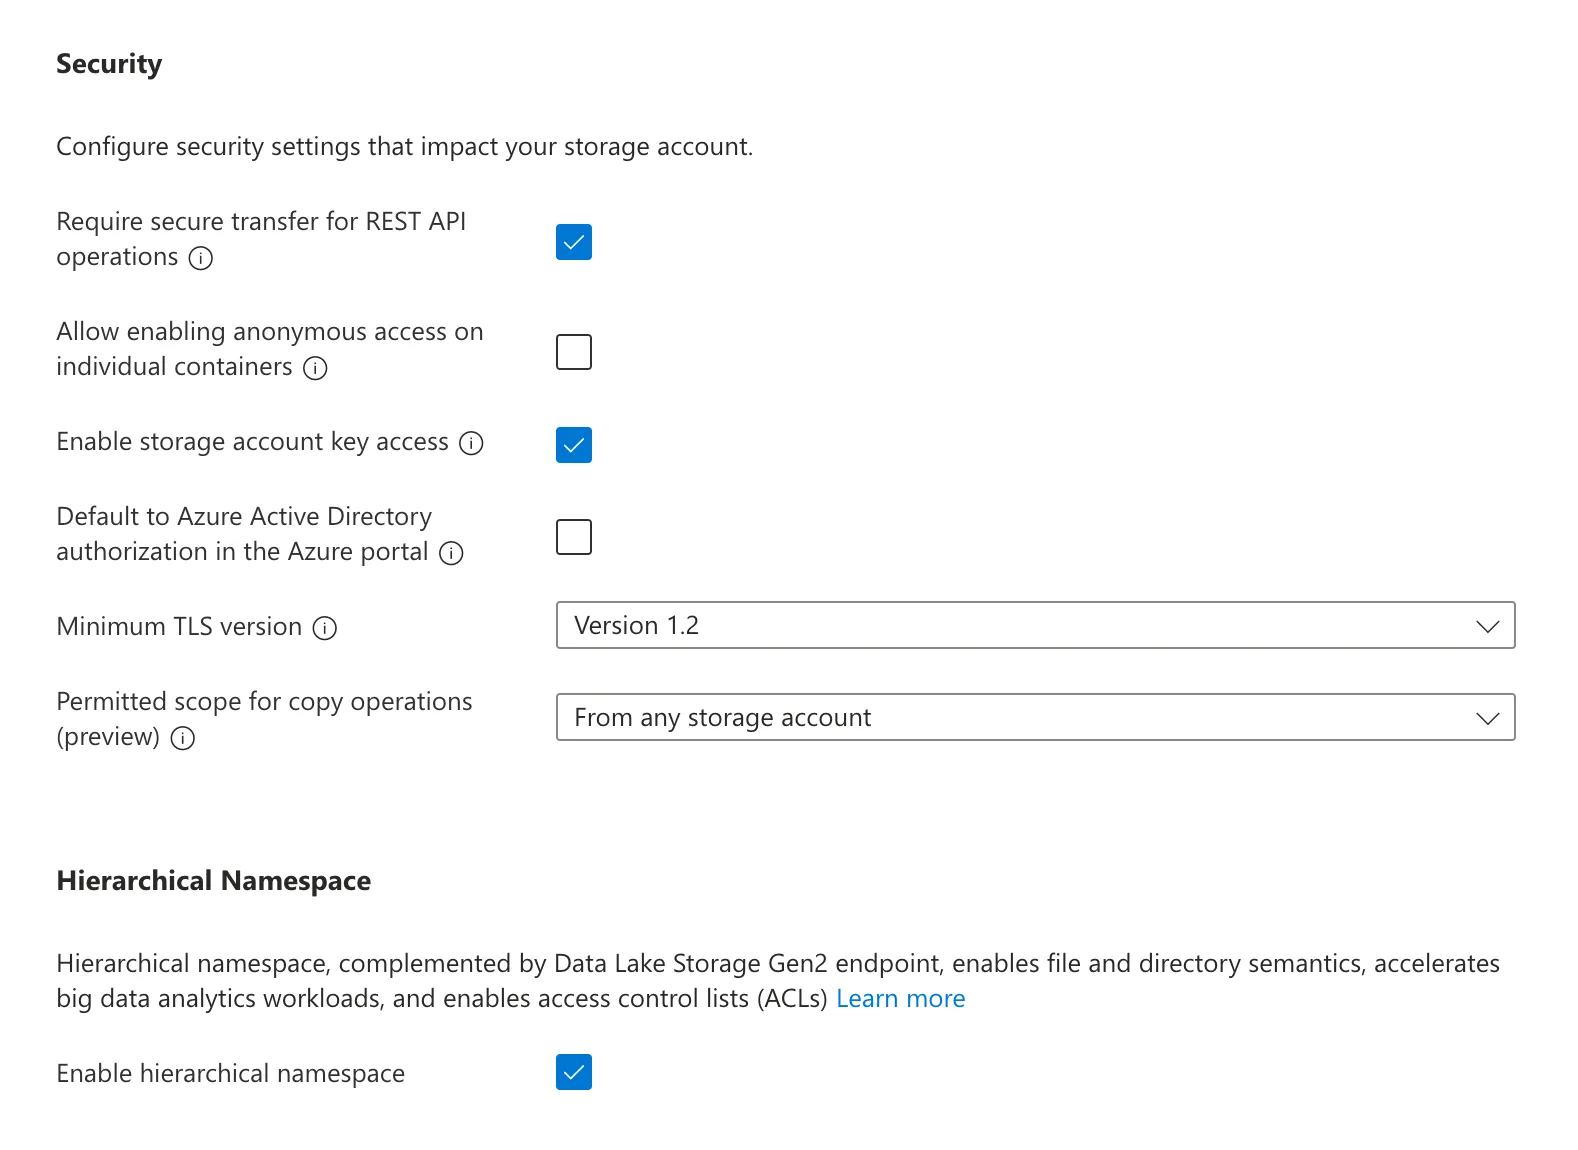
In the “Advanced” settings, under “Security” make sure Enable storage account key access is turned on. You may turn off (deselect) “Allow enabling public access on containers”. Under “Data Lake Storage Gen2”, select Enable hierarchical namespace.
-
In the “Networking” settings, you may limit “Network access” to either Enable public access from all networks or Enable public access from selected virtual networks and IP addresses. If the latter is selected, be sure to add Webflow’s static IP to the address range of the chosen virtual network. All other settings can use the default selections.
Networking allowlisting
Webflow Static IP:
34.69.83.207/32 -
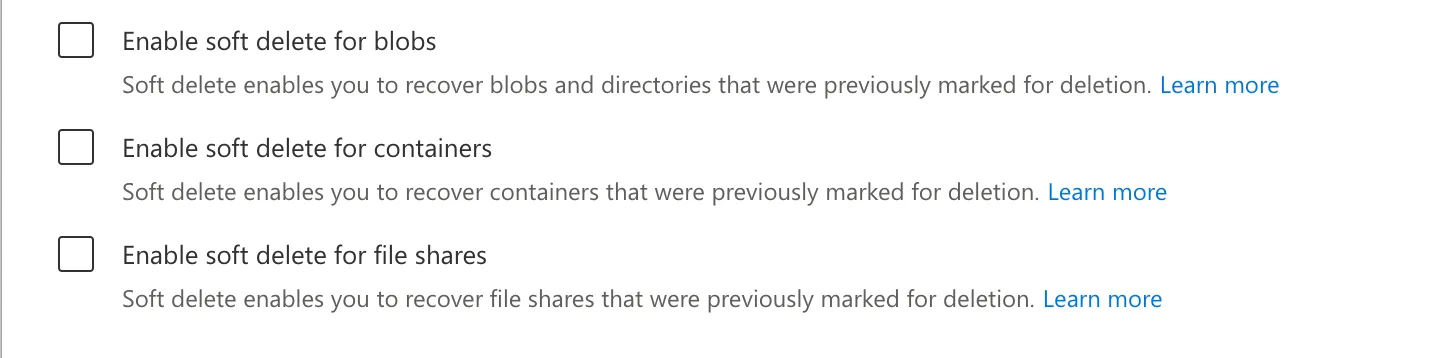
In the “Data protection” settings, you must turn off Enable soft delete for blobs, Enable soft delete for containers, and Enable soft delete for file shares.
-
Once the remaining options have been configured to your preference, click Create.
Create container and access token
-
In the Azure portal, navigate to the Storage accounts service and click on the account that was created in the previous step.
-
In the navigation pane, under “Data storage”, click Containers. Click + Container, choose a name for the container, and click Create.
Recommendation: dedicated container for data transfers
Use a unique container for these transfers. This:
- Prevents resource contention with other workloads
- Avoids accidental data loss from mixed lifecycle or cleanup rules
- Improves security by reducing surface area and enabling tighter, destination-scoped policies
-
In the navigation pane, under “Security + networking”, click Shared access signature.
-
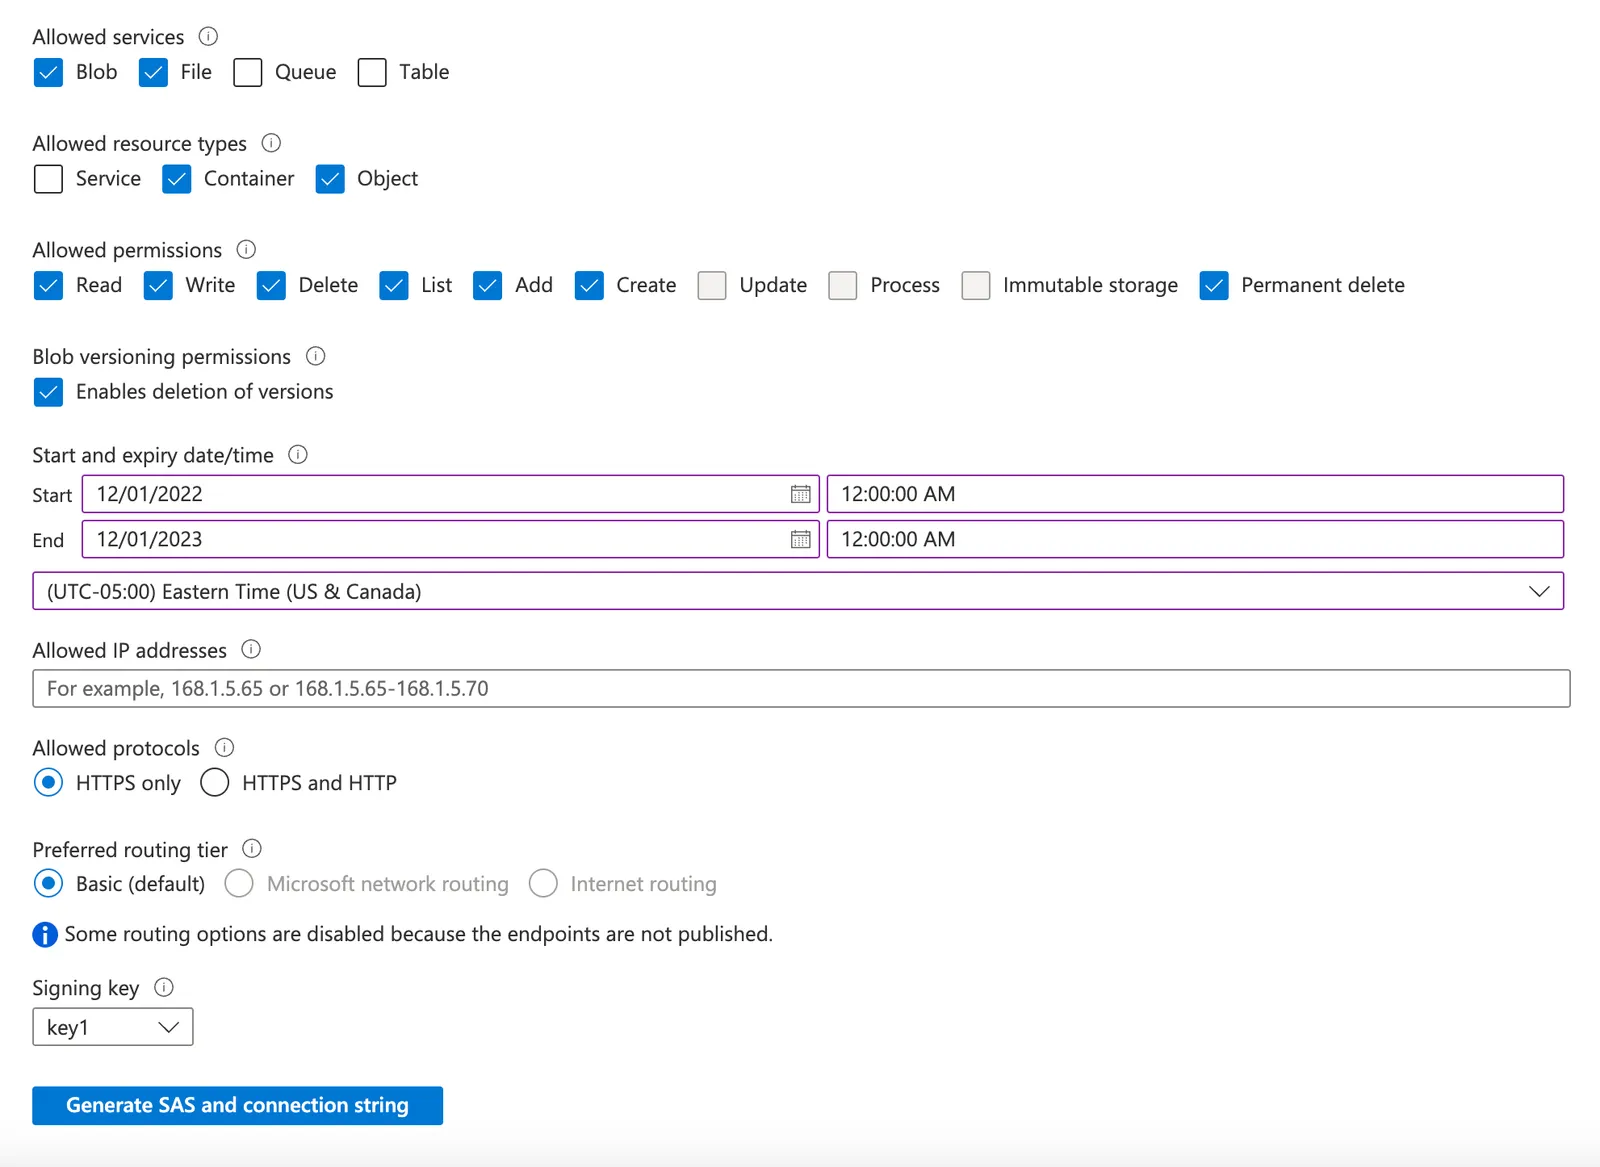
Update the required accessible services and permissions:
- Under “Allowed services”: select Blob and File.
- Under “Allowed resource types”: select Container and Object.
- Under “Allowed permissions”: select Read, Write, Delete, List, Add, Create, and Permanently Delete.
-
Select a “Start and expiry date/time” based on your security posture (e.g., set the expiration date 6 months into the future), and click Generate SAS and connection string.
-
Make a note of the SAS token that is generated.
Add your destination
Use the following details to complete the connection setup: storage account name, container name, your chosen folder name for the data, and your Storage account SAS token.
- Instructions for Analyze / Optimize for Webflow sites
- Instructions for Optimize for non-Webflow sites
Permissions checklist
- SAS token includes: read, write, delete, list, add, create, and delete permissions on the target container
- Container exists in the intended account/region
- If using network restrictions, the egress IP is allowed
FAQ
How is data organized in the container?
Data lands in Hive-style partitions per model: <folder>/<model_name>/dt=<transfer_date>/<file_part>_<transfer_timestamp>.<ext>. To write to the container root, enter . as the folder name.
What file formats are supported?
Parquet (default/recommended), CSV, and JSON/JSONL.
How are large datasets written?
Files are automatically split; multiple files may be written per model per transfer.
How do I know when a transfer completed?
Each transfer writes a manifest file per model under _manifests. Files are written per model per transfer in the format: _manifests/<model_name>/dt=<transfer_date>/manifest_{transfer_id}.json.
Why do I sometimes see duplicates?
Object storage is append-only. The change detection process uses a lookback window to ensure no data is missed, which can create duplicates. Downstream pipelines should deduplicate on primary keys prioritizing the most recent transfer window; manifest files can help bound the set of files to read.
Are there file size limits?
No explicit size/row limits for Blob Storage; files are split automatically based on volume and performance heuristics.