

Amazon Redshift
This guide walks you through configuring Amazon Redshift as a destination for your Webflow Analyze and Optimize data export.
Prerequisites
- If your Redshift security posture requires IP allowlisting, have the Webflow static IP:
34.69.83.207/32available during the following steps. It will be required in Step 2. - By default, Redshift authentication uses role-based access. You will need the trust policy prepopulated with Webflow’s identifier to grant access.
Network allowlisting
Webflow Static IP: 34.69.83.207/32
Configuration steps
Create a Limited User in Redshift
-
Connect to Redshift using the SQL client.
-
Execute the following query to create a user to write the data (replace
<password>with a password of your choice).Creating a user without a password.
Role-based authentication does not require a password. You may create the user using
CREATE USER <username> PASSWORD DISABLE;. -
Grant user
createandtemporaryprivileges on the database.createallows the service to create new schemas andtemporaryallows the service to create temporary tables.The schema will be created during the first sync
The schema name supplied as part of Step 4 will be created during the first connection. It does not need to be created manually in the destination ahead of time.
If the
schemaalready existsBy default, the service creates a new schema based on the destination configuration. If you prefer to create the schema yourself before connecting the destination, you must ensure that the writer user has the proper permissions on the schema, using
GRANT ALL ON schema <schema> TO <username>;Once you’ve provided the
GRANT ALLpermission on the schema, you can safely remove theCREATEpermission on the database (but you must retain theTEMPORARYpermission on the database).
Allowlist connection
-
In the Redshift console, click Clusters, and make a note of the cluster name.
-
Select the cluster you would like to connect.
-
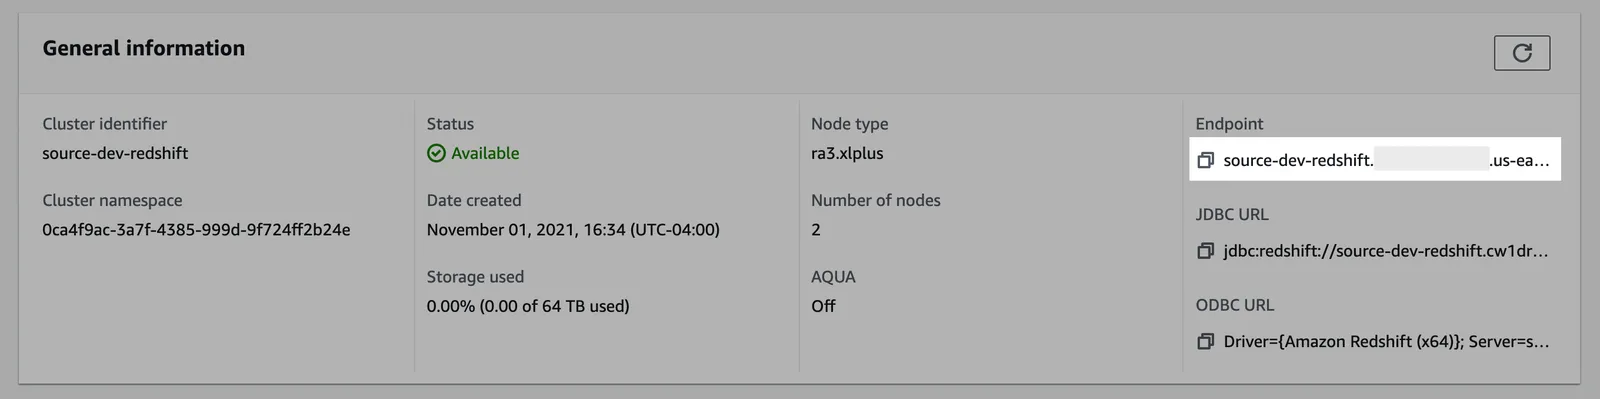
In the General information pane, make note of the Endpoint details. You may need to use the copy icon to copy the full details to discover the full endpoint and port number.
-
Click the Properties tab.
-
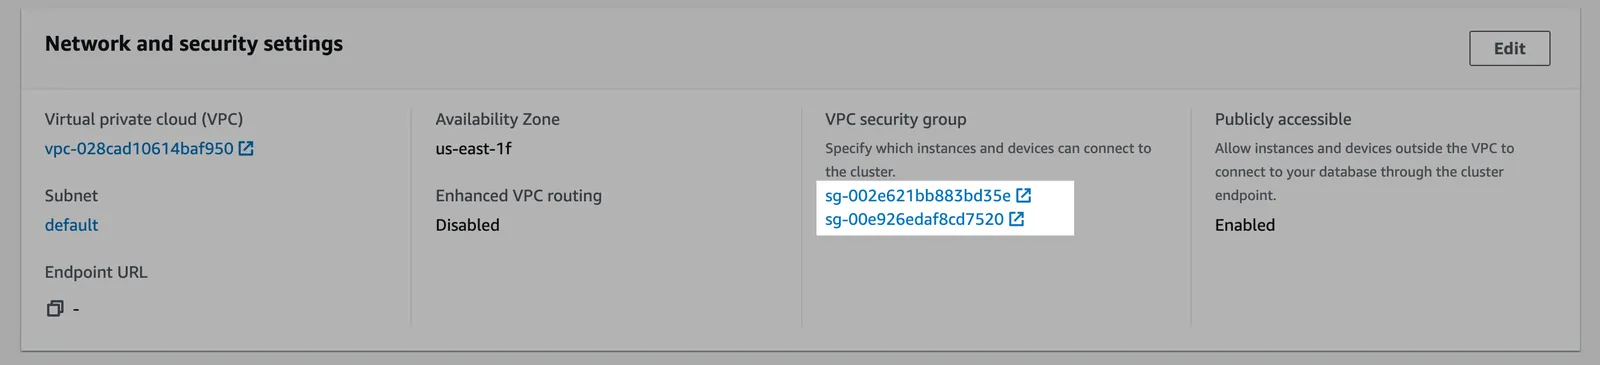
Scroll down to the Network and security settings section.
-
In the VPC security group field, select a security group to open it.
-
In the Security Groups window, click Inbound rules.
-
Click Edit inbound rules.
-
In the Edit the Inbound rules window, follow the steps below to create custom TCP rules for the static IP: a. Select Custom TCP in the drop-down menu. b. Enter your Redshift port number. (likely
5439) c. Enter the static IP. d. Click Add rule.Public accessibility and subnet requirements
For IP allowlisting from outside your VPC, the Redshift cluster must be set to Publicly accessible and deployed in a public subnet with a route to an Internet Gateway. For private Redshift clusters, SSH tunneling is supported. Contact support for instruction on configuring an SSH tunnel for your Redshift cluster.
Create a staging bucket
Create staging bucket
- Navigate to the S3 service page.
- Click Create bucket.
- Enter a Bucket name and modify any of the default settings as desired. Note: Object Ownership can be set to “ACLs disabled” and Block Public Access settings for this bucket can be set to “Block all public access” as recommended by AWS. Make note of the Bucket name and AWS Region.
- Click Create bucket.
Create policy
-
Navigate to the IAM service page, click on the Policies navigation tab, and click Create policy.
-
Click the JSON tab, and paste the following policy, being sure to replace
BUCKET_NAMEwith the name of the bucket chosen above, and REGION_NAME, ACCOUNT_ID, CLUSTER_NAME, USERNAME, and DATABASE_NAME with the proper Redshift values.Note: the first bucket permission in the list applies to
BUCKET_NAMEwhereas the second permission applies only to the bucket’s contents —BUCKET_NAME/*— an important distinction.Credential character limitations
For user credentials containing special characters, please avoid using the following characters:
@,[,],/,?,#,",\\,+, space,&,:as these characters can break connection string parsing. -
Click through to the Review step, choose a name for the policy, for example,
transfer-service-policy(this will be referenced in the next step), add a description, and click Create policy.
Create role
-
Navigate to the IAM service page.
-
Navigate to the Roles navigation tab, and click Create role.
-
Select Custom trust policy and paste the provided trust policy (from the prerequisite) to allow AssumeRole access to this role. Click Next.
-
Add the permissions policy created above, and click Next.
-
Enter a Role name, for example,
transfer-role, and click Create role. -
Once successfully created, search for the created role in the Roles list, click the role name, and make a note of the ARN value.
Alternative authentication method: AWS User with HMAC Access Key ID & Secret Access Key
Role-based authentication is the preferred authentication mode for Redshift based on AWS recommendations. However, HMAC Access Key ID & Secret Access Key is an alternative authentication method that can be used if preferred.
- Navigate to the IAM service page.
- Navigate to the Users navigation tab, and click Add users.
- Enter a User name for the service, for example,
transfer-service, click Next. Under Select AWS access type, select the Access key - Programmatic access option. Click Next: Permissions. - Click the Attach existing policies directly option, and search for the name of the policy created in the previous step. Select the policy, and click Next: Tags.
- Click Next: Review and click Create user.
- In the Success screen, record the Access key ID and the Secret access key.
Add your destination
Use the following details to complete the connection setup: username, host, database, cluster, your chosen schema, IAM role ARN, and staging bucket details.
- Instructions for Analyze / Optimize for Webflow sites
- Instructions for Optimize for non-Webflow sites
Permissions checklist
- Redshift database user exists and has
CREATEandTEMPORARYon the database. If you pre-created the schema, ensureGRANT ALL ON SCHEMA <schema> TO <username>. - IAM role trust policy allows the data transfer service to assume the role.
- IAM policy includes:
redshift:GetClusterCredentialson your target cluster (db user and db name resources).- S3
ListBucketonarn:aws:s3:::BUCKET_NAME. - S3
GetObject,PutObject,DeleteObjectonarn:aws:s3:::BUCKET_NAME/*.
- Network allowlisting (if enforced) permits egress IP/CIDR for the Redshift port (typically
5439).
FAQs
How is the Redshift connection secured?
We use role-based authentication with your AWS IAM Role. The data transfer service assumes your role to obtain short-lived database credentials and network access can be constrained by allowlisting the static egress IPs noted above.
Why is an S3 bucket required?
Redshift’s high-throughput path loads data from S3 using COPY. We stage files briefly in your bucket to maximize throughput and reliability. Files are cleaned up after load.
What are the oaud vs sub IDs used for?
These are identity claims used in the IAM trust policy when federating from GCP to AWS. sub uniquely identifies our Google principal in federation. oaud is an additional claim used to bind role assumption to your organization.
Why am I getting authentication errors with Redshift?
Common causes:
- Missing or incorrect permission on
redshift:GetClusterCredentials(ensure it targets the correct cluster ARN and region/account). - Trust policy mismatch (the data transfer service’s principal isn’t permitted to assume your role).
- Using a Serverless workgroup permission or
redshift-serverless:GetCredentialsinstead of provisioned cluster +redshift:GetClusterCredentials. - Propagation delay: IAM changes can take a few minutes to apply. Retry after 5-10 minutes.
Do I need to pre-create the schema?
No. The schema provided in the destination configuration is created automatically on first sync. If you pre-create it, grant ALL on the schema to the writer user and you may remove the database-level CREATE permission (retain TEMPORARY).